Jul 28, 2011
S-2000 Roadster Has anyone seen replacement LED lights that will fit in a standard, incandescent auto bulb socket?
Both the trunk light and the interior light get extremely hot to the touch. I realize that this probably isn't really that significant compared to the capacity of the ESS, but I still have the urge to replace these bulbs with white LED circuits that would remain cool. I could certainly design something like this, either with a custom PCB or maybe even just hand-wiring something, but I have a hunch that there is probably something on the market already.�
Jul 28, 2011
doug In years past I've bought automotive LEDs (for plug and play replacement) from these folks: LED Lights Accessories - SUPER BRIGHT LEDS
See also Scott's homebrew solution here: Trunk light LED upgrade�
Jul 28, 2011
NigelM I've used them for bulbs for my boat - worth taking a look at the 12v bulbs in the marine section, there may be something the right shape in there.�
Jul 28, 2011
TEG I swapped out most of the incan bulbs on my cars with LEDs too.
I have had good luck just going on ebay and buying from Hong Kong based suppliers.
Try this:
Auto SMD | eBay�
Jul 28, 2011
TEG By the way, be careful about turn signal indicator bulbs. On many cars, the flasher mechanism expects a certain current draw, and the lower powered LED bulbs may cause it to go into "fast flash mode" which is supposed to let you know that one of the "bulbs" may be burned out. Some LED providers offer a ballast resistor to fool the flasher, but then it somewhat defeats the point as you are using the same power as the incandescent bulb. In some cases you can swap out the flasher relay with one designed to expect LEDs.�
Jul 28, 2011
shark2k Haha, that site was the advertisment at the bottom of my screen.
-Shark2k�
Jul 28, 2011
roblab Darell Dickey, EVnut.com wires his own LEDs and replaces all his interior lights. He has picture and print information at
Rav Modifications�
Aug 13, 2011
S-2000 Roadster I believe that I've found an LED replacement for the 12 V wedge base lamp for the interior - the light that comes on when you open the door.
LE-0503-03W JKL Components LED Incandescent Replacements�
Aug 13, 2011
vfx Let us know how it works.�
Aug 13, 2011
S-2000 Roadster I will, as soon as the shipments arrive.
For the interior lamp, the LED replacement specifications are slightly larger than the actual bulb, at least in height (not diameter). I'll have to see whether it fits in the fixture without any clearance problems. Sometimes these dimensions are maximums, not actual, so I have a hunch the actual part will fit just fine.
Meanwhile, the truck/boot lamp measures 37.15 mm, but that does not match any of the parts from the Super Bright LEDs site. I've ordered the 36 mm festoon, 3610-x4, since its seems that the solder on the ends might be responsible for measuring larger. The strange thing is that it's difficult to get an idea of the 'standard' lengths that should be available. JKL Components has a festoon that is 43 mm max, where Super Bright LEDs has 42 mm and 44 mm lengths. Maybe it's just the difference between nominal length and maximum length. I'll report on the fit of the 36 mm festoon, or perhaps someone else here has already replaced their truck/boot lamp and can say which LED part they used.
EDIT: Looks like the Super Bright LEDs site does have a 37 mm festoon, the 3710-xHP3. They're $7.95 (7 times brighter) or $14.95 (13 times brighter), which seems expensive compared to the $2.84 3610-x4, but I guess you pay for the brightness. I'll have to make a second order with one of these brighter models just to see whether it's necessary.
Next, I'm planning on looking at the parking lamps and license plate illumination to see whether those are incandescent or LED. The license plate illumination is actually responsible for creating glare in the backup camera lens, so I am hoping that a different lamp will work around that problem. Another option is to fabricate a shield for the camera that prevents the license plate illumination (which comes on when the parking lights are on) from ruining the image. The backup lights themselves are fine, because they are aimed straight back and do not cause lens glare, but the license plate illumination is seriously problematic.�
Aug 27, 2011
S-2000 Roadster I just received the shipment from SuperBrightLEDs, but it will be Monday before the parts from Mouser arrive. What follows is my report so far.
INTERIOR "DOME" LIGHT: (turns on when you open the doors or manually switch it to On)
This light has a holder with a twist lock. Standard wedge base bulbs plug straight into the holder and then the holder is twisted into the fixture. The fixture itself can be disassembled, but that's only for the very brave and adept.
So far, my recommendation is the $4.95 WLED-WHP. Its 120� beam covers just as much area as the original incandescent. I would have preferred natural white, but the only available white is "cool white." It puts out a healthy 15 candles (15000 mcd) of brightness, which is at least as bright as the original. I noticed that the original 5 W incandescent is too hot to touch after it's been on long enough for you to remove the socket, but this replacement is only 0.3 W - quite a bit less wasted energy (94% less waste!). Note that both times I installed it, I got the polarity backwards, and it did not light up. If that happens to you, then quickly remove the base, rotate 180� and reinstall. I cannot remember whether this LED is protected against reverse polarity power, but it did not burn out after two brief instances of reverse voltage. Thankfully, you don't even have to unplug and replug the wedge base bulb itself, because the twist lock holder fits two ways.
I tried the $3.94 WLED-NW5, which is supposed to have a 220� beam, but it just barely did not fit into the fixture using the normal procedure for replacing the bulb. It's theoretically possible to fit it in there by disassembling the fixture further (see below) and plugging in the bulb after the holder has been twisted in, but I did not bother since the brightness is only 2 candles and I don't think that the wider beam would be of any use.
I disassembled the fixture with the hopes of fitting in the $11.95 WLEDB-CWHP4-DAC, but ran into a couple of problems. First of all, the killer is that the ring into which the four LEDs are mounted is literally too big in diameter to fit behind the bezel. A second problem is that I would not recommend disassembling the fixture for most people. It takes a rather delicate hand to take this thing apart without breaking it, and the real challenge is getting the it back together. You can see why I did not go back and try to fit the 2-cd bulb.
TRUNK LIGHT
The standard festoon bulb that comes stock is 37 mm, so the best replacements will be 37 mm, too.
Here I recommend the $14.95 3710-CWHP6. It's the brightest they offer, at 66 lumens, and the over-sized package actually fits just fine. Here, you drop from 5 W to 1.632 W, an energy savings of 67%. Again, the original bulb gets very hot and that really seems like a waste to me. Some of you who actually like the warm color of incandescent bulbs might prefer the 3710-WWHP6. Unfortunately, you still have the original problem that if one piece of luggage covers the tiny light you can't see the rest of the trunk. For me, the convenience of replacement far outweighed the potential advantage of installing something completely different. Besides, every trunk has a single light that can easily be obscured.
I also tried the $7.95 3710-CWHP3 and it seemed fine. It's half as bright as the HP6, but still plenty bright compared to the original. Power is about 0.6 W, or 87% less than incandescent. Also available in warm white as 3710-WWHP3.
I tried a couple of the 3610-xW4 bulbs, but here you have a slight problem. After removing a 37 mm bulb from the socket, these 36 mm bulbs fit loosely and flicker on and off. They're also rather dim for the trunk at only 5 lumens (4 lumens for warm white).
LICENSE PLATE ILLUMINATION
There are two bulbs and holders here, with the same 37 mm festoon bulb.
All of the same LED bulbs fit, but I notice that they're all much brighter than the OEM incandescent bulbs. Since I have an ongoing problem with the license plate lights causing glare in my backup camera lens, I chose the dimmest LEDs available. I wouldn't call it lens flare - what actually happens is that the light coming in at a 90� angle from above just makes the cheap plastic lens look fogged. With all the fogging in the headlights, I assumed for a while that the backup camera lens was fogged on the inside, too, but it turned out to be the license plate lights.
It's possible to fit the 3610-xW4 festoon bulbs into the license plate light holders by squeezing the metal springs slightly closed before fitting the new bulbs. You only need to make them 1 mm smaller, which is not too difficult. So far, I don't think that my license plate lights are flickering due to the undersized bulbs, but that may not last. I hesitate to recommend this option since they're technically not to spec. Anyway, once installed, but before screwing on the plastic lens covers, I rotated the directional LED while looking through my rear window at the Alpine in backup camera mode, until the lens looked completely clear. This reduced the brightness quite a bit, but considering that the LEDs are already ridiculously brighter than the incandescent bulbs I think it ended up about the same. On the side opposite the backup camera, I just aimed the LED straight out for full brightness.
These bulbs are only $2.84, so I guess I'm not too picky that they aren't perfect matches.�
Aug 28, 2011
SByer On the interior dome light, how is it handling the fade-out dimming when the light goes off? Many LED packages don't deal with dimming circuits well, and I'd worry about that.�
Aug 28, 2011
S-2000 Roadster Wow, I don't think the Roadster 2.5 has fade-out dimming. But I'm willing to put the original bulb back in there to compare.
I assume your 2008 must be a Roadster 1.5, so maybe you can tell me how many minutes it takes for the dome light to begin it's fade out (does it start immediately?) and how long the fade itself takes. Also, does this have anything to do with whether the key is on and/or the charge port door is open? Since I've never caught mine dimming the dome light, maybe I can make sure I stick around long enough for the process to start and finish.
The WLED-WHP is spec'd to operate with anything from 9 VDC to 14.5 VDC, and I suppose it just shuts off below 9 V. If my Roadster 2.5 actually has this dimming feature then I can test whether the LED replacement dims or just maintains until it completely shuts off.
NOTE: I believe that the "trouble with dimming" should be isolated to 120 VAC light circuits where the sine wave is chopped up with an SCR to achieve dimming. There are certainly LED power supplies that expect a 120 VAC sine wave and really start buzzing or hyperventilating (not literally) when square wave edges come through at up to 120 V peak-to-peak. On the Roadsters that dim the dome light, my first assumption is that the nominal 12 VDC supply is slowly lowered, and that should not pose anywhere near the same problem as you've heard about with 120 VAC incandescent replacements.�
Aug 28, 2011
doug They're not just using some pulse width modulation for that?�
Aug 29, 2011
S-2000 Roadster For 120 VAC systems, you can't reduce the voltage without dissipating a significant amount of wattage and therefore heat, so there the 120 VAC sine wave is chopped with an SCR that allows either the full sine voltage (which varies) or 0.
For 12 VDC systems, reducing the voltage is probably a cheaper circuit, especially assuming incandescent lamps. If you were to implement PWM for 12 VDC, you'd need a circuit to boost a CPU pin to 12 VDC with 5 W power capabilities, and that's not a cheap circuit. It's possible without a CPU, but the circuit is more elaborate than a simple DC voltage fade.
That said, I don't know what Tesla Motors is doing. Alas, I think the Roadster 2.5 doesn't have the dimming feature anyway (that I've noticed), so I can't just hook up a 'scope and see what's happening. Anyone have word on whether all Roadster have the same dimming feature (and I just missed it), or is this just a Roadster 1.5 feature?�
Aug 29, 2011
Doug_G I doubt they would adjust the voltage, because that presents a heat dissipation problem with the driver transistor. More likely they pulse-width-modulate (PWM) the 12VDC. That's much more efficient, simpler, and cheaper.
I don't think my 2.0 fades. If it does I've certainly never noticed.�
Aug 29, 2011
SByer Yes, a 1.5. When I close the door and lock the car, it's about a 1~1.5 second fade, starts close to immediately (as soon as the beep is done?). I'll pay attention a bit more as to the circumstances (I think I would notice the lack of fade, but human memory and perception and all...). I notice it because it seems enough slower than just normal incandescent fade-out to not be accidental.
I'm aware of fading issues with 120v circuits - and the varying qualities of LED drivers in handling it (a couple of non-dimming circuits are now hosting the 'failures'). Not familiar enough with what 12v circuits would use, thus the question. Certainly intriguing enough to send for the bulb and try it out...�
Aug 29, 2011
Doug_G Well, okay, I made a point of looking at it this evening. It didn't exactly clear it up in my mind. It faded out in less than a second; perhaps half a second. That seems a little long for the filament to simply be cooling down, but why would they bother fading it that quickly???�
Aug 30, 2011
doug Agreed. For what it's worth, I happened to use a portable scope on the instrument illumination of my '94 Miata some years ago and even that was pulse width modulated.�
Aug 30, 2011
S-2000 Roadster I just received the $1.28 JKL Components LE-0503-03W on Monday, and finally tried it out. Unless you inspect closely, it looks almost exactly like an incandescent bulb until you plug it in.
It uses 60% as much current but is not nearly as bright at 0.70 lumens as the $4.95 Super Brights LED product at 15 cd. This being my first attempt to convert candles to lumens, I believe that 15 cd is equivalent to 62.83 lumens, assuming the 120� beam angle of the 15 cd product is accurate. It doesn't appear to be 90 times brighter, but perhaps the dome bezel is limiting that 120� beam.
Those of you who want plenty of light should try the Super Bright LED, but the cool white color might seem unnatural.
If you prefer a more subtle light that still fills the cabin and provides plenty of light, the cheaper JKL Components part will certainly suffice. It has the same color temperature, but that seems to be less of an issue when the brightness is of such a lower intensity.
By the way, I did finally notice the very quick fade, and I didn't even have to restore the incandescent bulb (which I'm thankful of, since that thing gets too hot to touch almost instantly) for comparison. Both of these LED bulbs exhibit that quick ~1 second fade. I'm now curious whether the filament in the incandescent would make the fade appear slightly longer, but not curious enough to keep swapping bulbs. In any event, turning the bulb on and off with the rocker switch is verifiably instantaneous, so the fade is clearly something purposeful.�
Aug 30, 2011
S-2000 Roadster I assume that a voltage follower could track a discharging capacitor without dropping any further voltage, and thus without needing to dissipate any heat. The PWM would require an oscillator and pulse width generating circuits, so perhaps not quite as simple. To be honest, I haven't actually tried designing both circuits to see which would indeed have the lowest parts count and highest efficiency, although the lamp wastes 5W and that leaves a lot of room for inefficient circuits.�
Aug 30, 2011
Doug_G Complexity is irrelevant with modern electronics manufacturing. Cost, reliability, and size matters. Especially cost.
Ignoring the switching transistor, which you need in either case, let's compare cost and size:
You'd need a pretty big capacitor to hold up an incandescent light bulb for any substantial amount of time. It would be physically quite large, and cost at least several bucks. Electrolytic capacitors can have long-term reliability issues.
Using the tiniest, dumbest, and cheapest PIC microcontroller to run the switch, the cost is $0.35 in quantity and the thing is smaller than the switching transistor. And you probably don't even need a dedicated controller; probably auxiliary functions like this are run by a shared controller.�
Aug 30, 2011
S-2000 Roadster Complexity is related to cost, both in parts count and in the price of specific parts. As important as cost is, complexity cannot be entirely irrelevant. Don't forget the cost of developing the PIC firmware, not to mention the cost of either ordering the PIC with a custom mask ROM or the time needed to load the firmware into Flash. Analog electronics are 'programmed' to operate correctly as soon as they are soldered together.
With a voltage follower, the capacitor does not supply any current to the load, so the capacitor can be any size to make the RC product deliver the desired time constant. The power transistor merely duplicates the voltage using the 12 V battery source and perhaps some cascoding. So, perhaps a single transistor would be an inefficient design, but efficiency is rather moot when the bulk of the 5 W incandescent power goes into heat loss. You can afford to shift some or all of that same 5W loss into the power transistor when dimming without suffering a net loss in efficiency.
But you may be right. Every day I learn a new function of the Roadster which exhibits some degree of latency that far exceeds pure analog electronic technology, leading me to believe that too many functions are running through an underpowered controller. I've lost track of the number of buttons and switches on the Roadster that take a perceivable fraction of a second to respond. I really hope the Model S performs much quicker on all of these functions.�
Aug 30, 2011
Doug_G I'm not forgetting development cost, but speaking as a designer of aggressively-priced electronics, personally I'd use the PIC. (That's from someone who considers programming PICs to be highly annoying.)
Yes, there seems to be a cycle time of 1 second for just about every input on the car (but not the accelerator!). I suspect that's a function of some kind of bus polling. I doubt it's due to an underpowered processor; it could well be a less-than-ideal architecture decision made early in the project.�
Aug 31, 2011
S-2000 Roadster I use the PIC family, where appropriate, and find programming it in C to be quite easy. I still write the interrupt routines in assembly to avoid the massive function entry and exit code that is produced by the C compiler, and sometimes other pieces end up in assembly. But I do have one pure assembly side project that has never gotten off the ground - I don't know if the lack of a C compiler or lack of a budget is the biggest culprit.
They say that cars have hundreds of microprocessors these days, but I don't know how accurate that number or designation might be (perhaps they're counting all chips with serial digital interfaces as a 'processor'). If there are more than two processors in the car, then I'm sure it's possible that one or more is underpowered. The DSP in the PEM is certainly not underpowered, but it does not run everything. There is a Linux computer in there, and I wonder if it has a bad I/O latency for peripherals or just bad programming ... maybe there's limited I/O.�
Oct 12, 2011
strider S2K - thanks for the recos. However, how do you get the dome light cover off to replace the bulb? I was able to do the trunk and license plate bulbs w/ ease but I'm worried I'm going to break some tiny piece of plastic that will cost me $200 for a replacement.�
Oct 13, 2011
S-2000 Roadster That's a good question, and I struggled with this for a while, so don't feel like you're alone in worrying about how to do it.
Basically, there is a clear plastic lens inside a dark plastic frame. The clear plastic is able to rotate within the dark plastic from to turn the dome light On/Door/Off. The dark plastic frame simply snaps into the body panel below the roll bar, in front of the rear window. To remove the dome light, just pull one side of this frame out until the whole thing comes loose. It helps to have the dome light on when you do this, because the light spilling around inside the panel will show you how the dome light snaps in.
DO NOT TRY TO REMOVE THE CLEAR PLASTIC PIECE FROM THE DARKER PLASTIC FRAME!
(I did that, and it took an incredible amount of manual dexterity to get the thing back together. The only reason I even attempted that level of disassembly was to see if I could fit a larger, brighter LED structure inside - no luck, and thus it's not worth taking apart)
To put it another way, when you say "dome light cover" - I get the impression that you're headed in the wrong direction. You can't really remove the cover. You actually remove the entire dome light assembly, then remove the bulb from the back side. At no time is there ever a "cover" that can be removed. Hopefully this makes things more understandable.
After you remove the whole dome light assembly from the panel, it's fairly obvious how to rotate the bulb and remove the socket. You'll insert the LED replacement into the socket, then twist and lock the pair into the dome assembly. Finally, snap the whole thing back into the panel.
The car will time out if you take a long time doing this, so the LED might not work when you first plug it in. If that's the case, close your door and open it again, or basically do anything that would normally cause the interior dome light to turn on. You can even briefly restore the incandescent bulb to confirm that the dome light assembly is getting power. This will help you make sure that you have the LED installed correctly, because many versions will not light up if the '+' and '-' sides are reversed. If the LED doesn't work but the incandescent does, then simply try rotating the LED 180 degrees and try again. I can't remember which LED models were polarized and which were universal. I noticed that the more expensive ones seem to be wired to work either way, but the cheaper LEDs will only work with the proper polarity.
Note: The incandescent bulb will be hot if you've left it on while disassembling everything. Don't burn yourself. Also, it might be worth simply taking the LED into your Tesla Store or service and have them do this for you. I don't want to be responsible for anyone damaging their fine Roadster if my instructions are not clear.�
Oct 13, 2011
strider Of course - I am responsible for my own screwdriver gougesOk, so I need to pry out the black plastic frame and the whole unit will pop out. I'll give it another try tonight. Thanks!
�
Oct 17, 2011
dhrivnak I ordered the 6 light replacement (3710-xHP6) from Super Bright LEDs for the trunk light and the 3 light (3710-xHP3) for the license light and both were EASILY replaced and are much cooler. Thank you for the suggestion and the tips on installation.
This forum is a wealth of knowledge. Thank you all�
Oct 19, 2011
S-2000 Roadster Cool. Every time I see my Roadster lit up at night, it will be nice to think of the fact that it's not the only "upgraded" Roadster on the road.�
Oct 20, 2011
NigelM S-2000, thanks from me also. I just ordered the bulbs.�
Oct 22, 2011
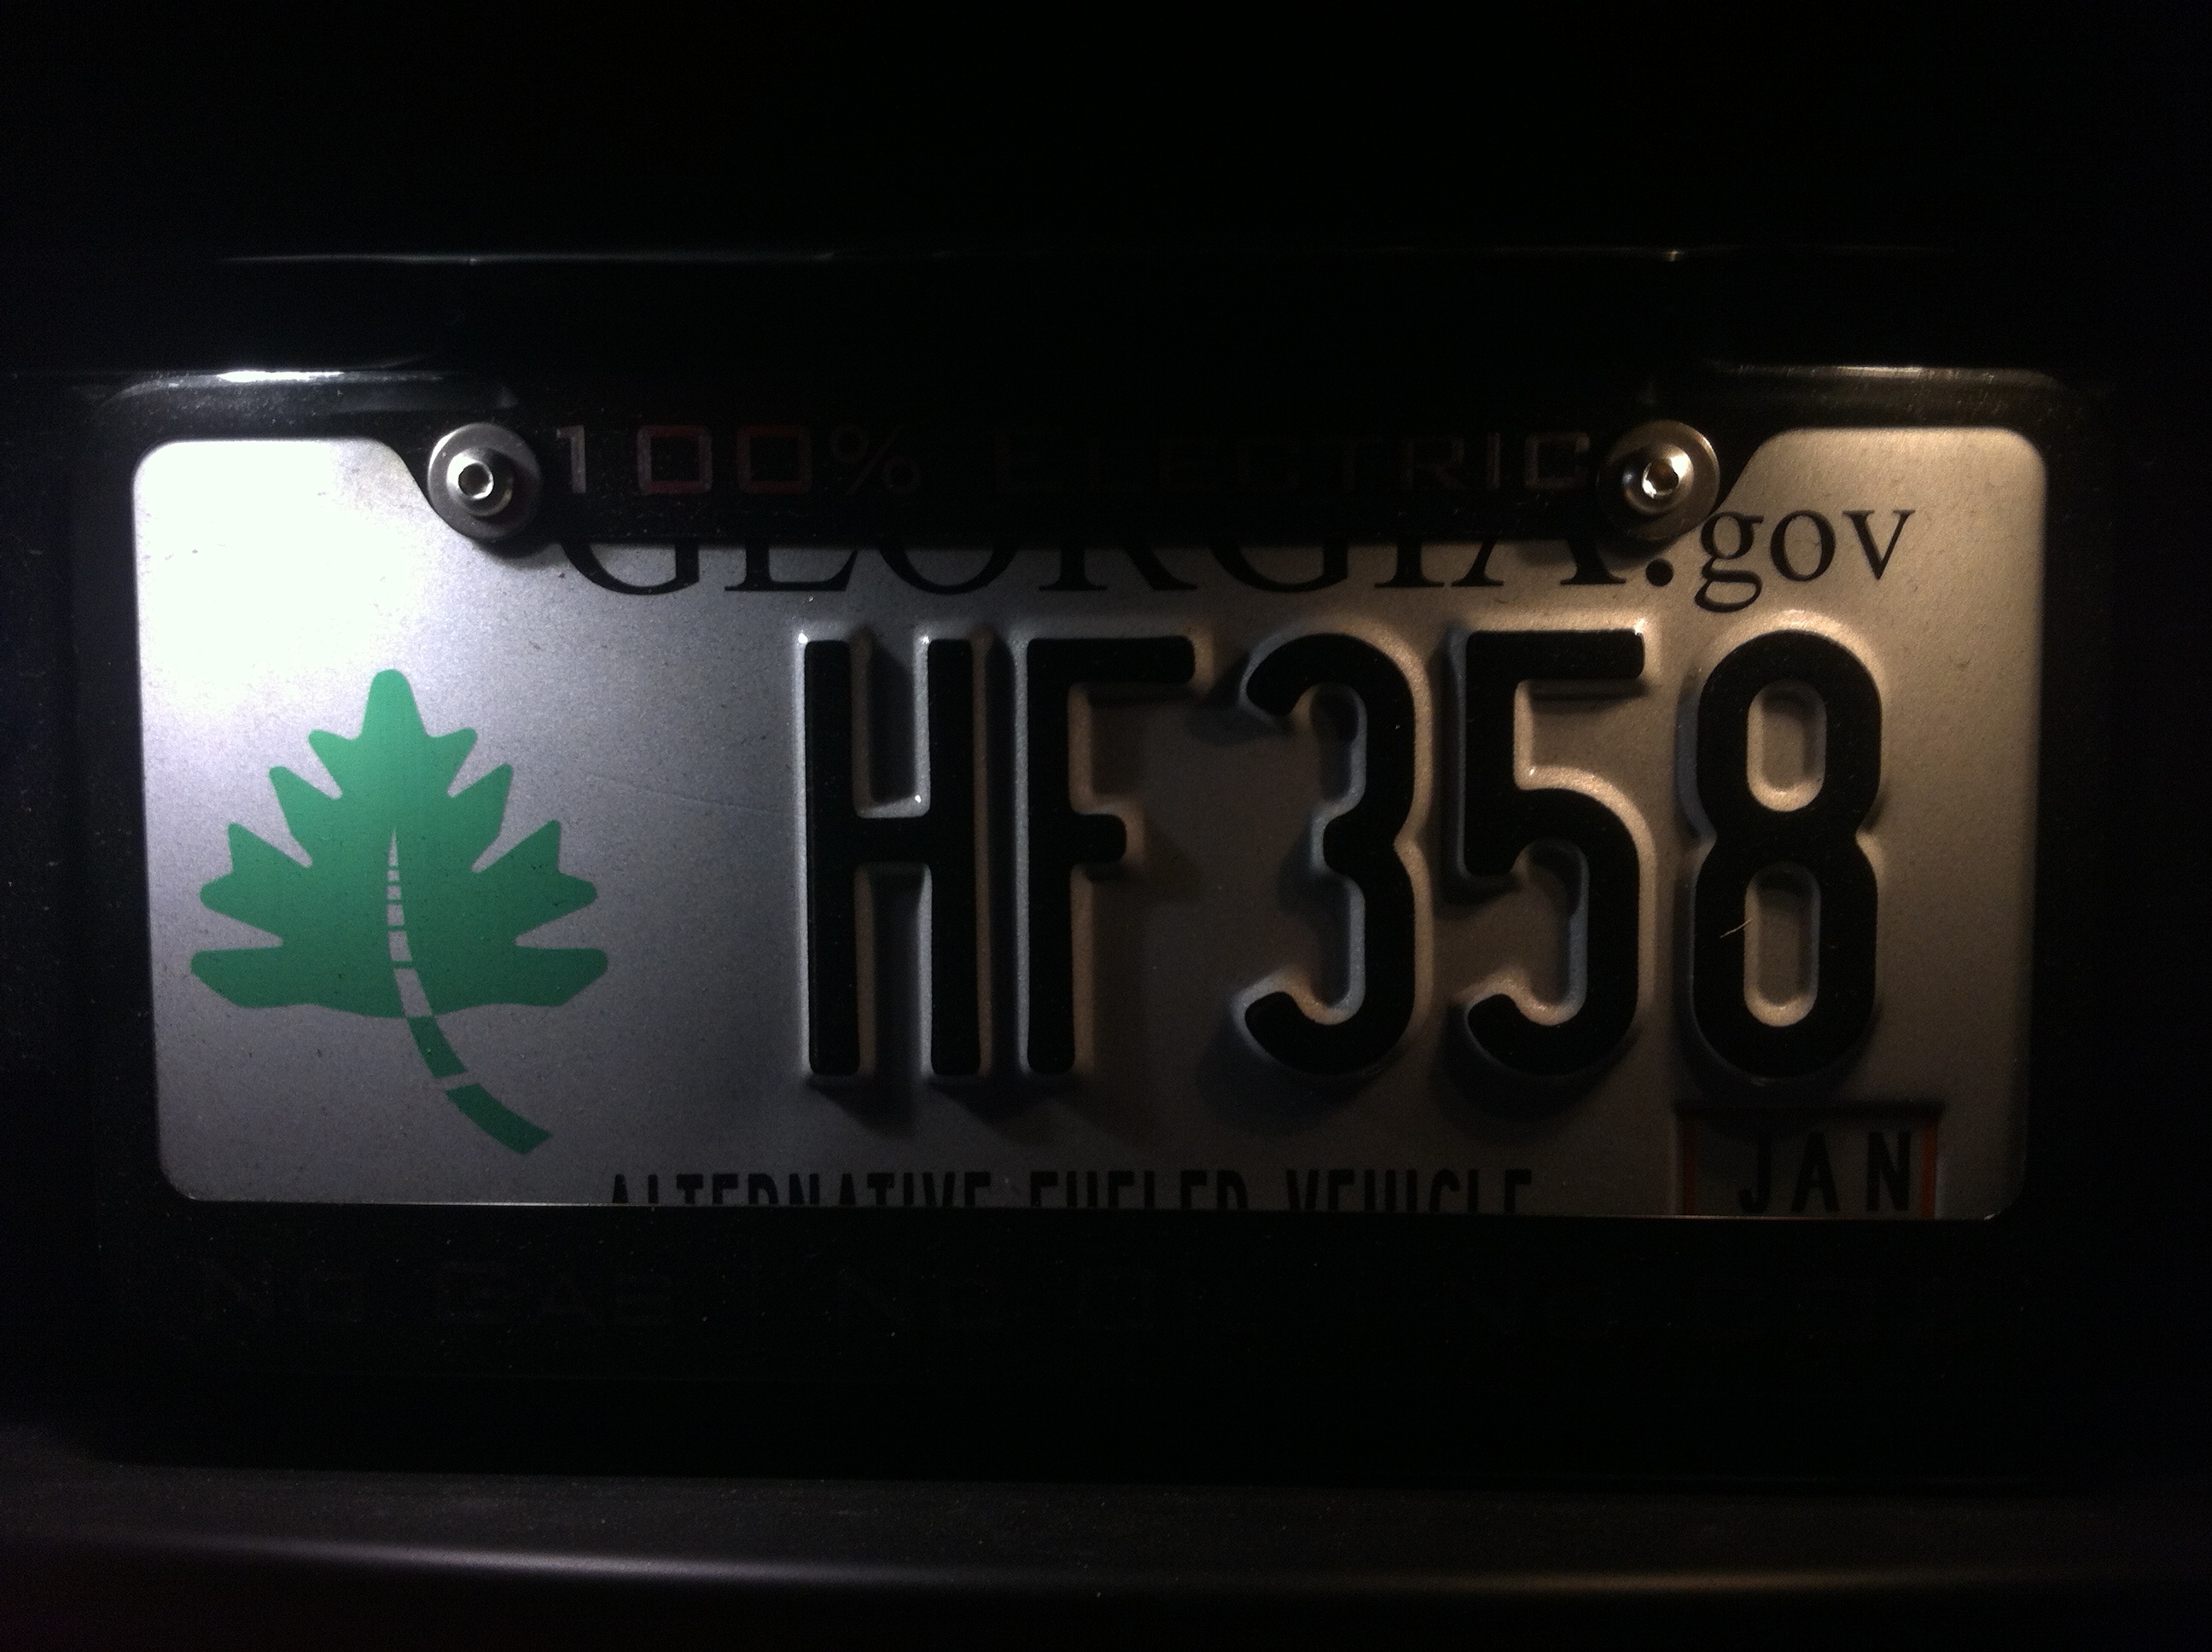
sprediletto License Plate Light Comparison
On the left, a 3710-xHP3 LED from superbrightleds.com
On the right, stock incandescent light
 �
�
Oct 22, 2011
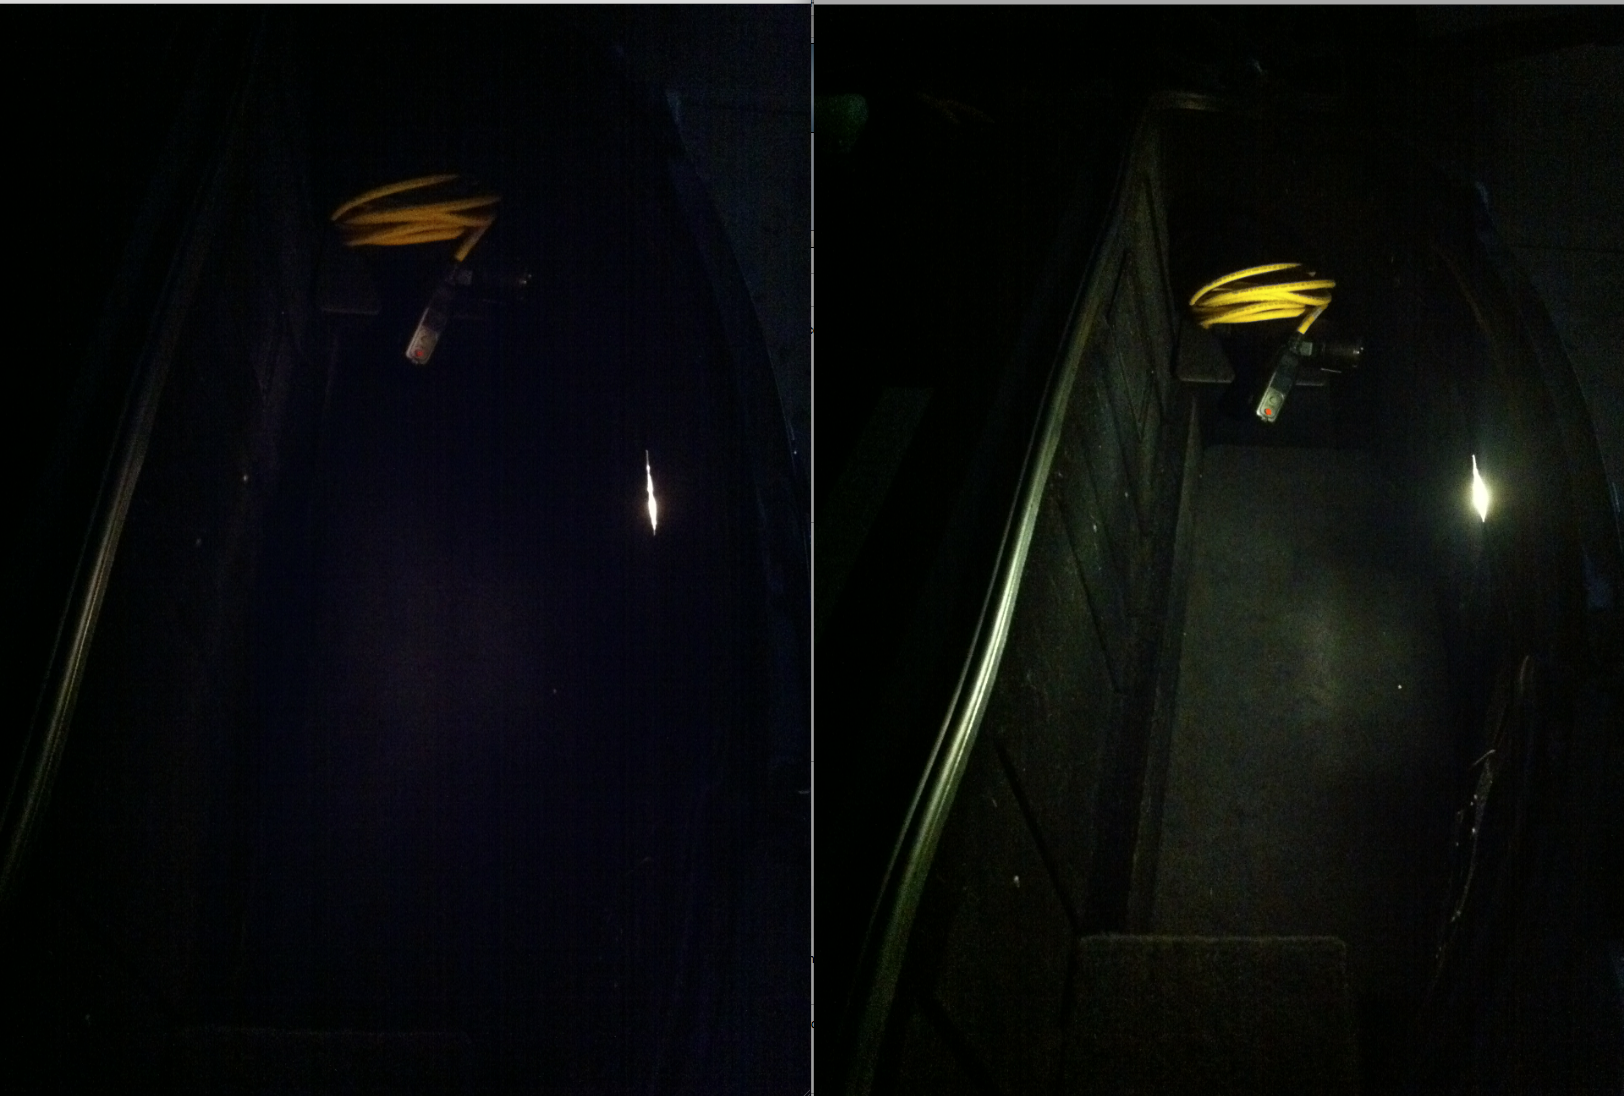
sprediletto Trunk Light Comparison
On the left, stock bulb
On the right, a 3710-xHP6 LED from superbrightleds.com
 �
�
Oct 22, 2011
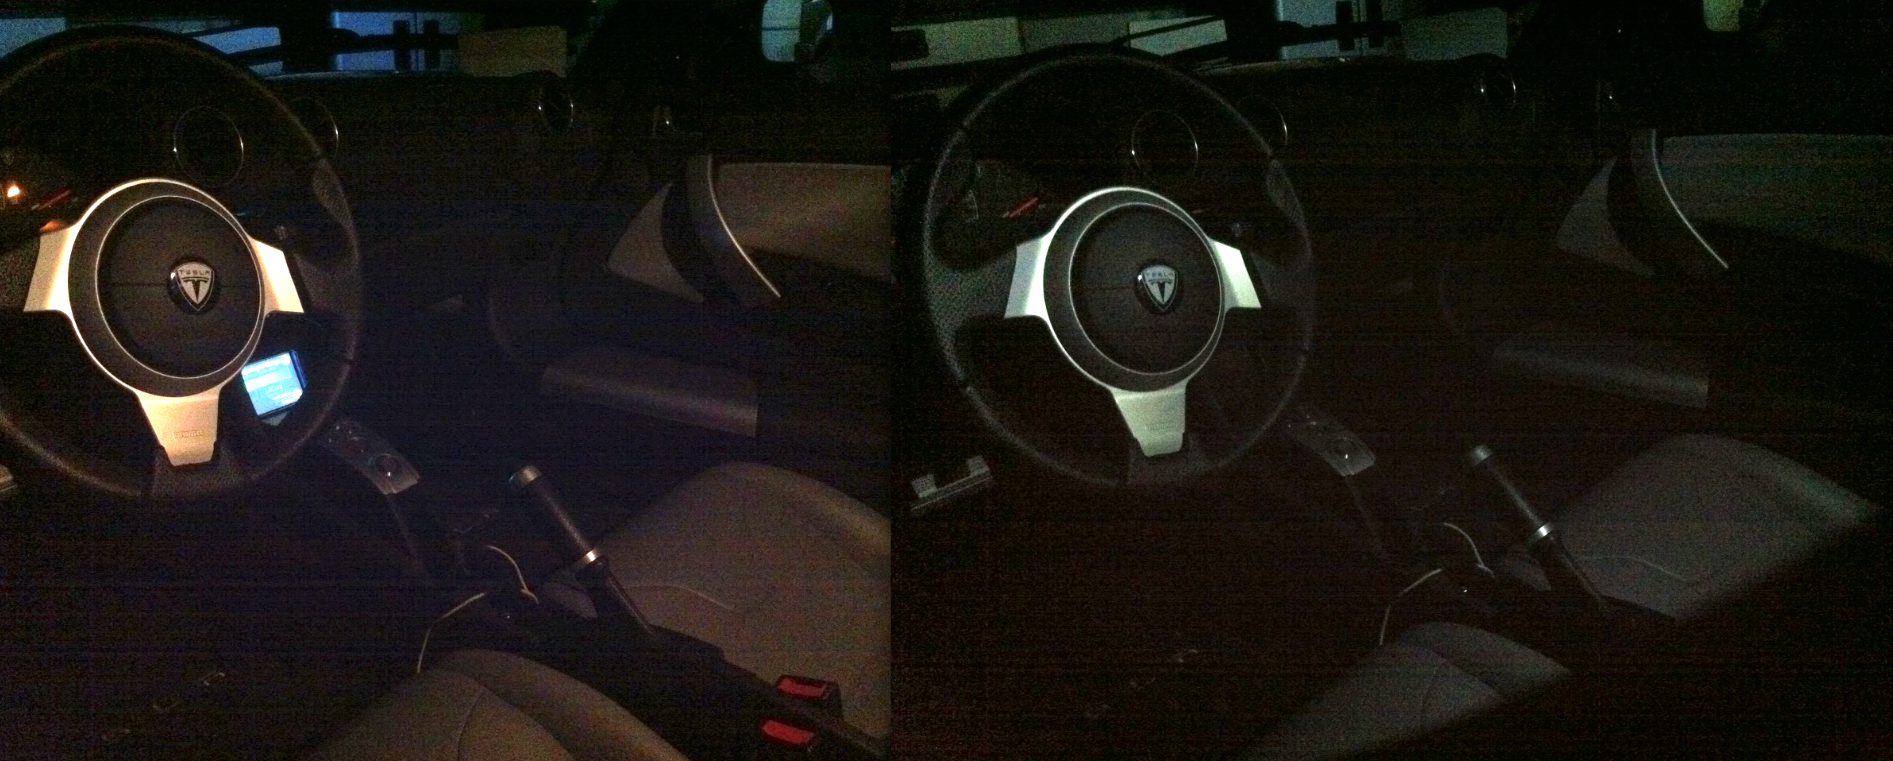
sprediletto Interior Dome Light Comparison
On the left, stock bulb
On the right, a WLED-xHP LED from superbrightleds.com
 �
�
Oct 24, 2011
Jaff Thanks for the comparative pics Spred...very interesting to see the difference!...BTW, have you got a bulb that makes the license plates look dimmer...no need to help out the photo-radar folks! :wink::biggrin:�
Oct 26, 2011
NigelM Fitted the bulbs, they look great. Here's 2 tips:
1) The dome interior dome light is a rocker and the "permanently on" setting left the light pointing backwards. There's plenty of spare cable in there so I just rotated the whole thing 180� and now it points forwards into the cabin when I turn it on. (Hope that makes sense!)
2) Remember to order 2 bulbs for the license plate lights.�
Nov 2, 2011
S-2000 Roadster I have the same 3610-NW4 LED model on both the left and the right, yet I still have a similar difference in brightness on my license plate. That's because rotating the right LED to avoid glare in the cheap, plastic backup camera lens ends up reducing the brightness quite a bit. I guess I could rotate the other side to match and still have enough brightness to meet regulations, but I figure it doesn't hurt to leave it unbalanced.
By the way, I don't see that I documented this anywhere else on the 4 pages of this thread, but it looks like I decided against using the 3710-CWHP3 LEDs that I have because they are so ridiculously bright. The 3610-NW4 is tame in comparison, yet still brighter than the incandescents.�
Nov 2, 2011
S-2000 Roadster Yes, that makes sense, and it's a great suggestion. I'll take a look tomorrow. I rarely turn the dome light on, manually, but it might as well be facing in the more optimal direction (maybe mine already is).�
Nov 2, 2011
NigelM I pointed my 3710-CWHP3 LEDs straight down and then about 15� backwards towards the plate. I have almost zero flare on the camera but I get a really cool kind of ghostly white down on the road under the diffuser. I'm told it's not disturbing to other drivers, at least no more than the bright rear lights in any case.�
Sep 12, 2012
S-2000 Roadster Quick followup: I've had one or two 3610-NW4 LEDs go bad on me. They start flickering even when the car's not moving. I just replaced the second one now (but I used a 3610-CW4 that is probably going to end up the same).
I really wish these worked because they're cheaper and not so bright. If you're really worried, try the 3610-NW4 or maybe the 3610-WW4. Between the 3710-xHP3 and 3710-xHP6, you definitely want the x3 because the x6 is way brighter.�
Feb 11, 2015
jimmyz80 I've been doing some bulb swapping on my roadster and figured I'd just add to this thread instead of creating a new one. So far I've had success with the following:
Dome Light
I used a WLED-WHP6 from SuperBrightLEDs.com.
194 LED Bulb - 6 SMD LED Wedge Base Tower | Wedge Bulbs | Specialty & Automotive | Universal LED Bulb Finder | Super Bright LEDs | Super Bright LEDs
It fits into the dome light perfectly, and is a LOT brighter and whiter than stock. Takes about 30 seconds to install from start to finish.
Front Parking Lights
I bought a pair of bulbs off of Amazon that appeared to be identical to what I used in my dome light, but a bit cheaper.
Amazon.com: JDM ASTAR Extremely Bright 5730 SMD 194 168 2825 W5W T10 LED Bulbs,Xenon White(Brightest T10 Bulb in the market): Automotive
As far as I can tell these are basically identical to the bulb mentioned above for my dome light, although the metal housing is visually a little bit different. Originally I had tried some "CANBUS compatible bulbs here since I thought the car monitored the current draw on these, but those bulbs would overheat and flicker within 30 seconds of installing them into the housing. These non-CANBUS bulbs I linked to above seem to be reliable, but I just installed them tonight and can't say yet whether the car will throw any errors at me once I start driving with them.
The best way I found to swap these is the following:
Total time to install should be less than 15 minutes.
- Open the hood
- Remove the black plastic cover that runs the width of the car in front of the cooling fans (it has the washer reservoir cap protruding through it). There are 8 plastic trim fasteners to remove with a phillips head screwdriver, and one 4mm hex/allen bolt to remove.
- Once the cover is off, you can remove the rubber cap from the side of each headlight housing.
- Twist the turn signal bulb and pop it out to give you access to the parking light bulb.
- Reach in and upward with two fingers and you'll feel the little "spear" that the parking bulb is mounted in. There are two clips you need to squeeze with your fingers and pull to remove it. Some wiggling is necessary, since it looks like this particular bulb was never meant to be removed easily.
- Swap the new LED bulb onto the "spear" and make sure it remains lit even if you wiggle it around a little bit. If it flickers, you might need to adjust the little contact wires on the bulb wedge to make sure they're contacting the contacts in the bulb holder "spear".
- Do your best to re-insert the bulb and "spear" back into the hole you removed them from. It's a bit tight with the bulbs I used, but some gentile wiggling helped it all slide into place. One of mine snapped with with a positive click, and the other side just seems to be held in by friction. I don't know if the clip are worn out on that side or what, but the bulb seems to stay put regardless.
- Reassemble the turn signal bulb, rubber cap, and plastic cover.
License Plate
Over on the Model S sections of the forum, I saw people talking about bulbs produced under the name Abstract Ocean. They are a perfect fit for the roadster as well, and seem to work well.
LED Licence Plate Bulb Kit - Abstract Ocean
Originally I had tried some bulbs given to me for free from DDM Tuning when I bought my HID kit from them. Those bulbs flickered and failed within 30 seconds. Definitely stick with the Abstract Ocean bulbs, since they are MUCH higher quality. Someone should talk AO into selling a 3-bulb kit instead of the 2-bulb Model S kit. The 3rd bulb would work great in the roadster trunk.
These take about 2-3 minutes to install.
I have some front turn signal bulbs on order that claim to be error free, so I'll update this thread once they arrive and I've tested them.�
Feb 12, 2015
Chillout Thanks for telling me about the alternative way to replace the parking lights!
I thought the only way to do it was by removing the wheel and doing some gyneacologist-like finger twisting to reach the light.�
Feb 12, 2015
ibcs Thank you Jimmyz80 for the Dome light link. I'd replaced the others, but did not have a source on the last yellow light.�
Feb 12, 2015
jimmyz80 Oh trust me, you still do....you just won't be elbow deep while doing it. LOL�
Feb 13, 2015
Chillout �
Feb 21, 2015
ibcs Concerning the Dome Light you said 30 seconds to install. Unfortunately, I'm passed my 30 seconds on trying to figure out how it comes apart.
Can you offer any suggestions? Does the plastic clear piece come out or is it the whole plastic surround that needs to be removed?
Thanks for your time,
---Kent�
Feb 21, 2015
jimmyz80 The whole thing pops out. Just carefully slide a flathead screwdriver under one of the shorter sides of it, and pry lightly. One side seems to pull out easier than the other, so you may need to gently try both sides.�
Feb 21, 2015
delavandaag I am facing problems in removing the plastic trim fasteners that hold the plastic cover under the hood in place. To turn the trimmers with the screwdriver I have to apply some pressure on the screwdriver/trimmer. However, that pressure causes the trimmers to pop in again or not to come out at all. Does anyone have a suggestion?
Thanks, Dela�
Feb 21, 2015
slcasner Emphasis on the "gently". It is easy to break the plastic latches that hold the light module in place. How do I know?�
Feb 21, 2015
jimmyz80 Make sure you use a screwdriver big enough to fit the fastener, so you can loosen without applying much pressure. The plastic screw part will back out easily and then you can pry the remaining "bushing" part of it out of the hole. Don't drop anything either or you may never get it back haha.�
Feb 22, 2015
Chillout Oh this was a piece of cake compared to going from the wheel-side... This time I didn't have to keep my head in the dirty nasty wheelwell and I could actually see what I was doing!
Thanks so much for this guide.
Also, I think the leds posted here are awefully expensive. I can get LEDs at dx.com for just couple of dollars/euros. That way you can just order 10 or so, in case on of them fails... and still be cheap :
http://www.dx.com/p/t10-1-5w-30lm-led-optical-lens-white-light-car-clearance-lamp-2-pcs-12v-159438#.VOoAi9t0yM8
 �
�
Feb 22, 2015
dhanson865 AO sounded nice until they said they matched the OEM color temp. I'd rather have something in the 3000K to 4500K range preferably not at either extreme. I'm assuming the OEM is 2700K but I'm not sure.�
Feb 22, 2015
jimmyz80 They're not color matched to the ugly yellow incandescent color. They're a pure white color with no hint of yellow or of blue, so I'd guess somewhere in the 4300-5000K range.
- - - Updated - - -
Awesome, I'm glad it was easy! The reason I posted the bulbs I did, is because every time I've bought cheap LED bulbs they've lasted all of about 60 seconds before they failed. I've had much better luck with the pricier brands who tend to care about their reputation. The listing you posted also shows bulbs with only a 30 lumen output, so they'll be less than 1/3rd of the brightness of the ones I listed. It makes no sense to swap in LEDs when they aren't at least as bright as the incandescent bulbs being replaced.�
Mar 1, 2015
jimmyz80 I just returned home from some traveling and installed the front turn signal bulbs I had ordered. They install using the exact same access steps as the parking lights, and are very easy to change. None of the acrobatics that are required for the parking lights. So far I haven't seen any errors pop up on the VDS from the turn signal bulbs, but I've only tested them out in the garage. It's messy outside right now, but hopefully tomorrow I'll get a chance to go driving and see if I get any errors. Here's a link to the bulbs I used. They are very expensive, but they are also VERY bright, and appear to draw enough current to not make the VDS throw bulb-out error.
High Power 50W CREE 7507 LED Bulbs | Turn Signal or Back Up Lights
Note: Make sure to get the Amber colored bulbs, NOT the white ones.�
Mar 3, 2015
heychubs Thanks for posting info about your LED swaps! I've ordered and replaced the front parking light, which wasn't horribly hard. I think the hardest part was trying to put the parking lights back into their housing. I do have a couple questions. I replaced the dome light with the ones you suggested above, but they would not turn on. When I put the original bulbs back in, they worked fine. Do you think I got a defective LED bulb?
Also, the license plate lights came in a 2 pack, but the rear license plate only took one bulb. Your post makes it seem like it should take both bulbs? Did I miss a bulb somewhere back there?�
Mar 3, 2015
jimmyz80 Glad the information has been useful.
For the dome light, I don't think polarity matters so I don't think it's possible to put it in backwards or anything like that. It still might be worth rotating it 180 degrees in the bulb holder though. Also check the little wires on the part of the bulb that slides down into the bulb holder. It's possible one of them is pushed off to the side a bit, and may not be contacting the metal in the bulb holder. You may need to use a toothpick or something as you're sliding the bulb in, to keep the wires aligned with the contacts on the bulb holder. Sort of a crappy design, but all the LED bulbs seem to use it. Also you said "bulbs" a few times. Does your dome light actually have more than one bulb in it?
What year/version is your roadster? Mine is a 2.0 and the license plate has two separate bulb housings for the license plate. One on the left side of the plate and one on the right side of the plate. Maybe the new 2.5 body panels only used one?�
Mar 3, 2015
heychubs Good suggestions, I'll try that for the dome light tonight. There is only one dome light, I think I typed the (s) because these LEDs all look alike.
Oh, interesting. I have a 2010/2.0 too. It only has a single bulb housing, and only uses one bulb, centered above the license plate. I guess I'll use the spare bulb for my trunk light. woohoo.�
Mar 3, 2015
jimmyz80 How weird. What production number was your roadster? I wonder if they transitioned from one bulb to two, or from two bulbs to one.�
Mar 3, 2015
heychubs #678, so it looks like they went from one to two bulbs.�
Mar 4, 2015
heychubs I think I got a dud. I had ordered a few spares, and the next bulb I tried, worked.
How do you like your turn signal LEDs? Are they as bright or brighter than the bulb it replaced? That may have to be my next purchase...�
Mar 6, 2015
jimmyz80 Glad to hear it was just a bum bulb.
So far I'm happy to report that the turn signal LEDs are completely error free after a week or so of driving with them. They must draw enough current to keep the car's sensors happy. They are FAR FAR brighter than the stock incandescent bulbs. I highly recommend them, but again...remember to get the amber colored ones.�
Mar 8, 2015
bart513 Can you show exterior pics of how they look installed?�
Mar 8, 2015
Chillout Also, did you get the additional resistors?�
Mar 8, 2015
jimmyz80 Nope, no resistors seem to be required with these turn signal bulbs. They are very high powered LEDs, so they must draw enough current to make the car think they are incandescent.
- - - Updated - - -
Here are a few pics I snapped tonight just to give an idea of what everything looks like. I promise I'll take better ones when I'm not in such a rush.
http://imgur.com/a/C9fIC
Also a quick video of the turn signal to get an idea of what it looks like.
https://vid.me/sO4D
You can really see how much brighter the parking light bulbs are, as compared to the crappy dim little yellow'ish incandescents that came from the factory. The license plate bulbs are perfect IMO, just a pure, bright white.�
Mar 9, 2015
bart513 Awesome thanks!�
Mar 13, 2015
Chillout Oh dear, those LEDs at ijdmtoy.com are getting a bit expensive with shipping... would be around $100 for just 2 LEDs. Does anyone know of any other leds that do work?
Edit:
Forgot to say that that movie looks AWESOME!�
Mar 13, 2015
jimmyz80 If you're referring to the turn signal bulbs, they are sold as a pair. You don't need to order a quantity of two.�
Mar 13, 2015
heychubs Yep! I original was hesitant to get them because $50/each would have been pricey, but $50 for the pair is worth it! They came yesterday, so I'm excited to get them in.
On a side note, does anyone know where I can get a replacement dome light? I sort of broke off the side clip when I removed it, and every so often it gets loose and tilts out a bit.
----Edit----
Found the replacement dome light. $56 from lotusgarage.com�
Mar 13, 2015
Chillout I know they are a pair... but sending to the Netherlands adds about $48 to the price, not including border-taxes�
Mar 14, 2015
jimmyz80 Ahh ok. The $100 price you posted was suspiciously close to ordering two pairs.�
Mar 14, 2015
Chillout �
Mar 14, 2015
jimmyz80 Awesome! Any chance you can post a link to the item? I'm curious now.�
Mar 14, 2015
Chillout I got these:
CREE LED 30W Yellow BAU15S 1056 PY21W 2100LM AC / DC12V-24 Turn Lights LED, $11.52 | DHgate.com
Let's hope they are any good�
Mar 14, 2015
jimmyz80 Looks like they have fewer leds but for that price it still may be a great deal. Very curious.�
Mar 14, 2015
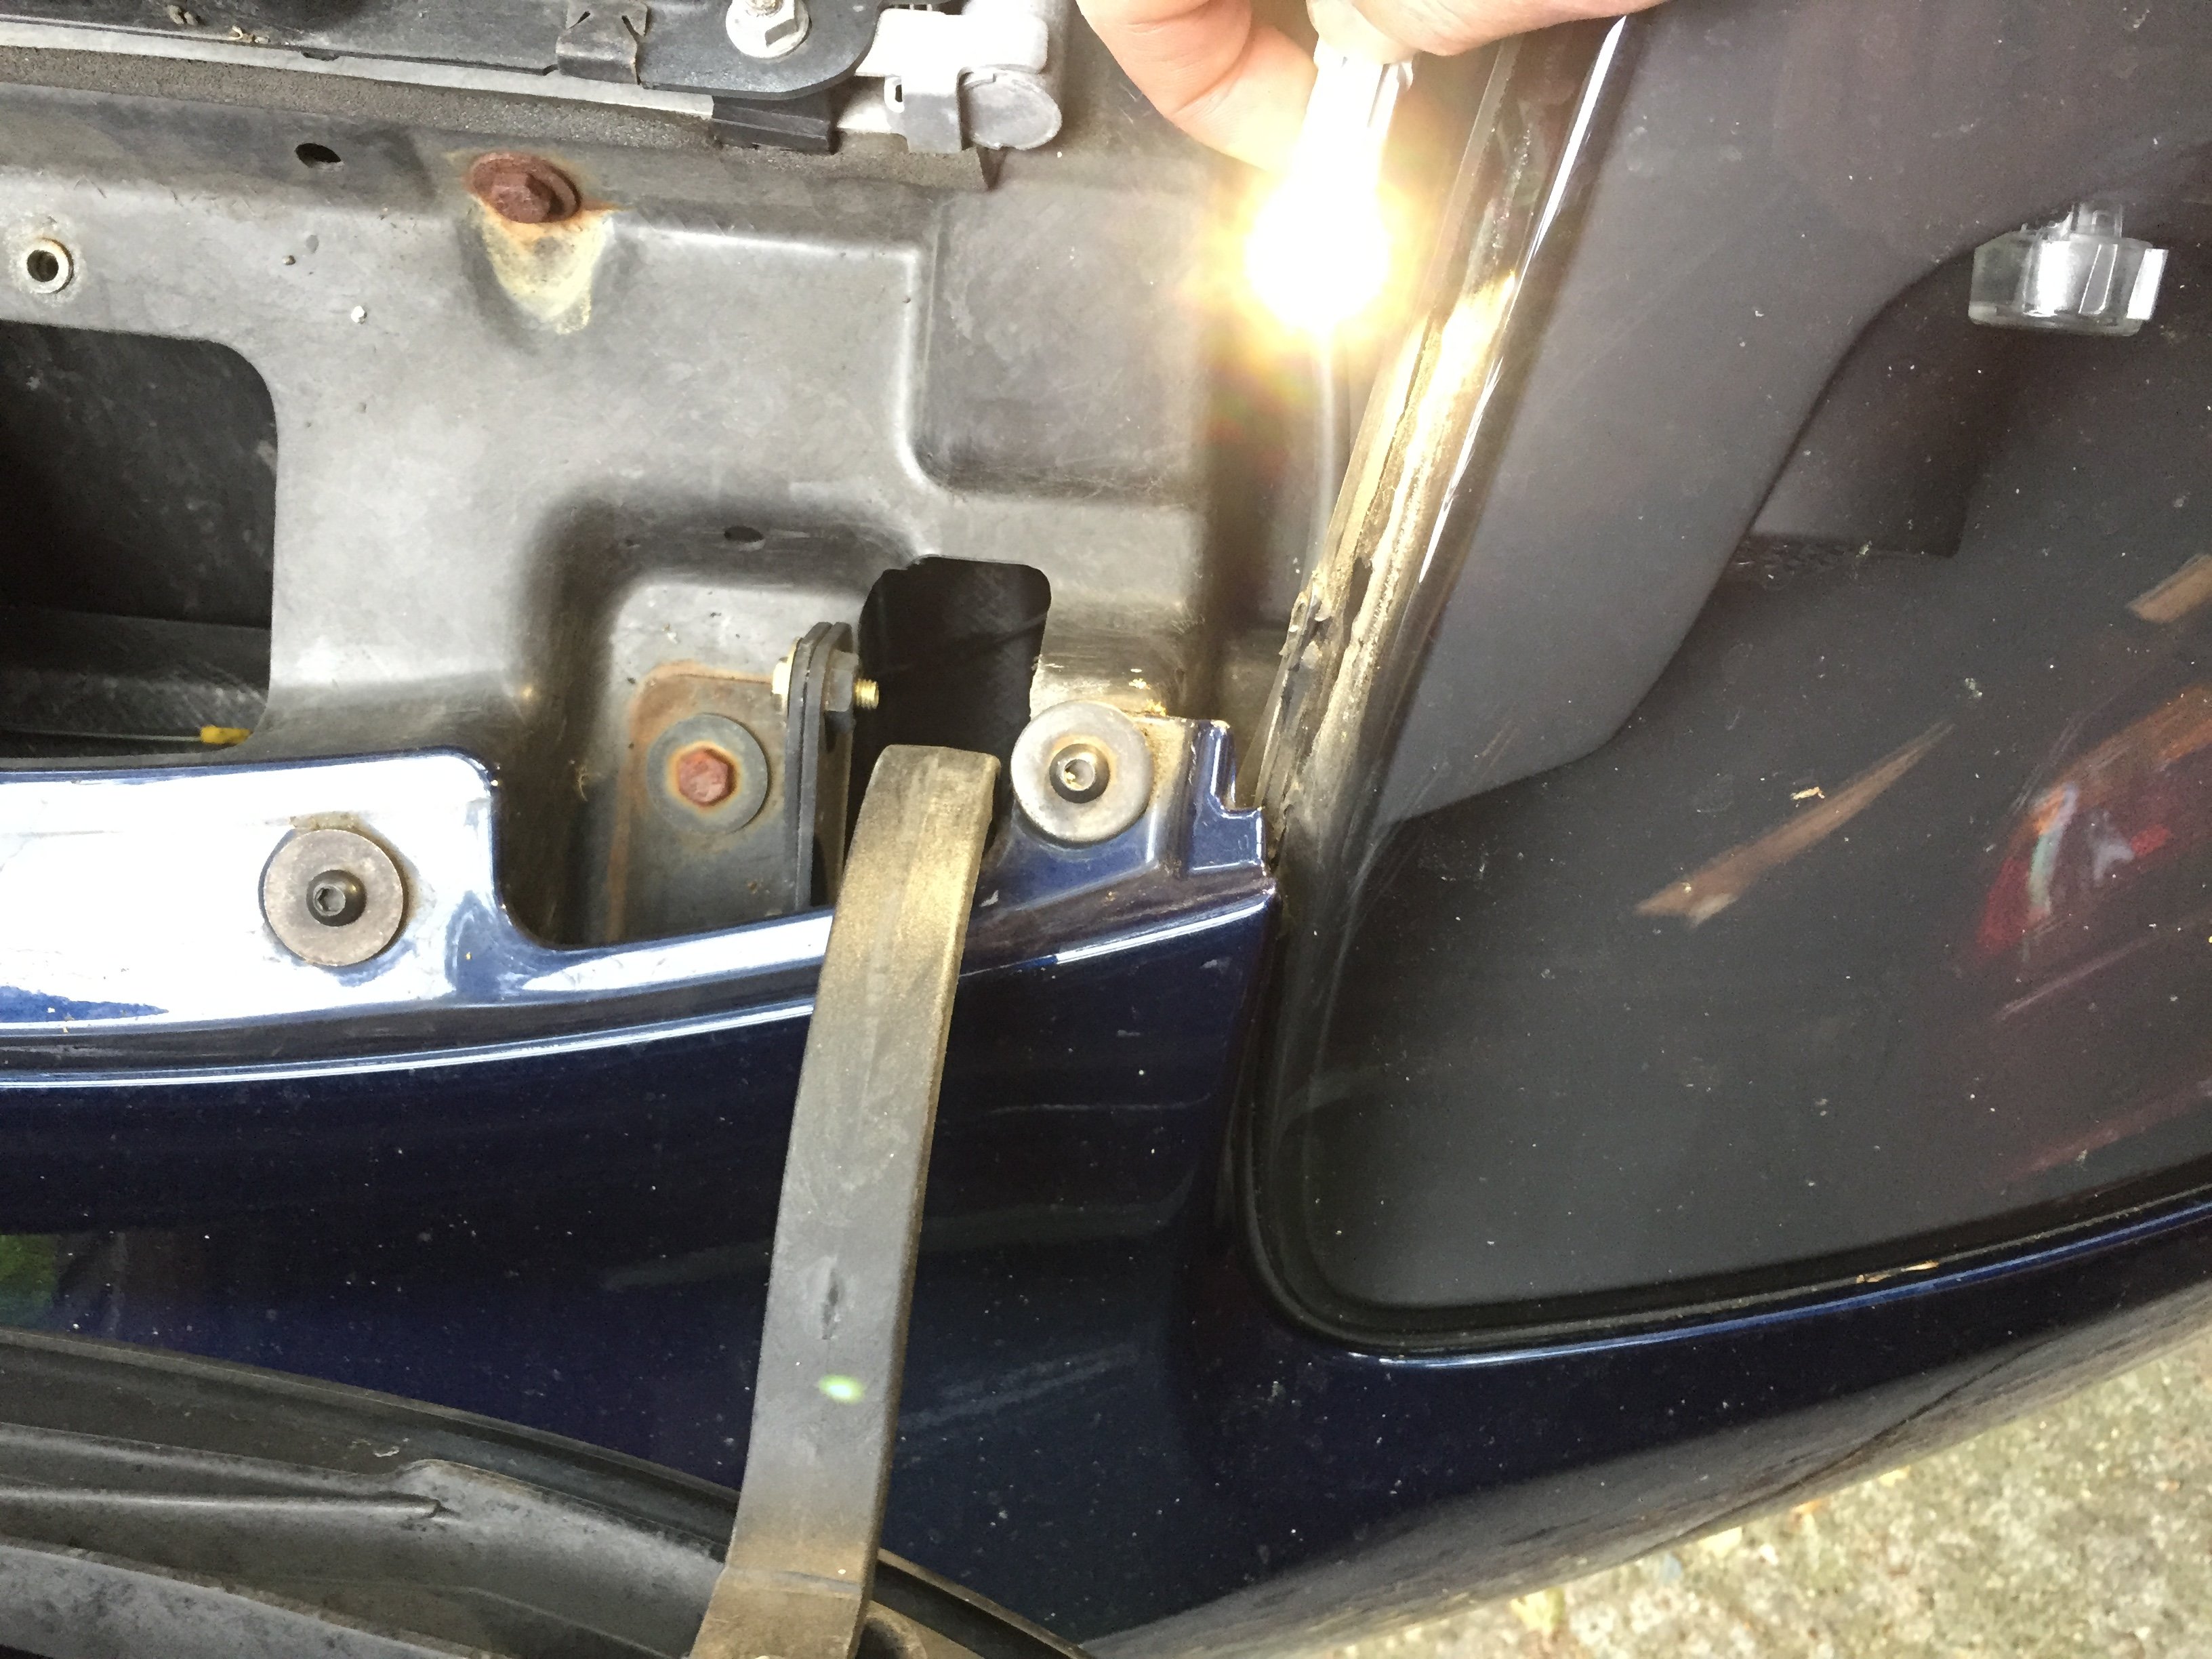
augkuo Thanks Jimmy - I replaced my parking lights with LEDS and much brighter! I've included pictures with his steps:
Front Parking Lights
I bought a pair of bulbs off of Amazon that appeared to be identical to what I used in my dome light, but a bit cheaper.
Amazon.com: JDM ASTAR Extremely Bright 5730 SMD 194 168 2825 W5W T10 LED Bulbs,Xenon White(Brightest T10 Bulb in the market): Automotive
As far as I can tell these are basically identical to the bulb mentioned above for my dome light, although the metal housing is visually a little bit different. Originally I had tried some "CANBUS compatible bulbs here since I thought the car monitored the current draw on these, but those bulbs would overheat and flicker within 30 seconds of installing them into the housing. These non-CANBUS bulbs I linked to above seem to be reliable, but I just installed them tonight and can't say yet whether the car will throw any errors at me once I start driving with them.
The best way I found to swap these is the following:
- Open the hood

2.Remove the black plastic cover that runs the width of the car in front of the cooling fans (it has the washer reservoir cap protruding through it). There are 8 plastic trim fasteners to remove with a phillips head screwdriver, and one 4mm hex/allen bolt to remove.
3.Once the cover is off, you can remove the rubber cap from the side of each headlight housing.
4.Twist the turn signal bulb and pop it out to give you access to the parking light bulb.
5.Reach in and upward with two fingers and you'll feel the little "spear" that the parking bulb is mounted in. There are two clips you need to squeeze with your fingers and pull to remove it. Some wiggling is necessary, since it looks like this particular bulb was never meant to be removed easily.

6.Swap the new LED bulb onto the "spear" and make sure it remains lit even if you wiggle it around a little bit. If it flickers, you might need to adjust the little contact wires on the bulb wedge to make sure they're contacting the contacts in the bulb holder "spear".
7. Do your best to re-insert the bulb and "spear" back into the hole you removed them from. It's a bit tight with the bulbs I used, but some gentile wiggling helped it all slide into place. One of mine snapped with with a positive click, and the other side just seems to be held in by friction. I don't know if the clip are worn out on that side or what, but the bulb seems to stay put regardless.
8. Reassemble the turn signal bulb, rubber cap, and plastic cover.
Total time to install should be less than 15 minutes.�
Mar 14, 2015
jimmyz80 Awesome. Thanks for adding the instructional pics!�
Mar 14, 2015
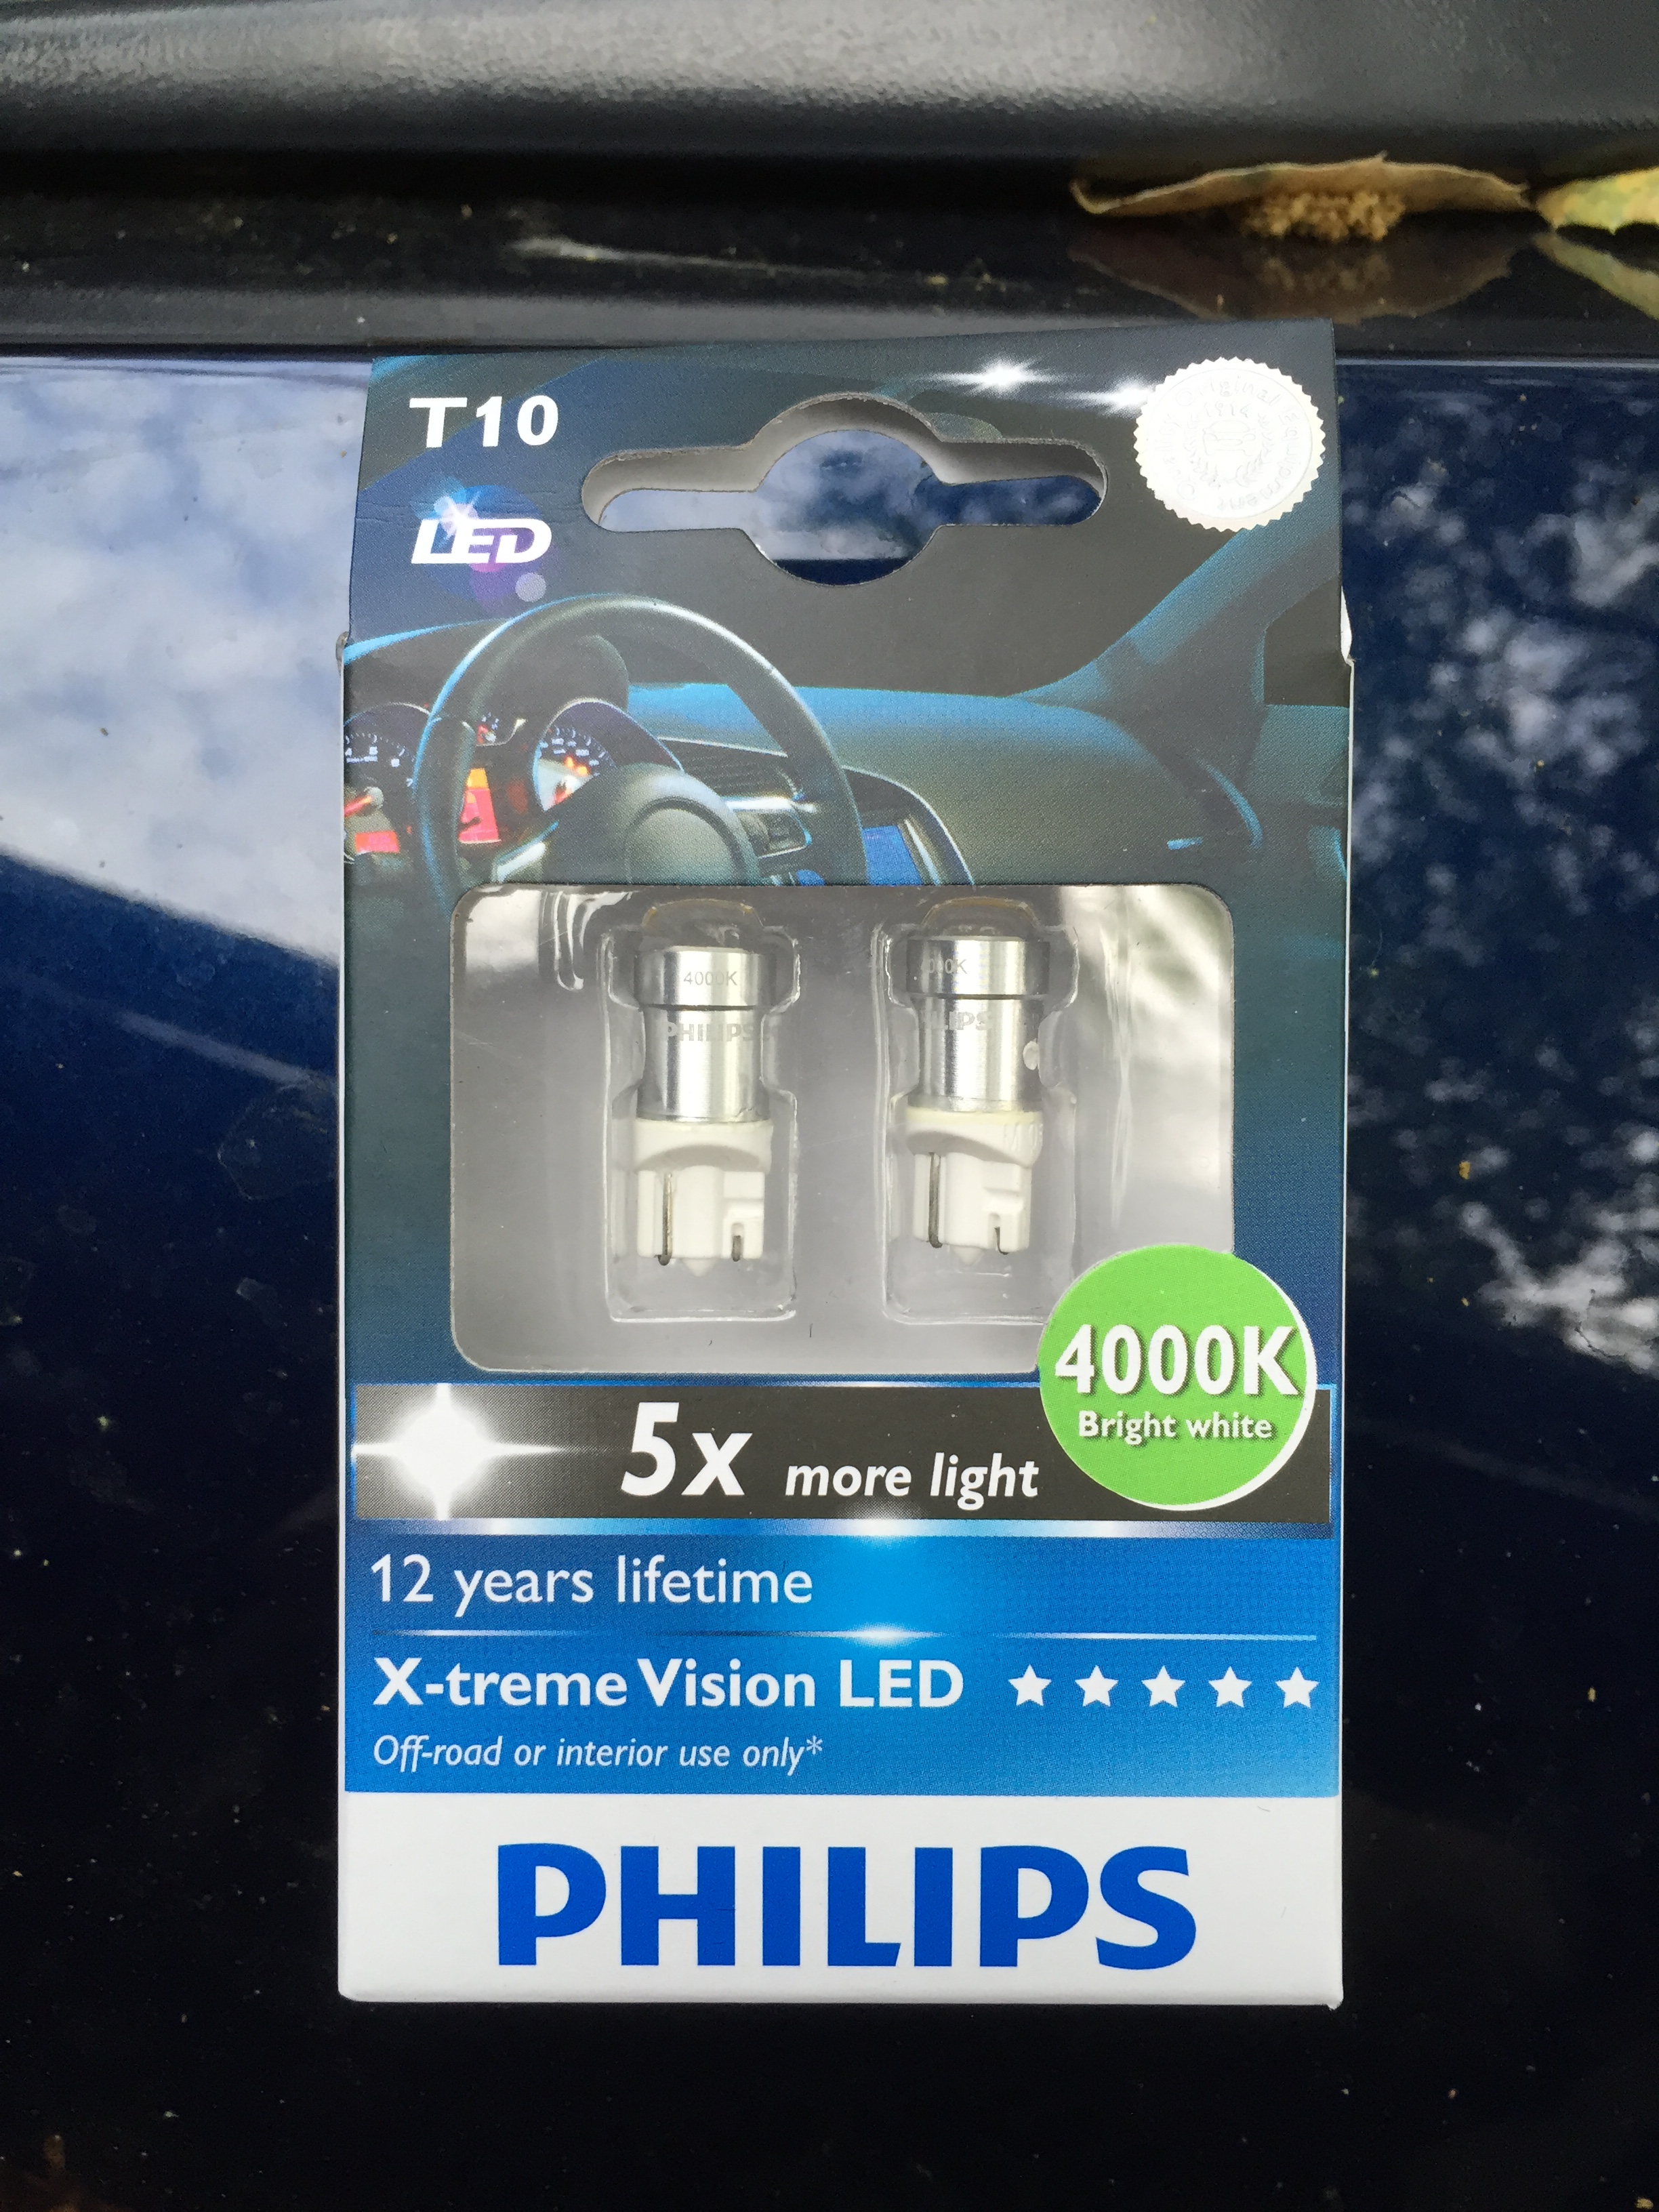
augkuo By the way, the Phillips bulbs were like 20 Euros with shipping so it's really cheap now with the strong dollar
Seller: autolampen-hsk ( 8694 )
Seller Information: autolampen-hsk Verena Szinglober Auf der Hude 14 59823 Arnsberg DE
Item title Price Qty Item total
PHILIPS - W5W LED T10 12V 1W 4000K X-treme Vision Philips 2 Stk. !!TOP PREIS!! (item: 201079748617 transaction: 1118974596010 )

Paid on Oct-02-14 EUR 14.30 EUR 6.00 1 EUR 14.30 Deutsche Post Brief Estimated delivery: You can contact seller for more information.
Subtotal EUR 14.30 Shipping and handling EUR 6.00 Total EUR 20.30 �
Mar 14, 2015
spaceballs Augkuo did you already add LEDs too your old Roadster?
Also I've had another roadster owner ask about the lights, are they xenons? because they are so bright, I haven't had time to check but I assume they are since they are really bright!�
Mar 15, 2015
augkuo #783 has the xenon upgrade but no LEDs for the parking lights since I had DRLs installed that were LEDs anyway.�
Mar 16, 2015
heychubs Sadly, these LEDs did not work for me. They did the fast blink after install, and I kept getting "Left blinker error". It wasn't a bad LED bulb because even if I swapped sides, I'd still get the same error message. They would almost work, as there were no errors after I put in one reg and one LED bulb, but as soon as I put both LED bulbs in, I'd get the error message. Not sure what the problem is, but I've just put the reg bulbs back in for now.�
Mar 16, 2015
jimmyz80 How weird... I'm going on a month or so with them now, and not a single error or fast-flash. I wonder what the variable is between our setups. Out of curiosity, what's your firmware version on the car?�
May 11, 2015
Chillout I guess my Roadster doesn't like them... throws an error!�
Jan 31, 2016
Austrianer I tried AFTERPARTZ 2*CREE XB-D Amber Light 80W LEDs but got hyper flashing and errors too. Each of these LEDs draw 410mA at 12V. With a parallel resistor starting at 100 Ohms and below it worked, no hyper flash and errors anymore. So it seems the minimum current to keep the Roadsters boardcomputer quiet is somewhere from 500mA to 550mA.
I will now try to solder 82 Ohm 3W resistors into the turning signal sockets, there should be enough space.
With the LED (410mA, 4.92W) and the 82 Ohm parallel resistor (146mA, 1.75W) the power consumption would be around 6.7W which is only about 1/3 of the original bulb (1800mA, 21.6W).
Btw, I have a European Roadster Sport 2.5, don't know if the turning light circuit is the same in all models.�
Jan 31, 2016
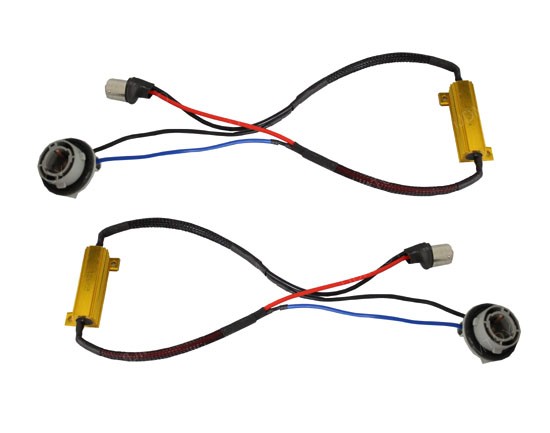
wiztecy All 1.5's will hyper-flash as well. I didn't want to cut or dig into the wiring and found these pre-built resistors with light socket connectors that are almost plug & play. What you need to do is cut off some or one of the nipples on the connector that the LED turnsignal will be mounted to to make it fit into the slots of the housing. You can turn it enough so it locks in place by pressure. I used a very sharp utility knife to do my custom work.
1156 3156 7440 LED Hyper Flash Fix Wiring Adapters For Turn Signal
 �
�
Jan 31, 2016
Austrianer I know these adapters, one of my LEDs I tested had such an adapter included. The problem is with this adapter a lot of energy is wasted and converted into heat, that's why this big heat sink is on.
The adapter I tested looks like the same but had only about 6.3 Ohms and draw 1900mA on its own (=22.8W) at 12V.
But even an 8 Ohm version draws 1500mA and produces heat, together with my type of LED they would both draw 1900mA compared to 1800mA of the original bulb.
So that's why I decided to test the limit and found it for a less power consuming solution.
The 82 Ohm / 3W resistor I use needs no additional heat sink and is small enough to fit into the back of the original bulb connector socket, no need to cut of anything (I hope :wink�
Jan 31, 2016
wiztecy Saving energy with your turn signals blinking is waste of time in my opinion. Also your headlights, Halogen, don't really make that much of an impact with your range if you go LED or even turn them off.. I have a Zero motorcycle and that would get the most benefit due to a smaller pack, even there I'm not messing with LEDs or headlights to save pennies in terms of energy usage efficiency. I'd rather have a cleaner installation. Also that heat-sync will never heat up from a blinker. Its not constantly flowing current and how long does a blinker stay on? Worse case scenario would be you're disabled on the side of the road running your hazards, but even then, you have bigger issues on your hands.
Only reason I swapped out my regular incandescent bulbs for LEDs is that LEDs are brighter hence safer so that others see you better, and they run cooler. My parking lights have already melted the clear covering in the past.�
Feb 1, 2016
Austrianer Your parking lights clear covering already melted?
That's why I've already replaced anything I could with LEDs, parking, license plate, trunk and interiour lights. Was inspired by the trunk light melted thread to do so.
And for the turning signal, well everybody has to decide this on his own. If I have the opportunity to make the turning lights brighter, less power consuming and less heating, then I will do so.
Anyway, I will make photos of my solution, hope to get the resistors in the next days.�
Feb 3, 2016
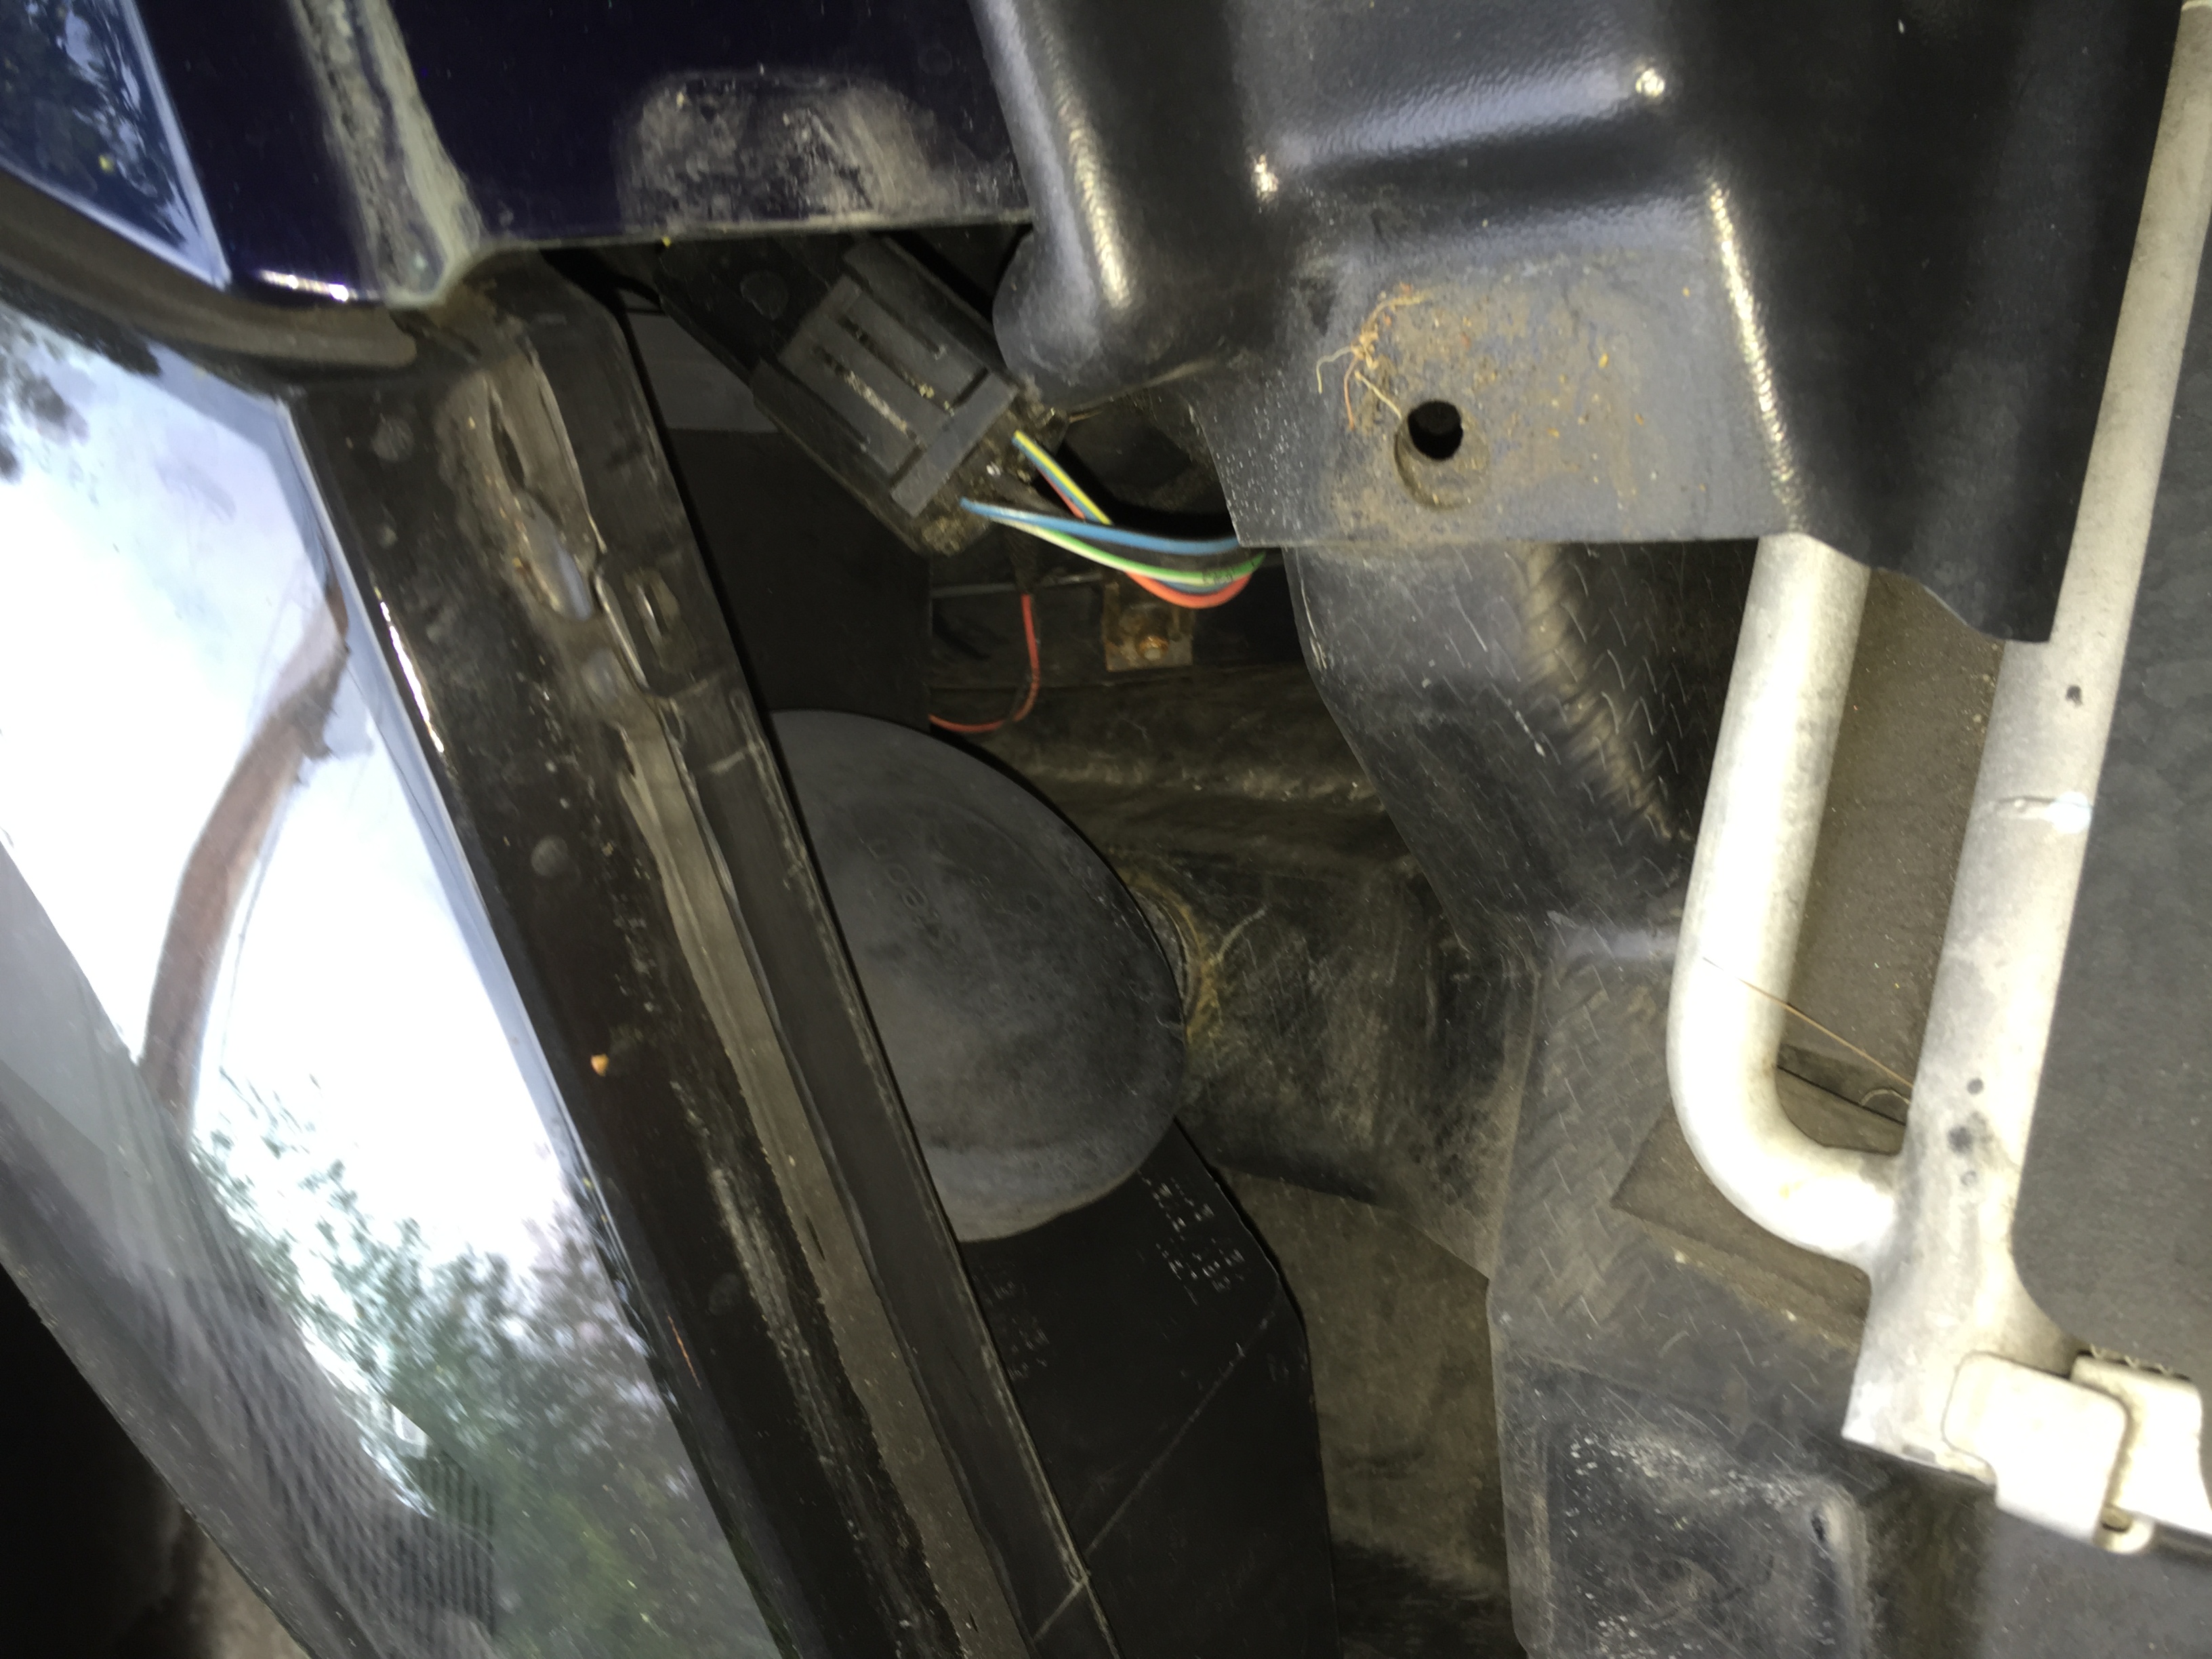
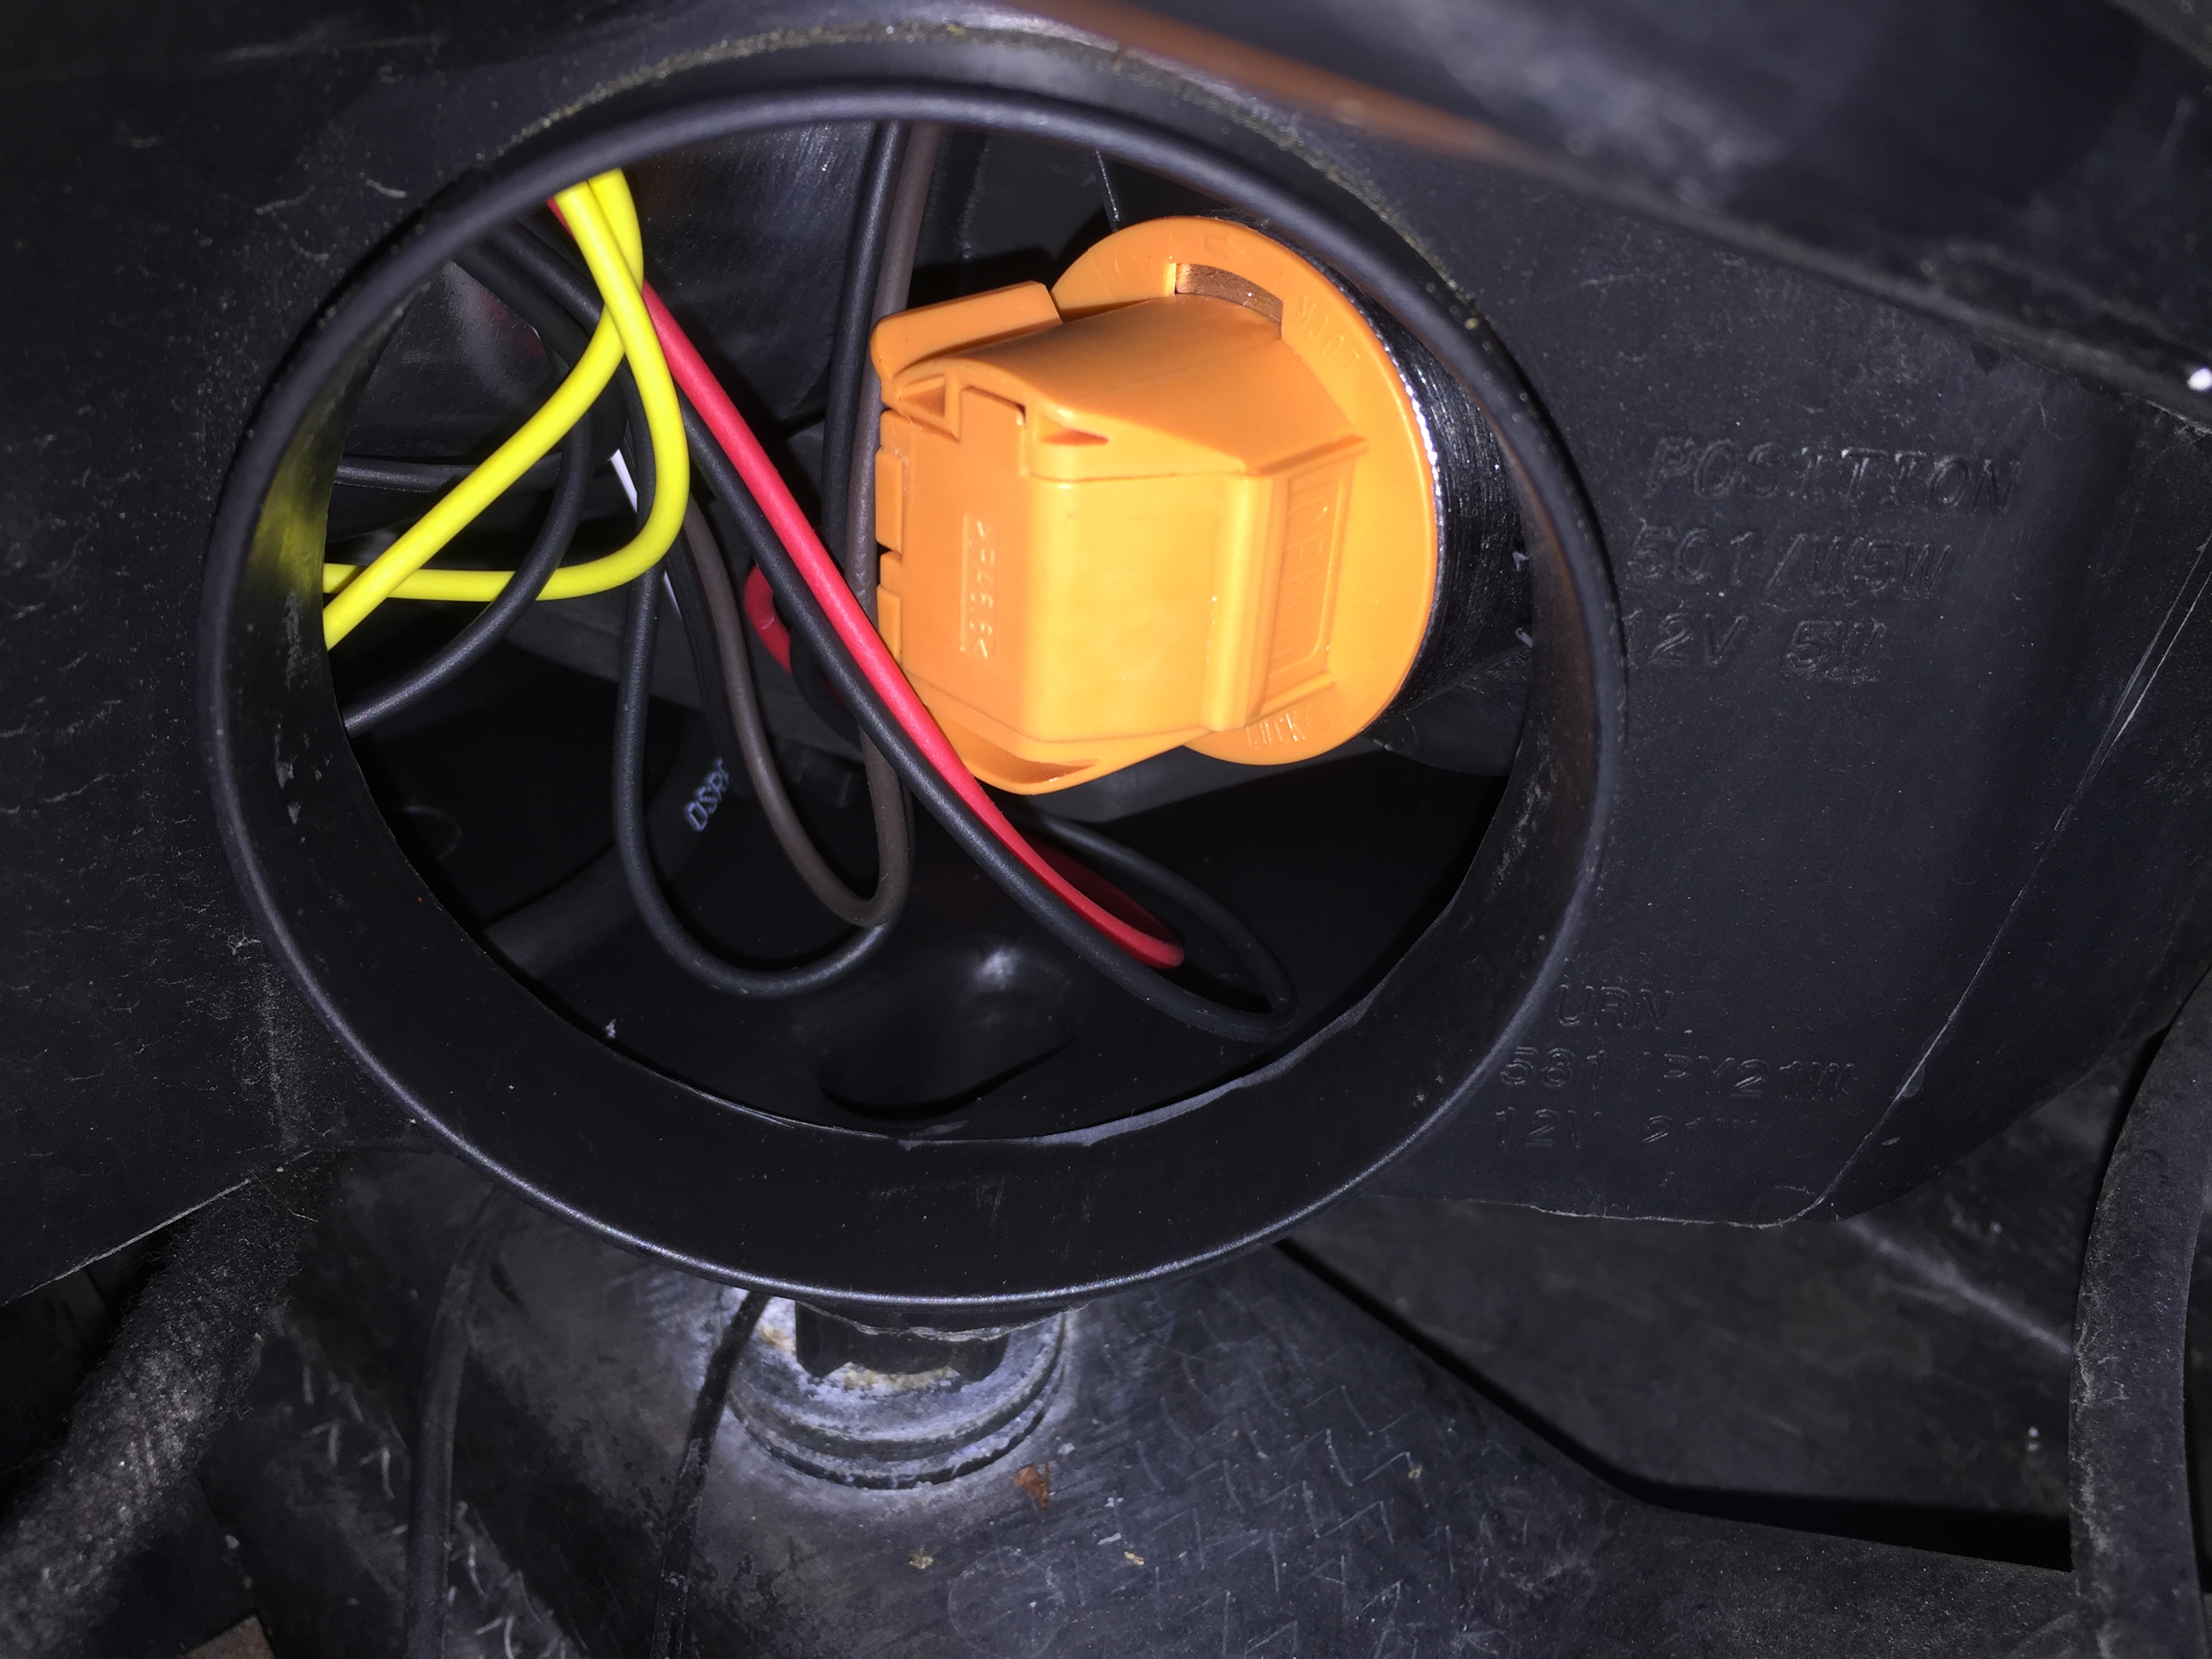
Austrianer As announced here are few photos of my modifications, the LEDs in the turning signal are working perfectly :biggrin:

There was no space inside the socket for the resistor, so I placed it outside, had to solder the wire beside the red cable only, the other one is just plugged in.
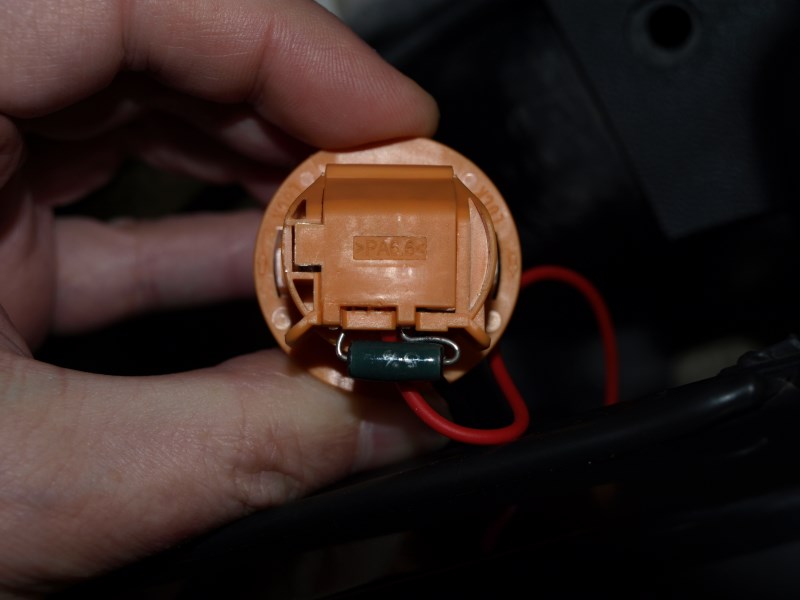
Closed socket from behind.

From the side.
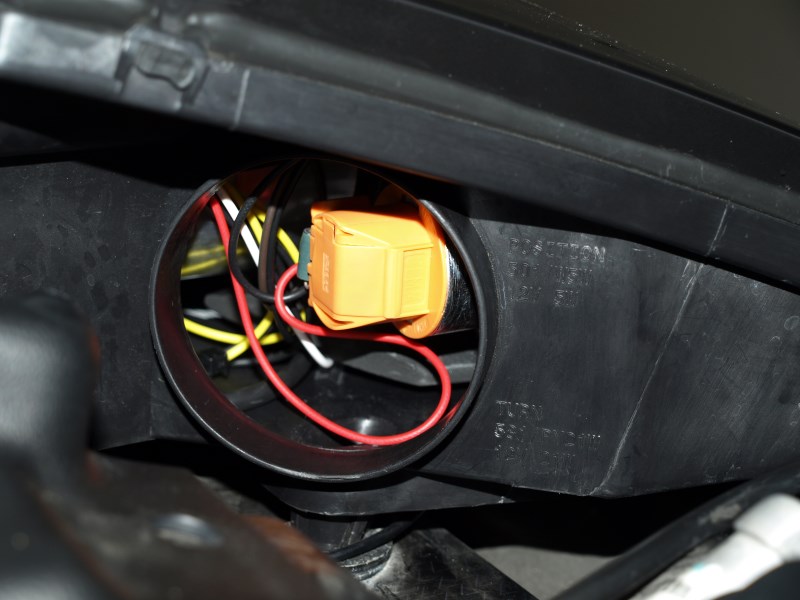
No spacing problem when mounted.
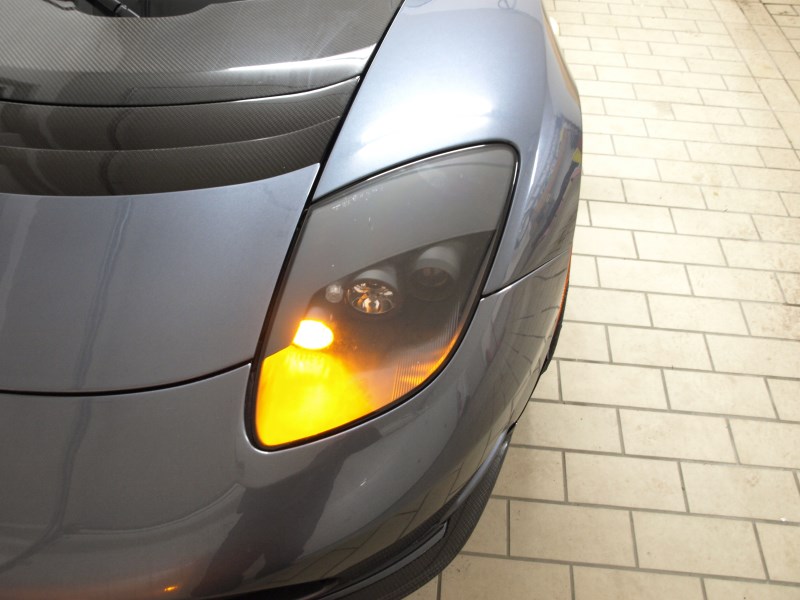
The LED in action.
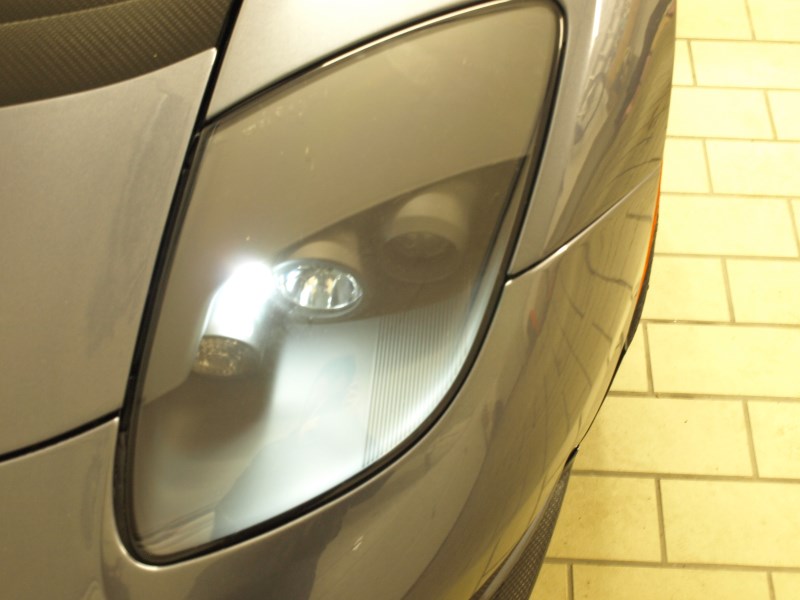
And here's a sample photo of my parking light LED, color appears the same as of the Xenons.�
Feb 22, 2016
ravng Hi.
Thanks for the tip! Replaced my interior and trunk light with the SuperBrightLeds you recommended, made a huge difference!
�
Không có nhận xét nào:
Đăng nhận xét