Jan 2, 2013
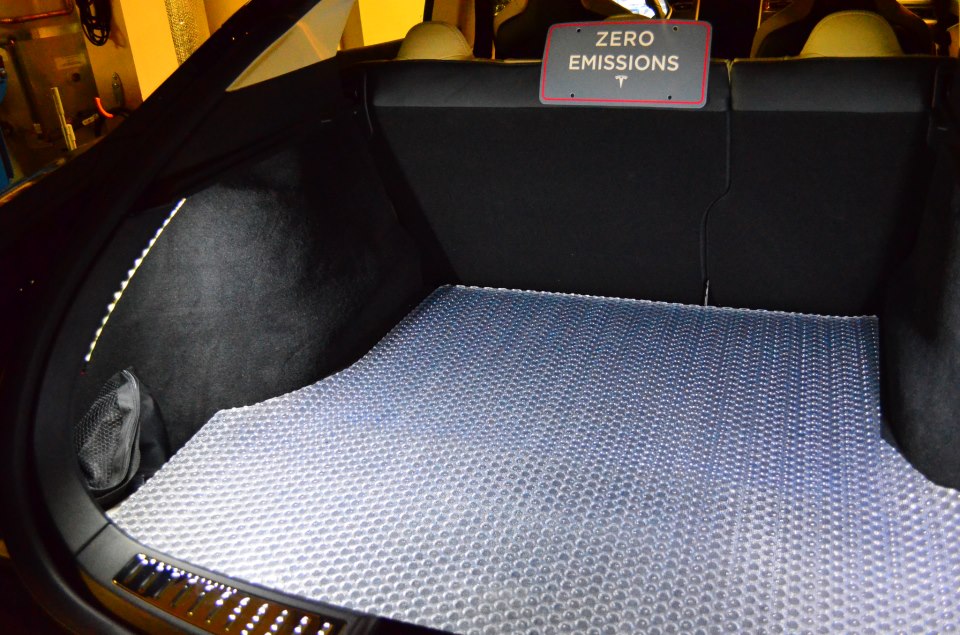
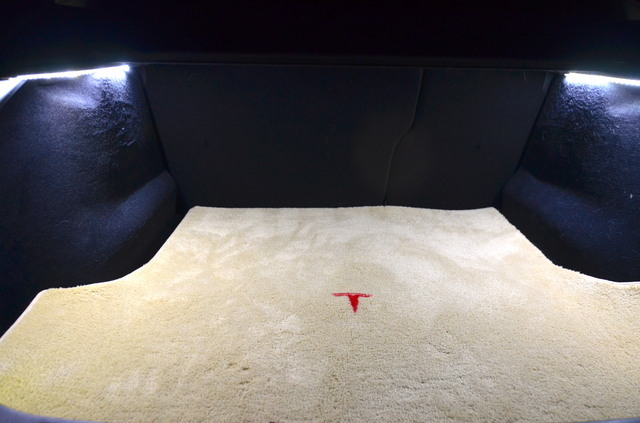
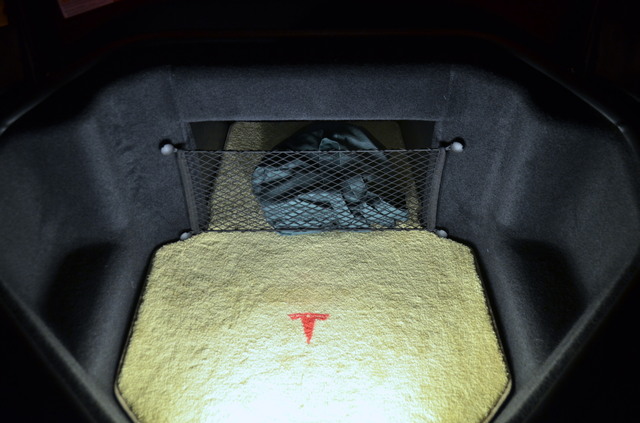
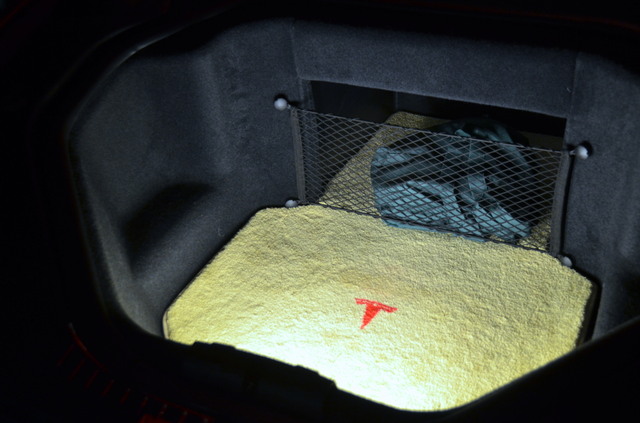
efxjim I found the light level in the Frunk and Trunk to be very poor. Here is what I did to brighten things up.
I purchased 2 of the following light kits from Fry's. There are available elsewhere.
OLSHAWHT2 Home Accent Expansion Kit
I also purchased 2) 5ft. extensions and 1) 10ft extension.
OLSHAEXT5FT Home Accent Extension
OLSHAEXT10FT Home Accent Extension
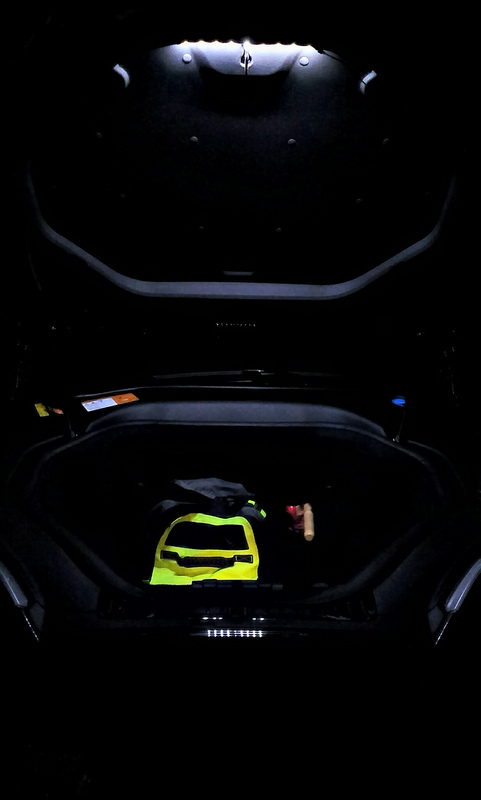
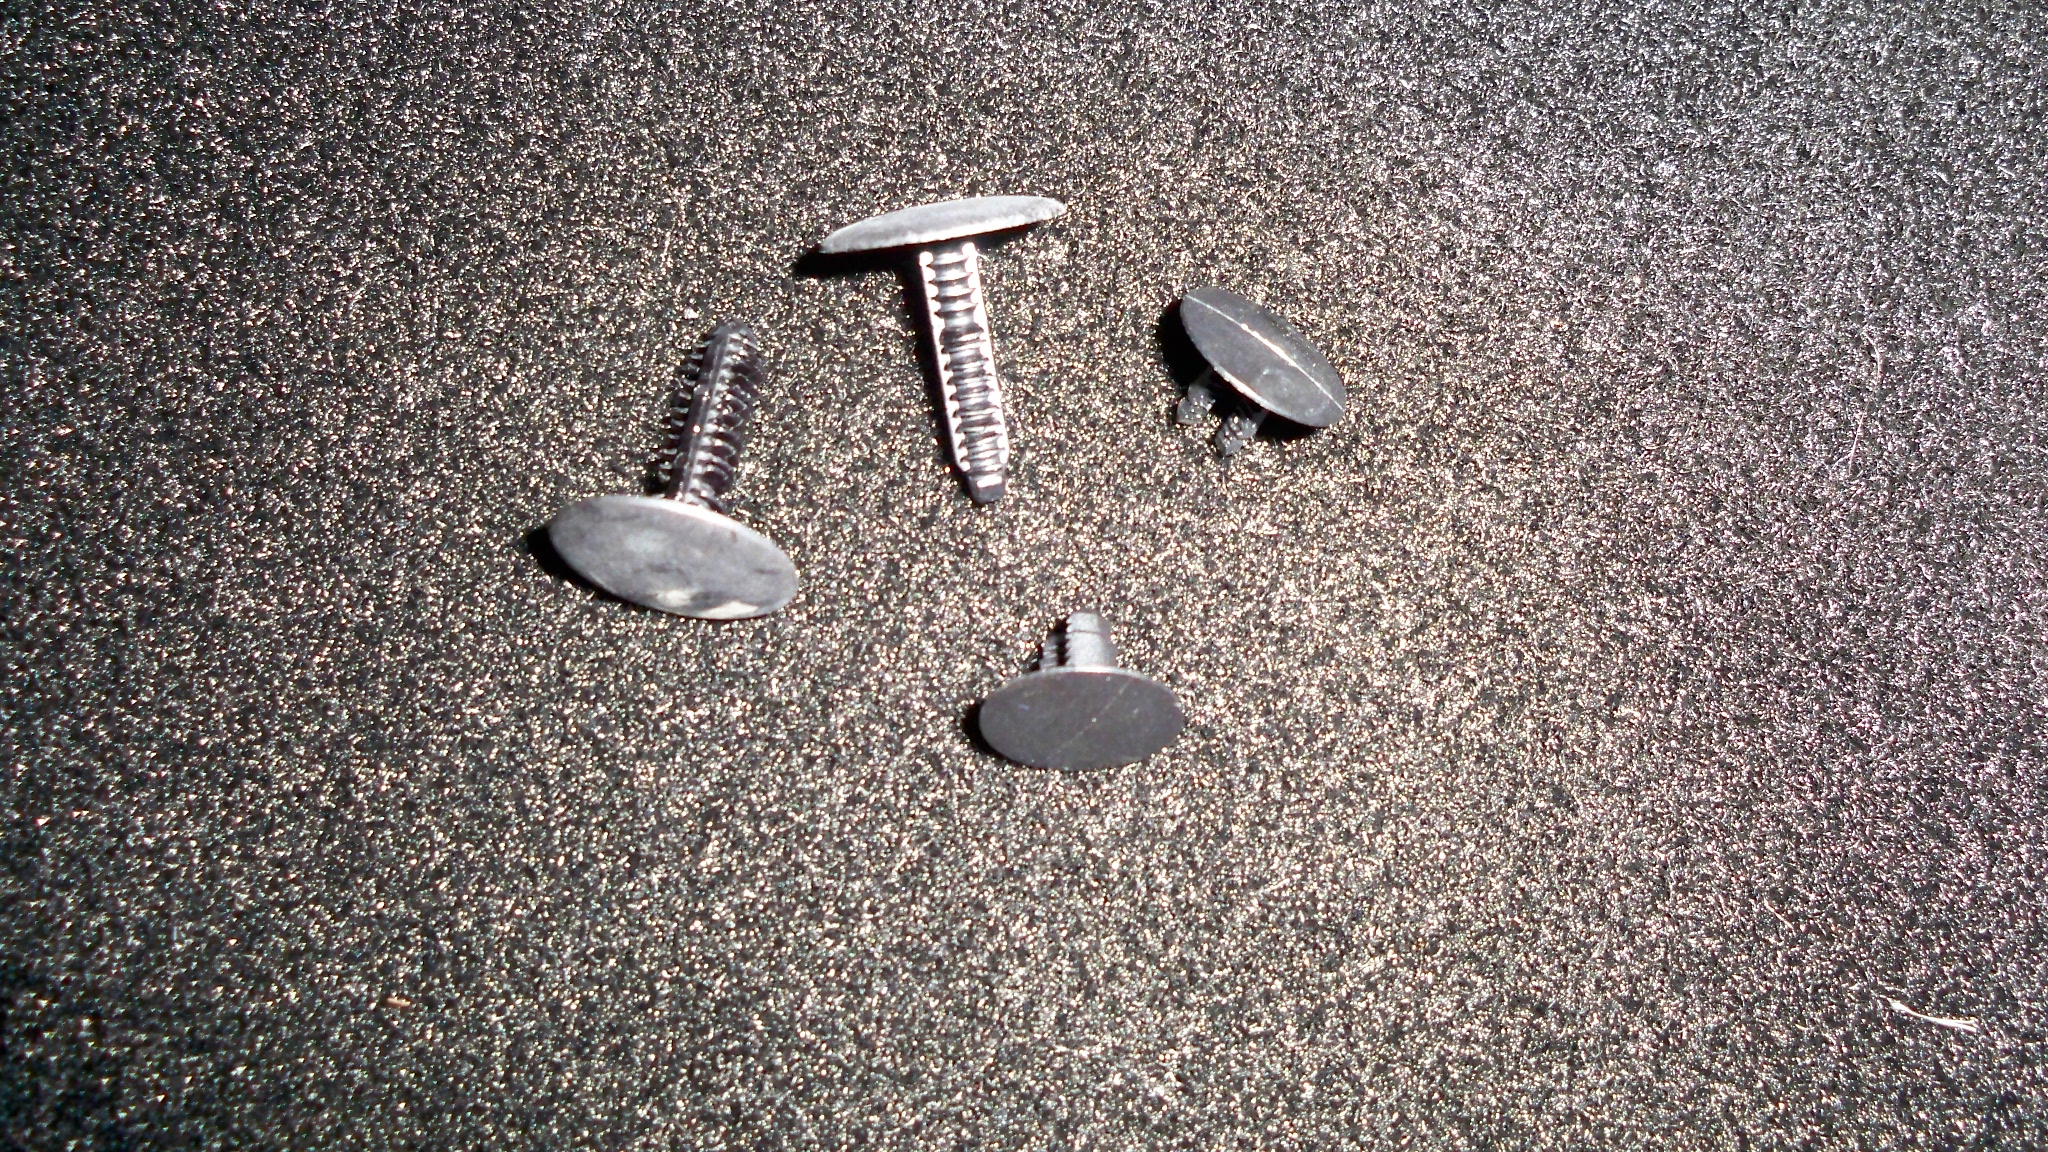
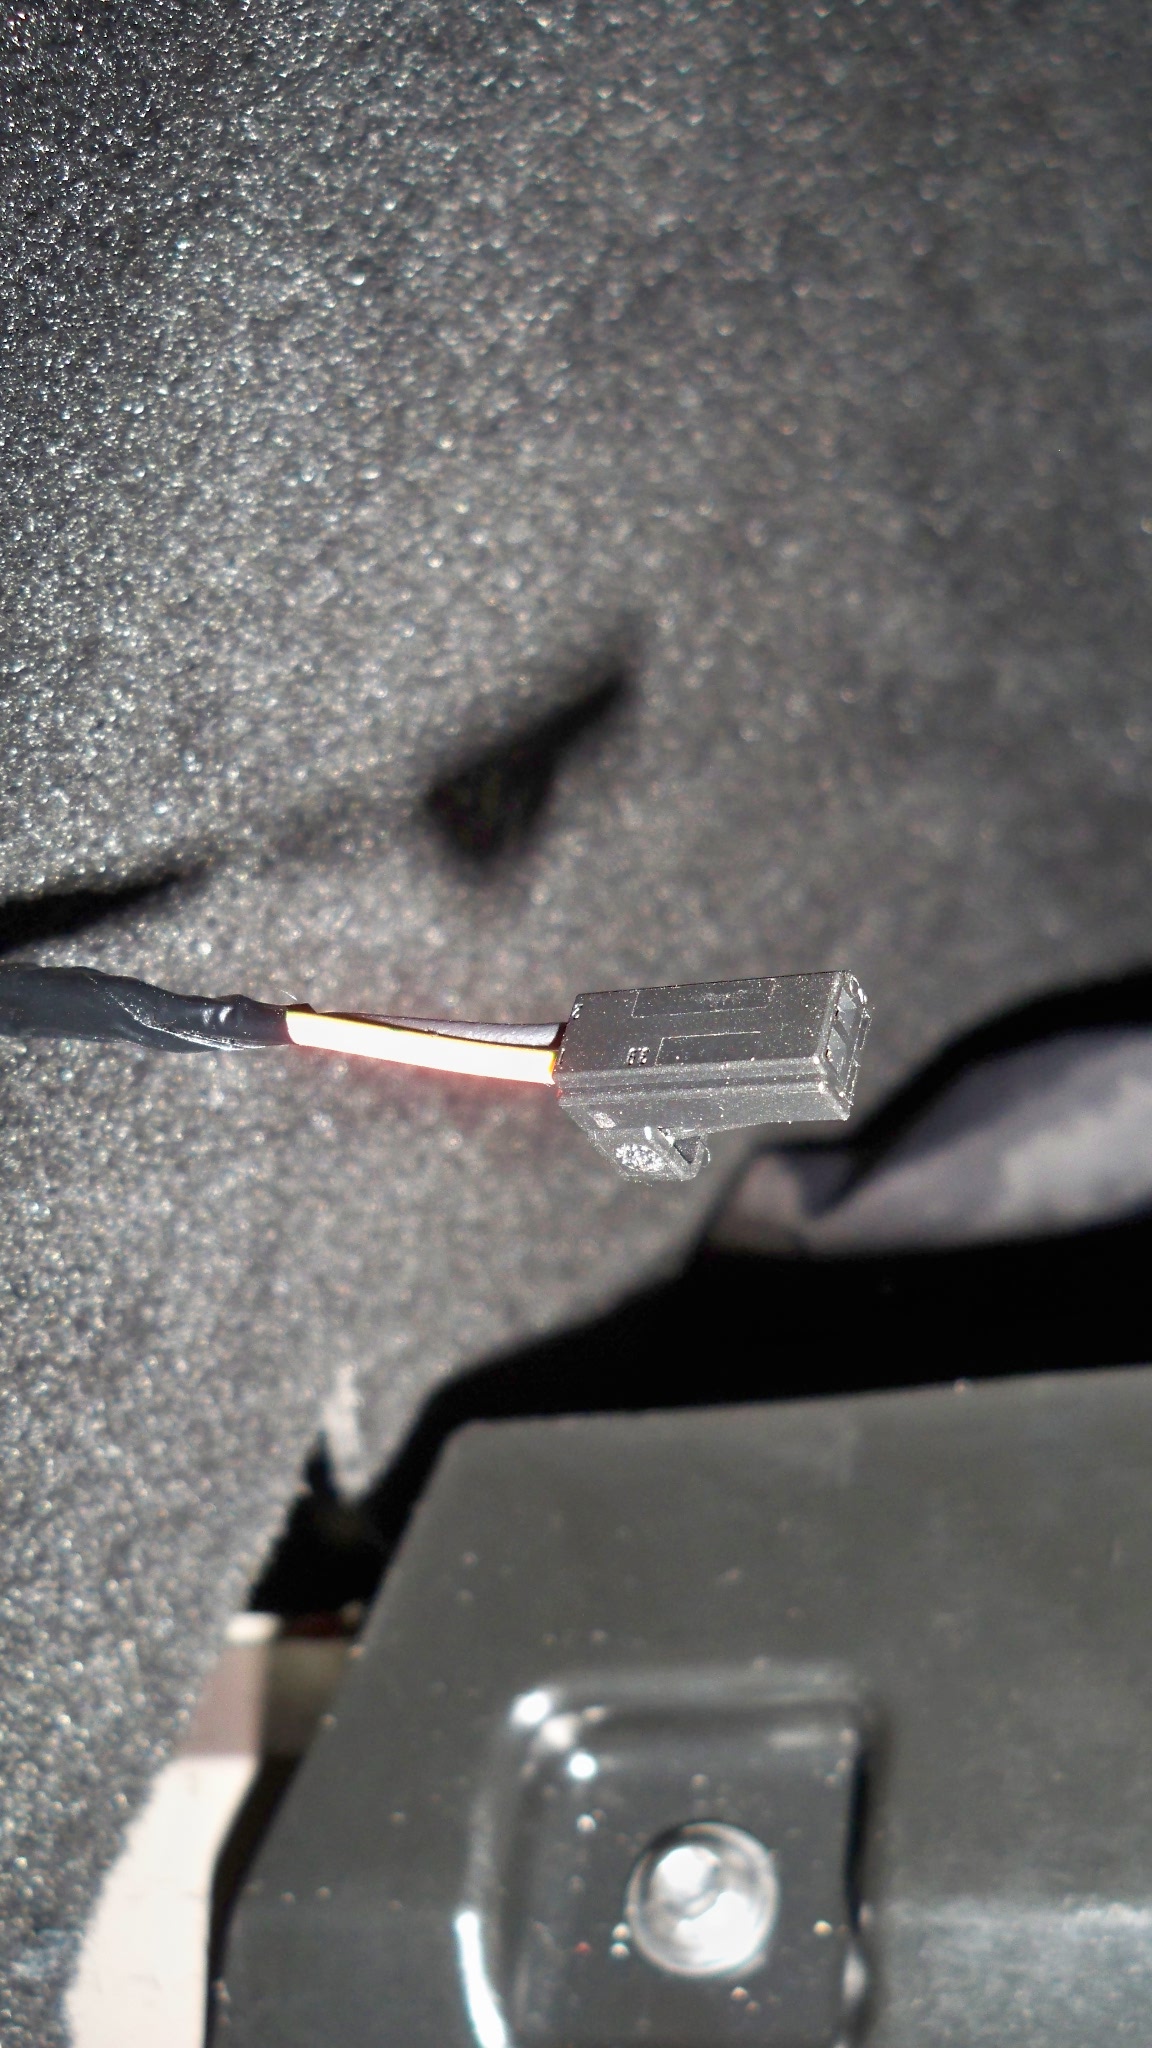
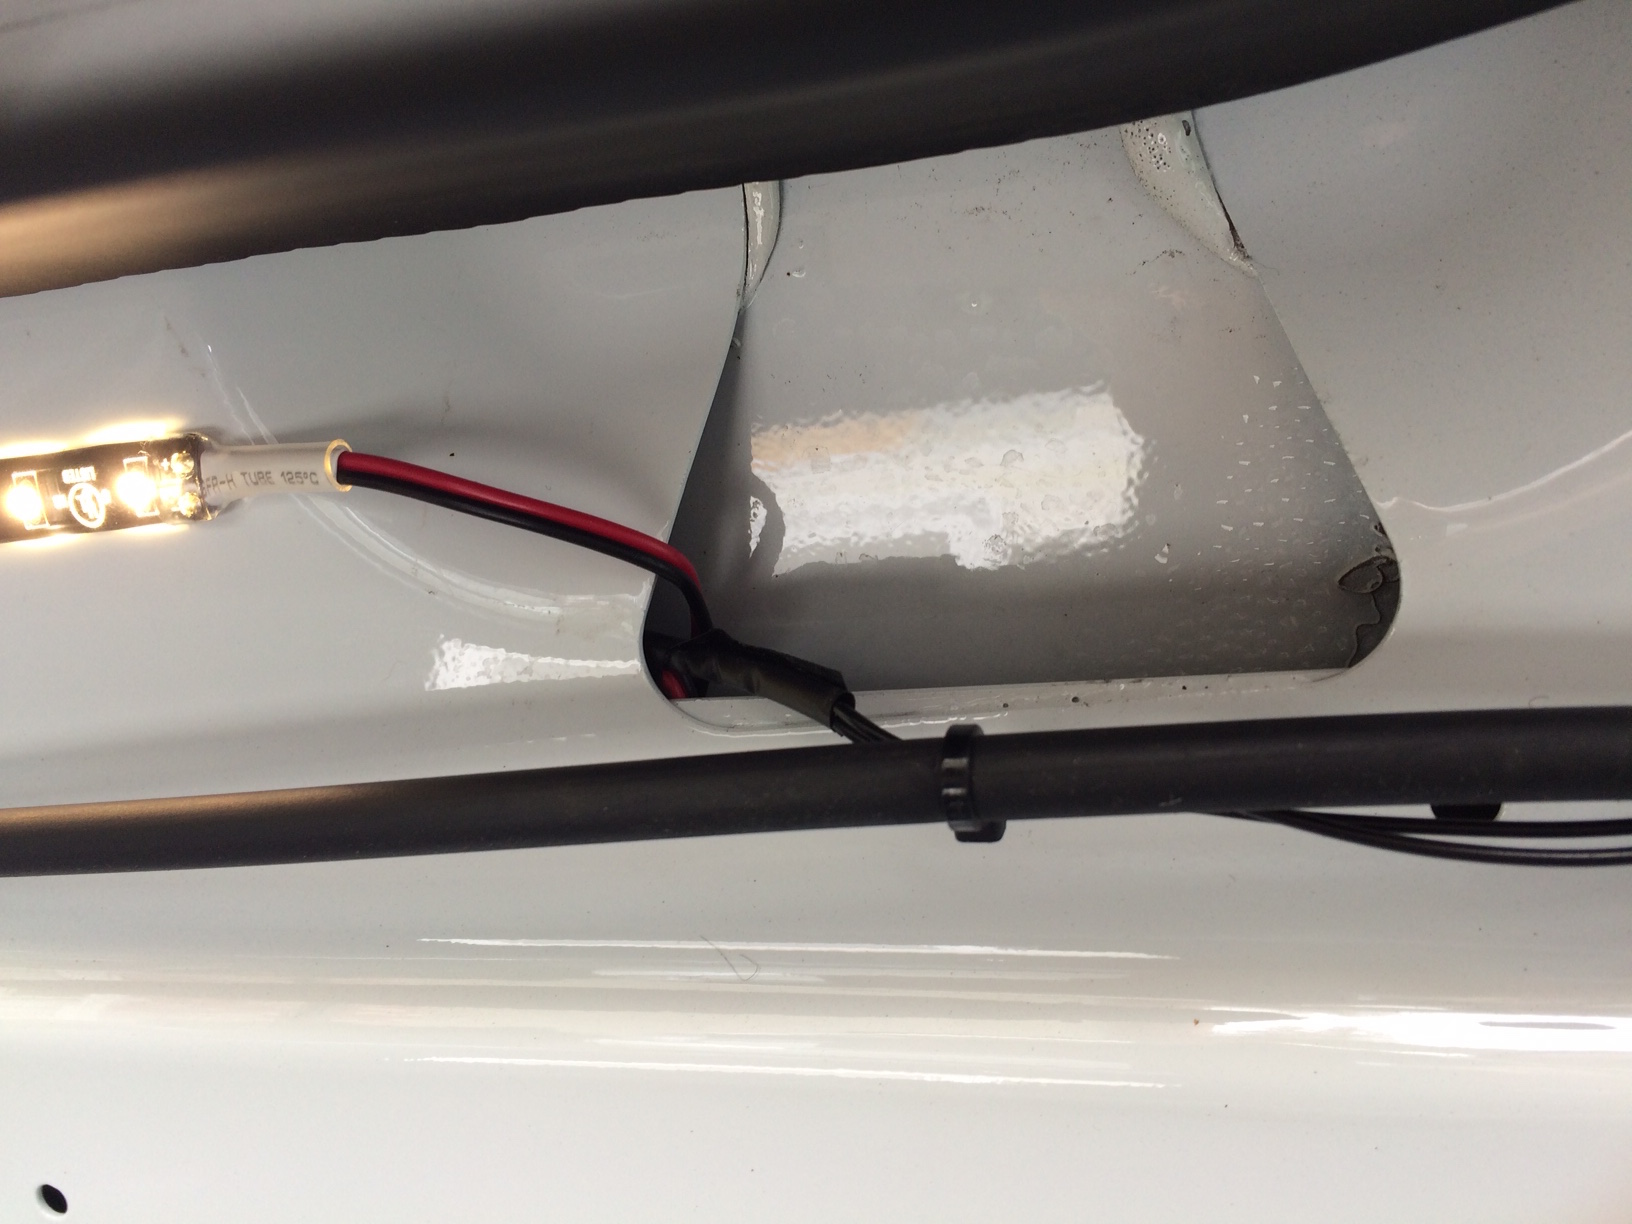
Pop out the 2 lights in the Trunk and the one in the Frunk (extra hard to remove). Unplug the light from it's wires. I used a small snap knife pop the lens off the LED base while holding the back with a set of Visegrip pliers.
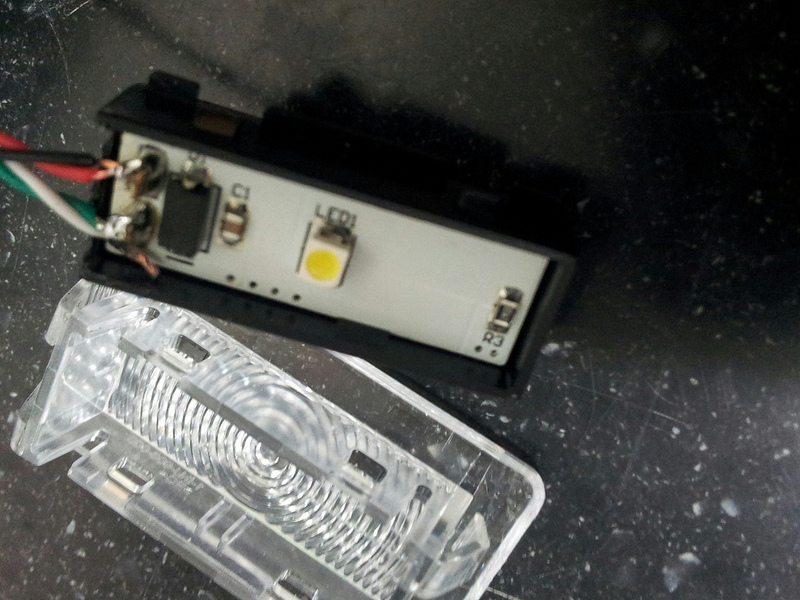
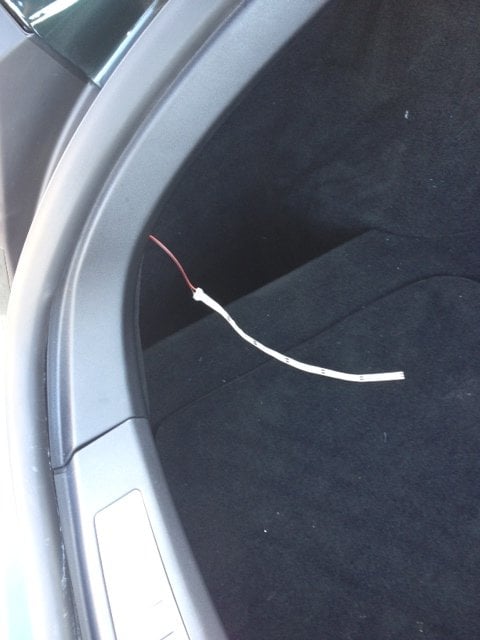
Cut one of the 1ft extension cords in half and strip back the wires. Marry the green and white (negative) and the red and black (positive). Then solder the wires to the pins providing power to the LED. I nipped the black housing a little to allow the wires to pass easier. Align the base and cover (they only go one way) and snap shut.
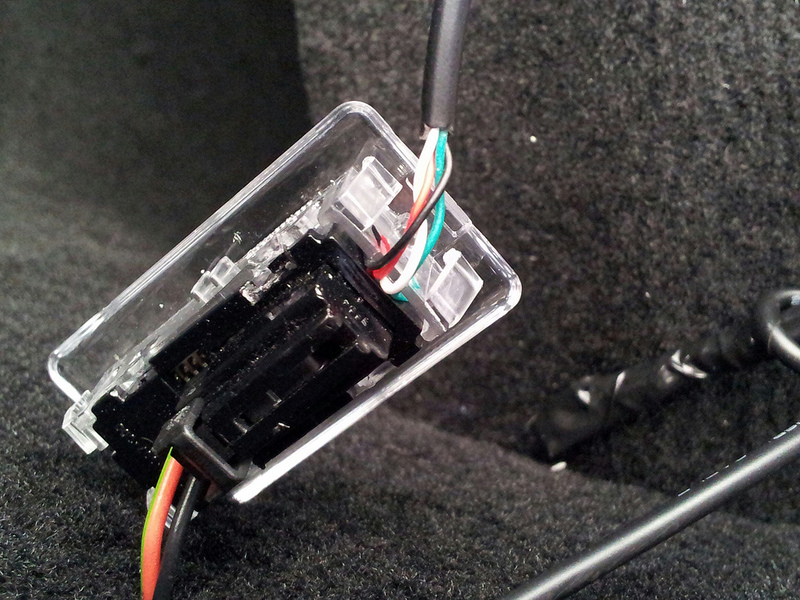
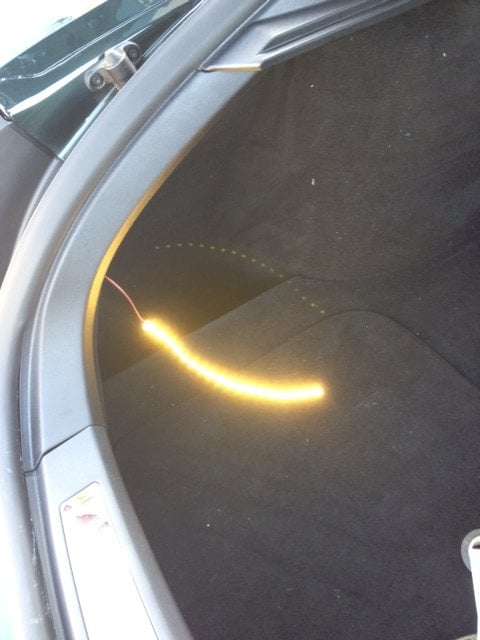
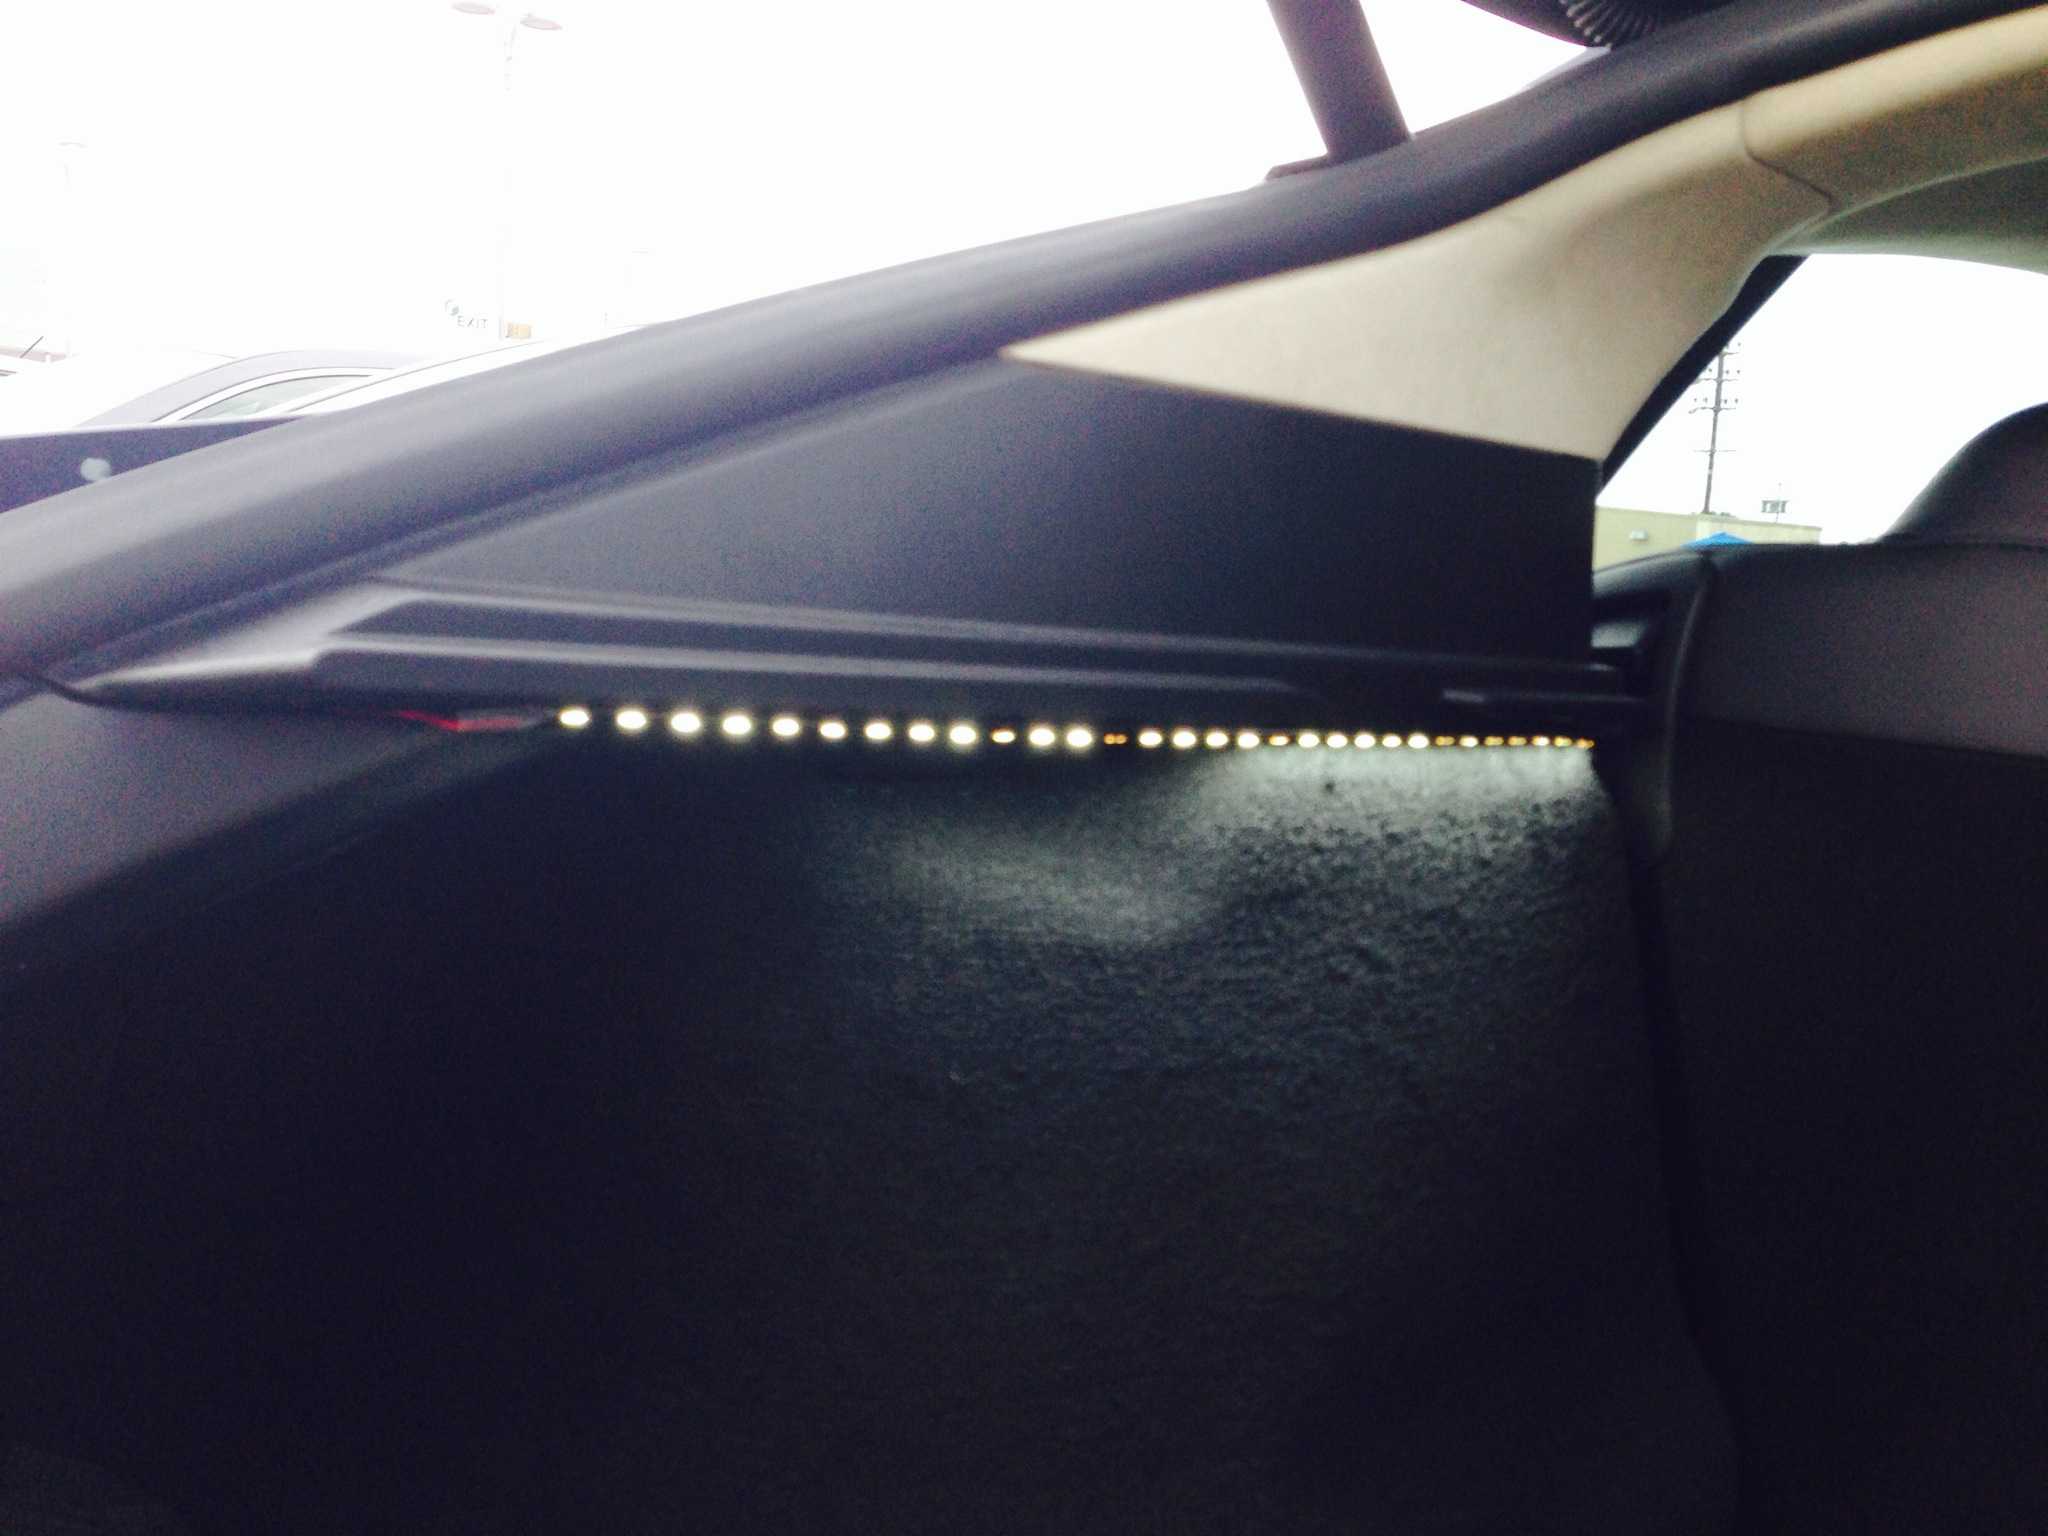
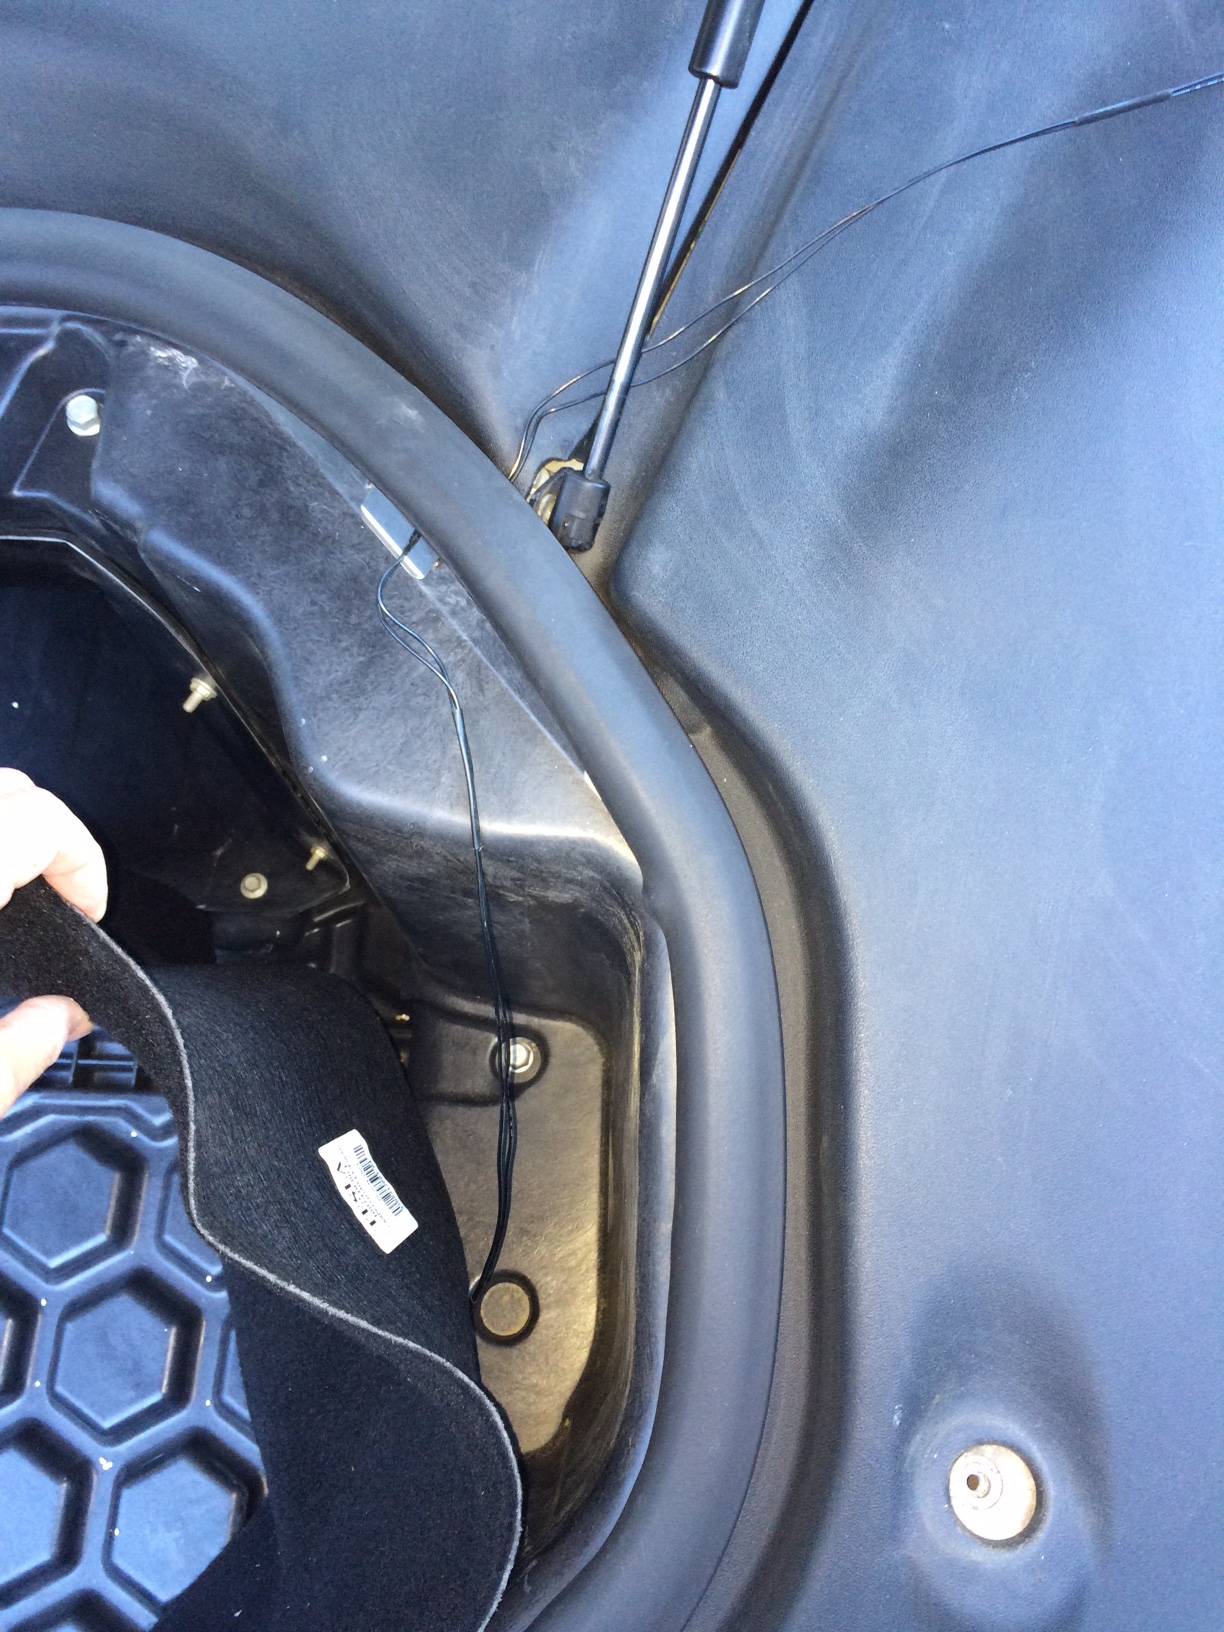
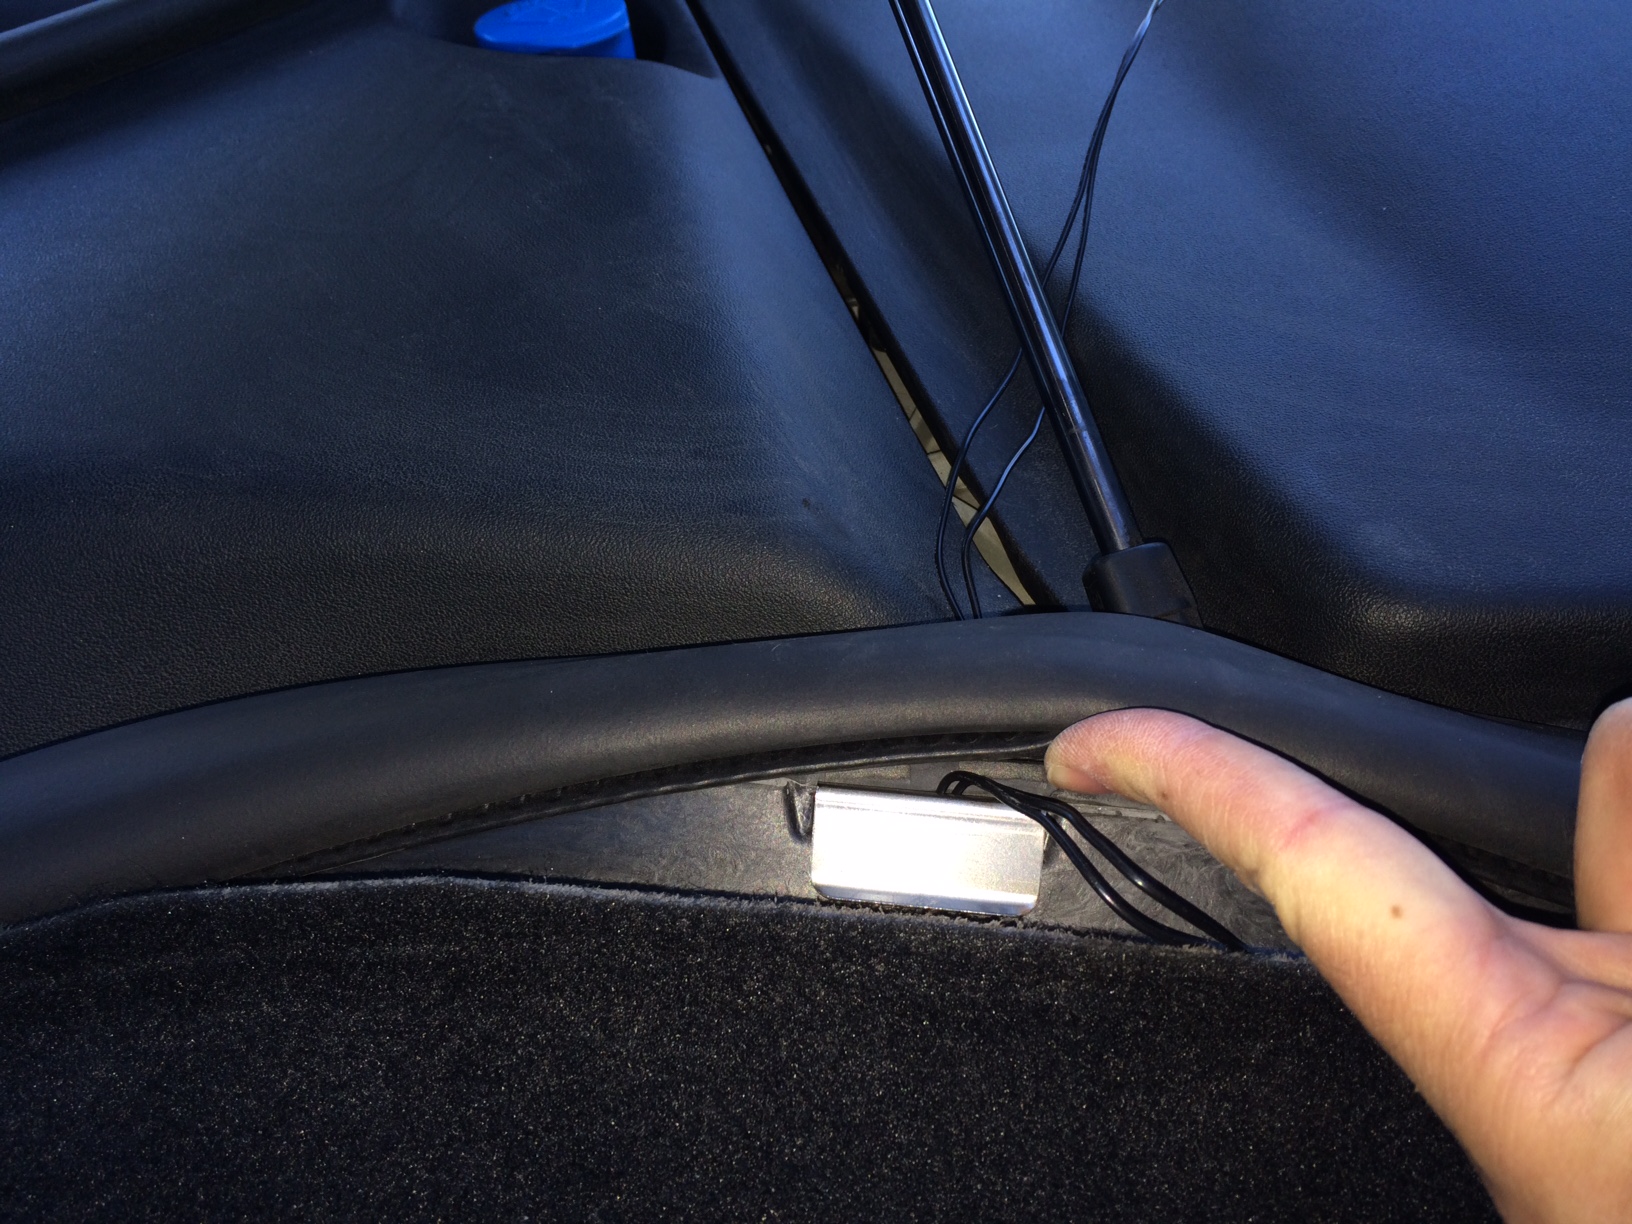
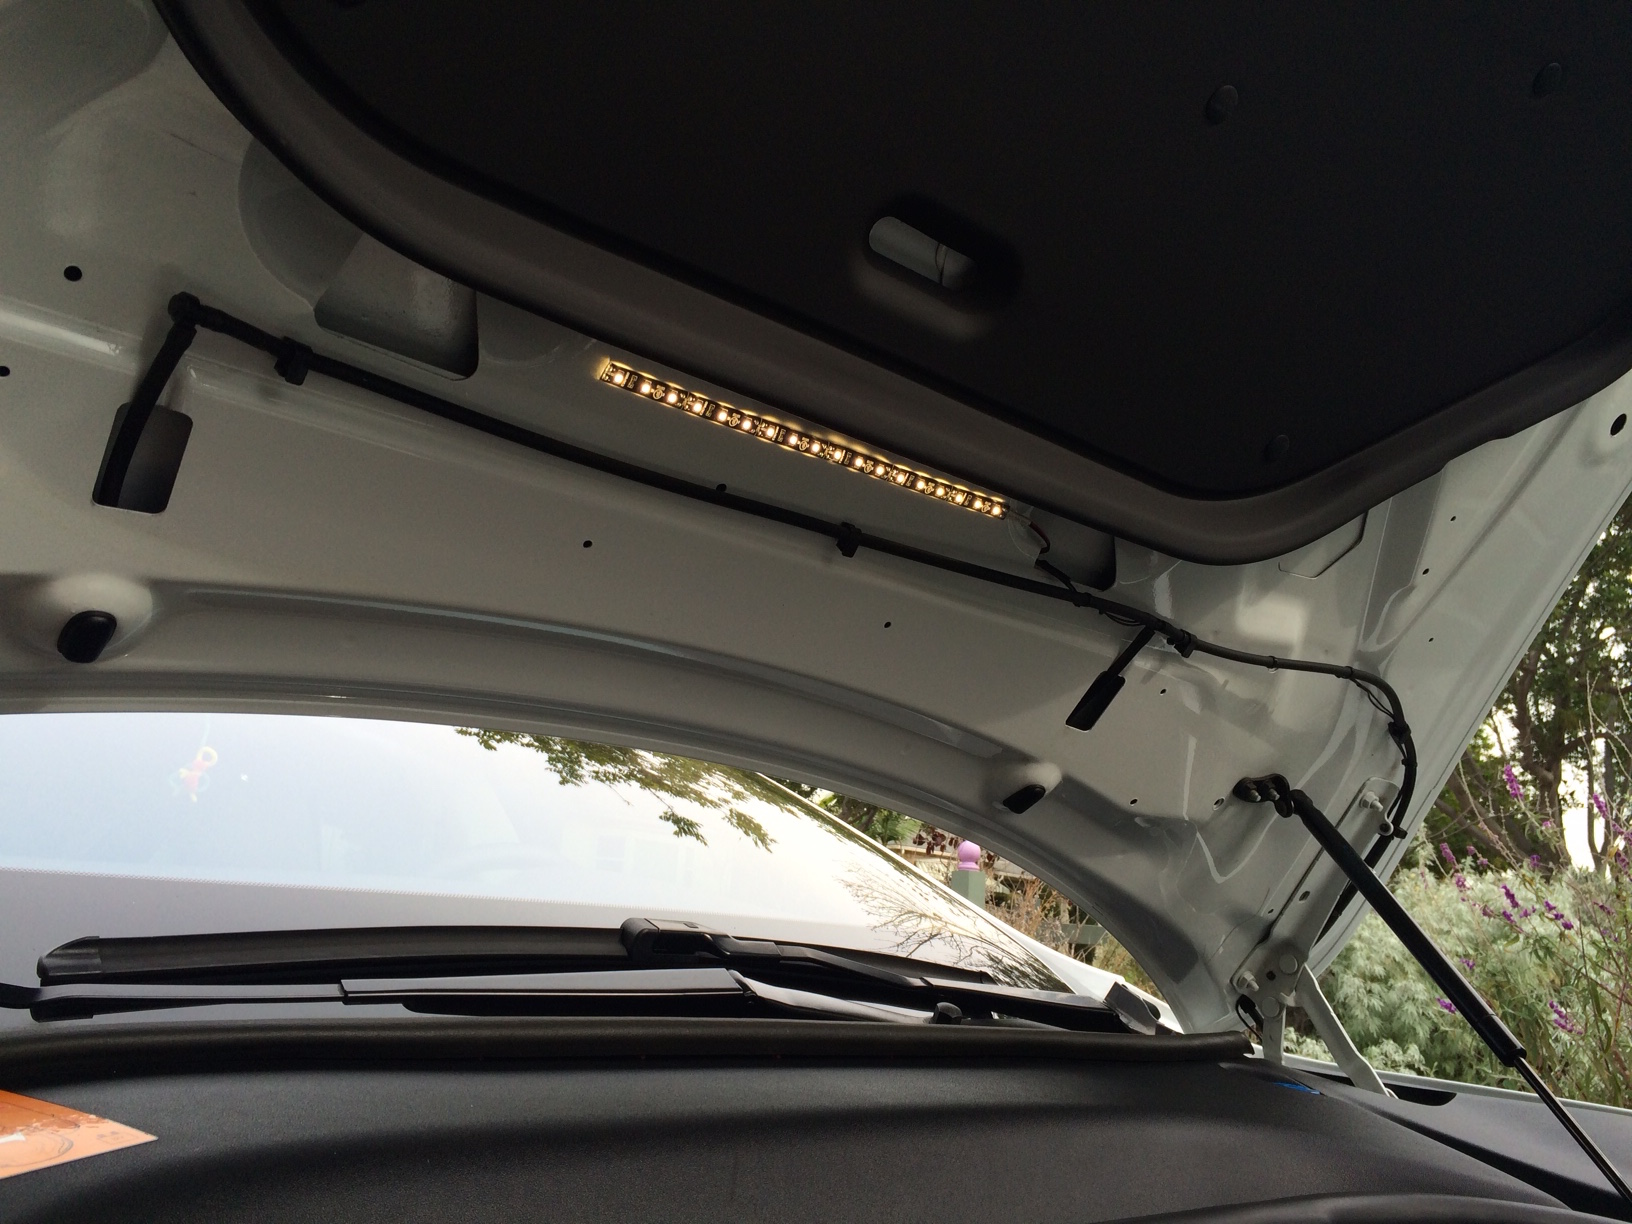
Stick the light strip under the privacy shelf mount and feed the wire down through the vent opening and out of the light hole (coat hanger helps here).
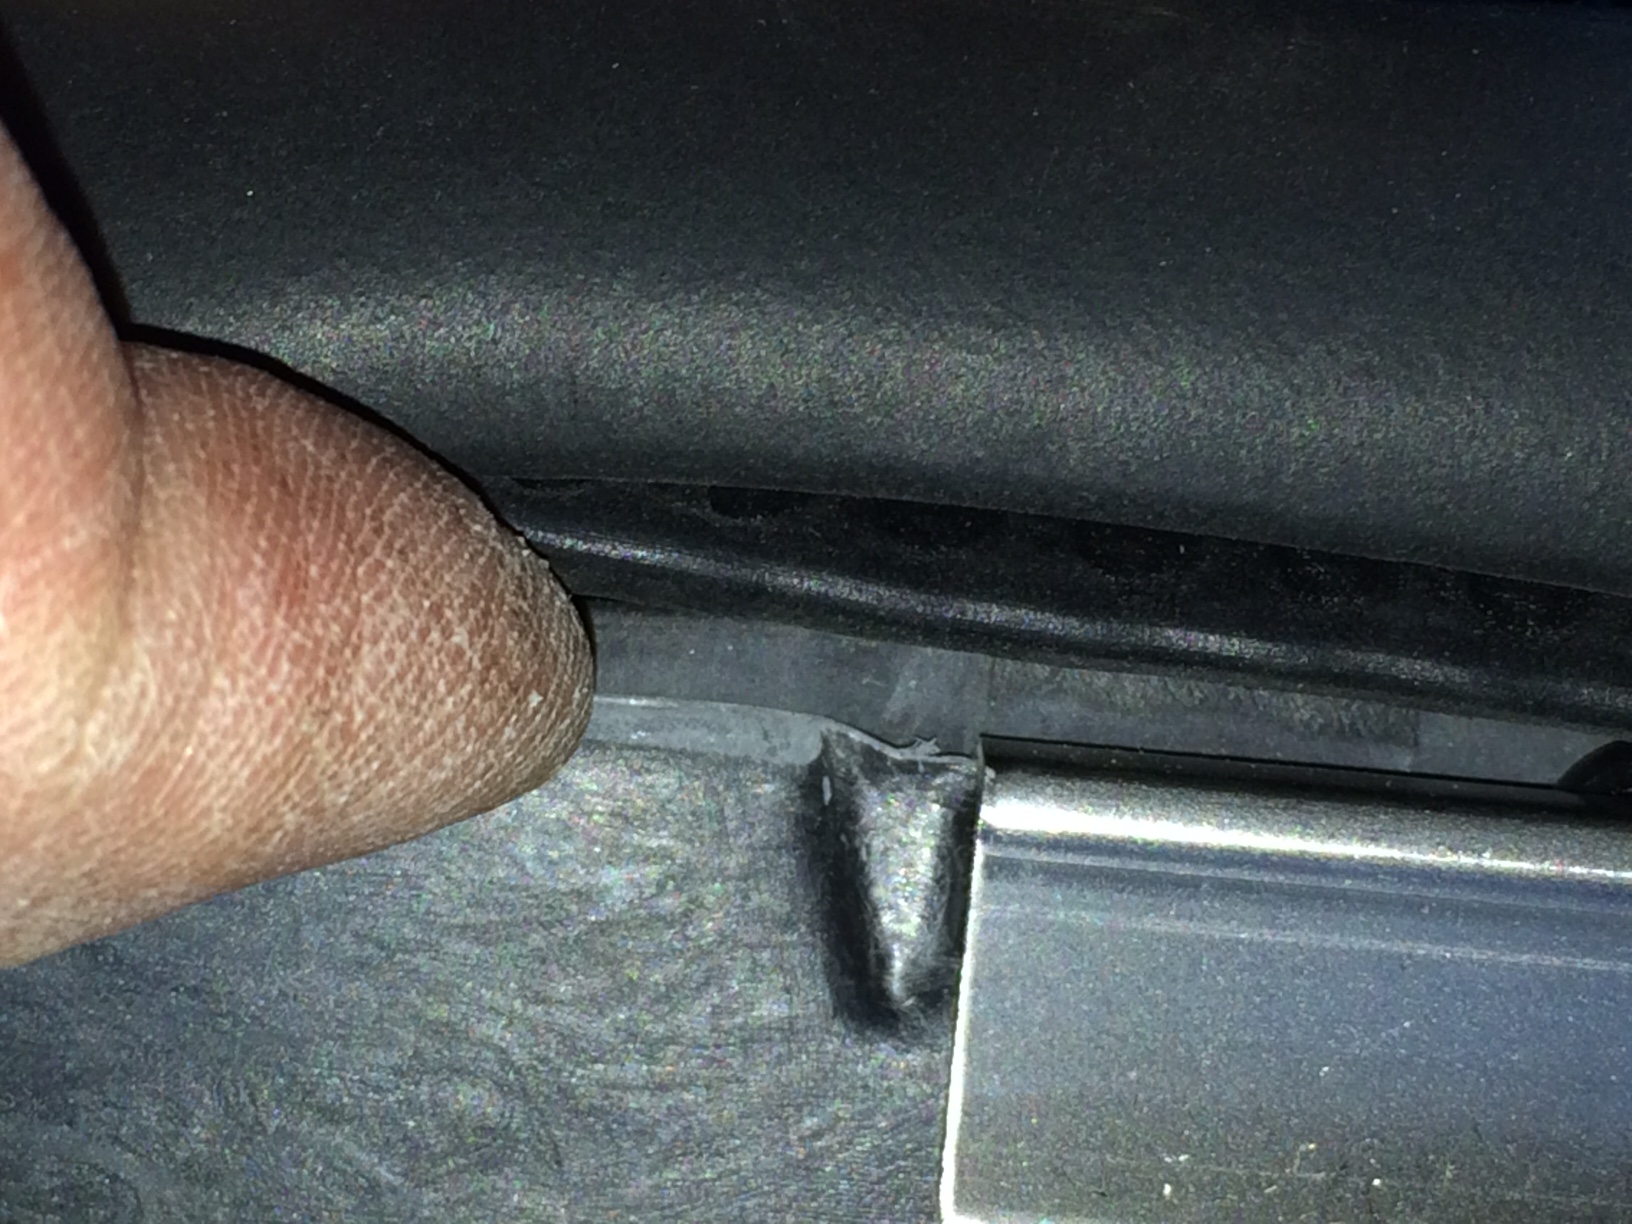
The Frunk wiring can follow the wiper hose at the hinge and tuck under the weather stripping. I stuck the light strip in the curve of the hood pointed back down the hood.
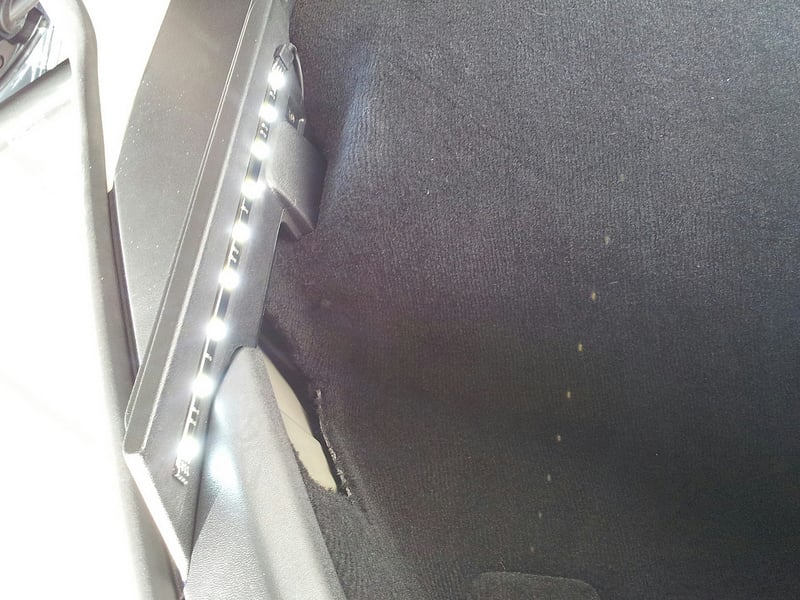
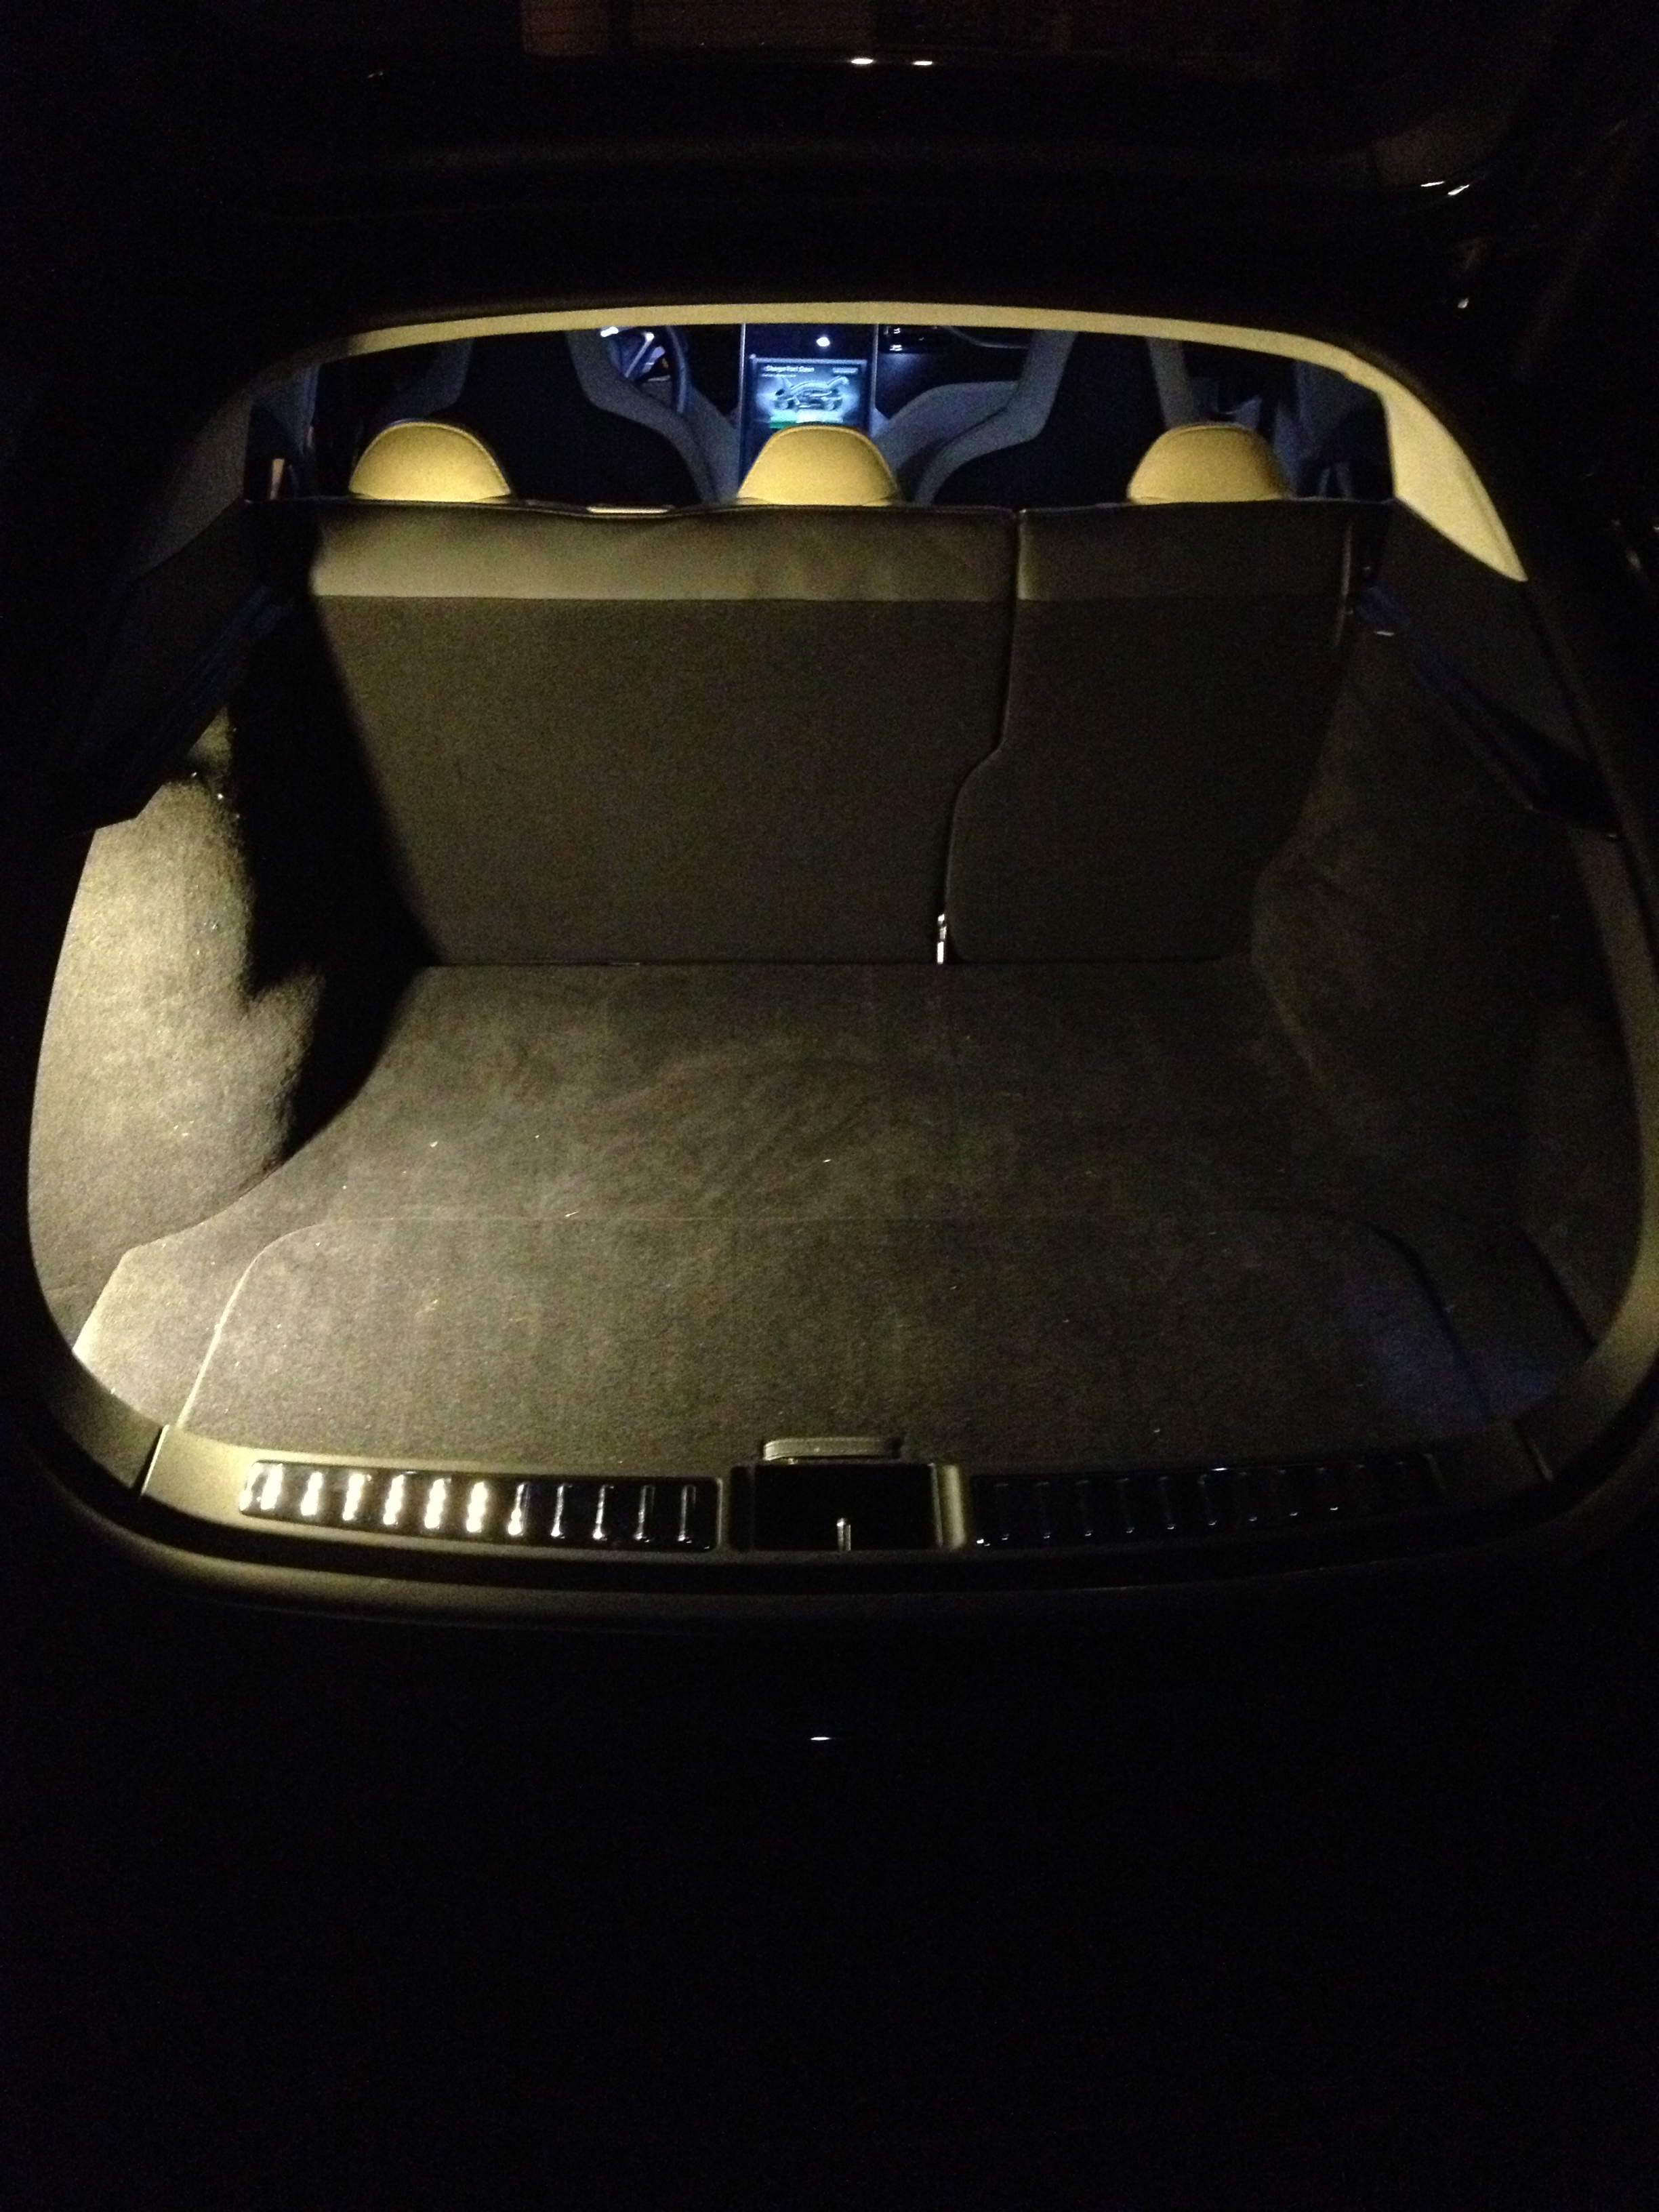
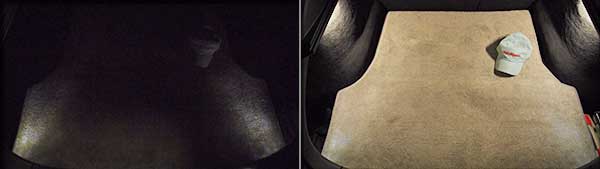
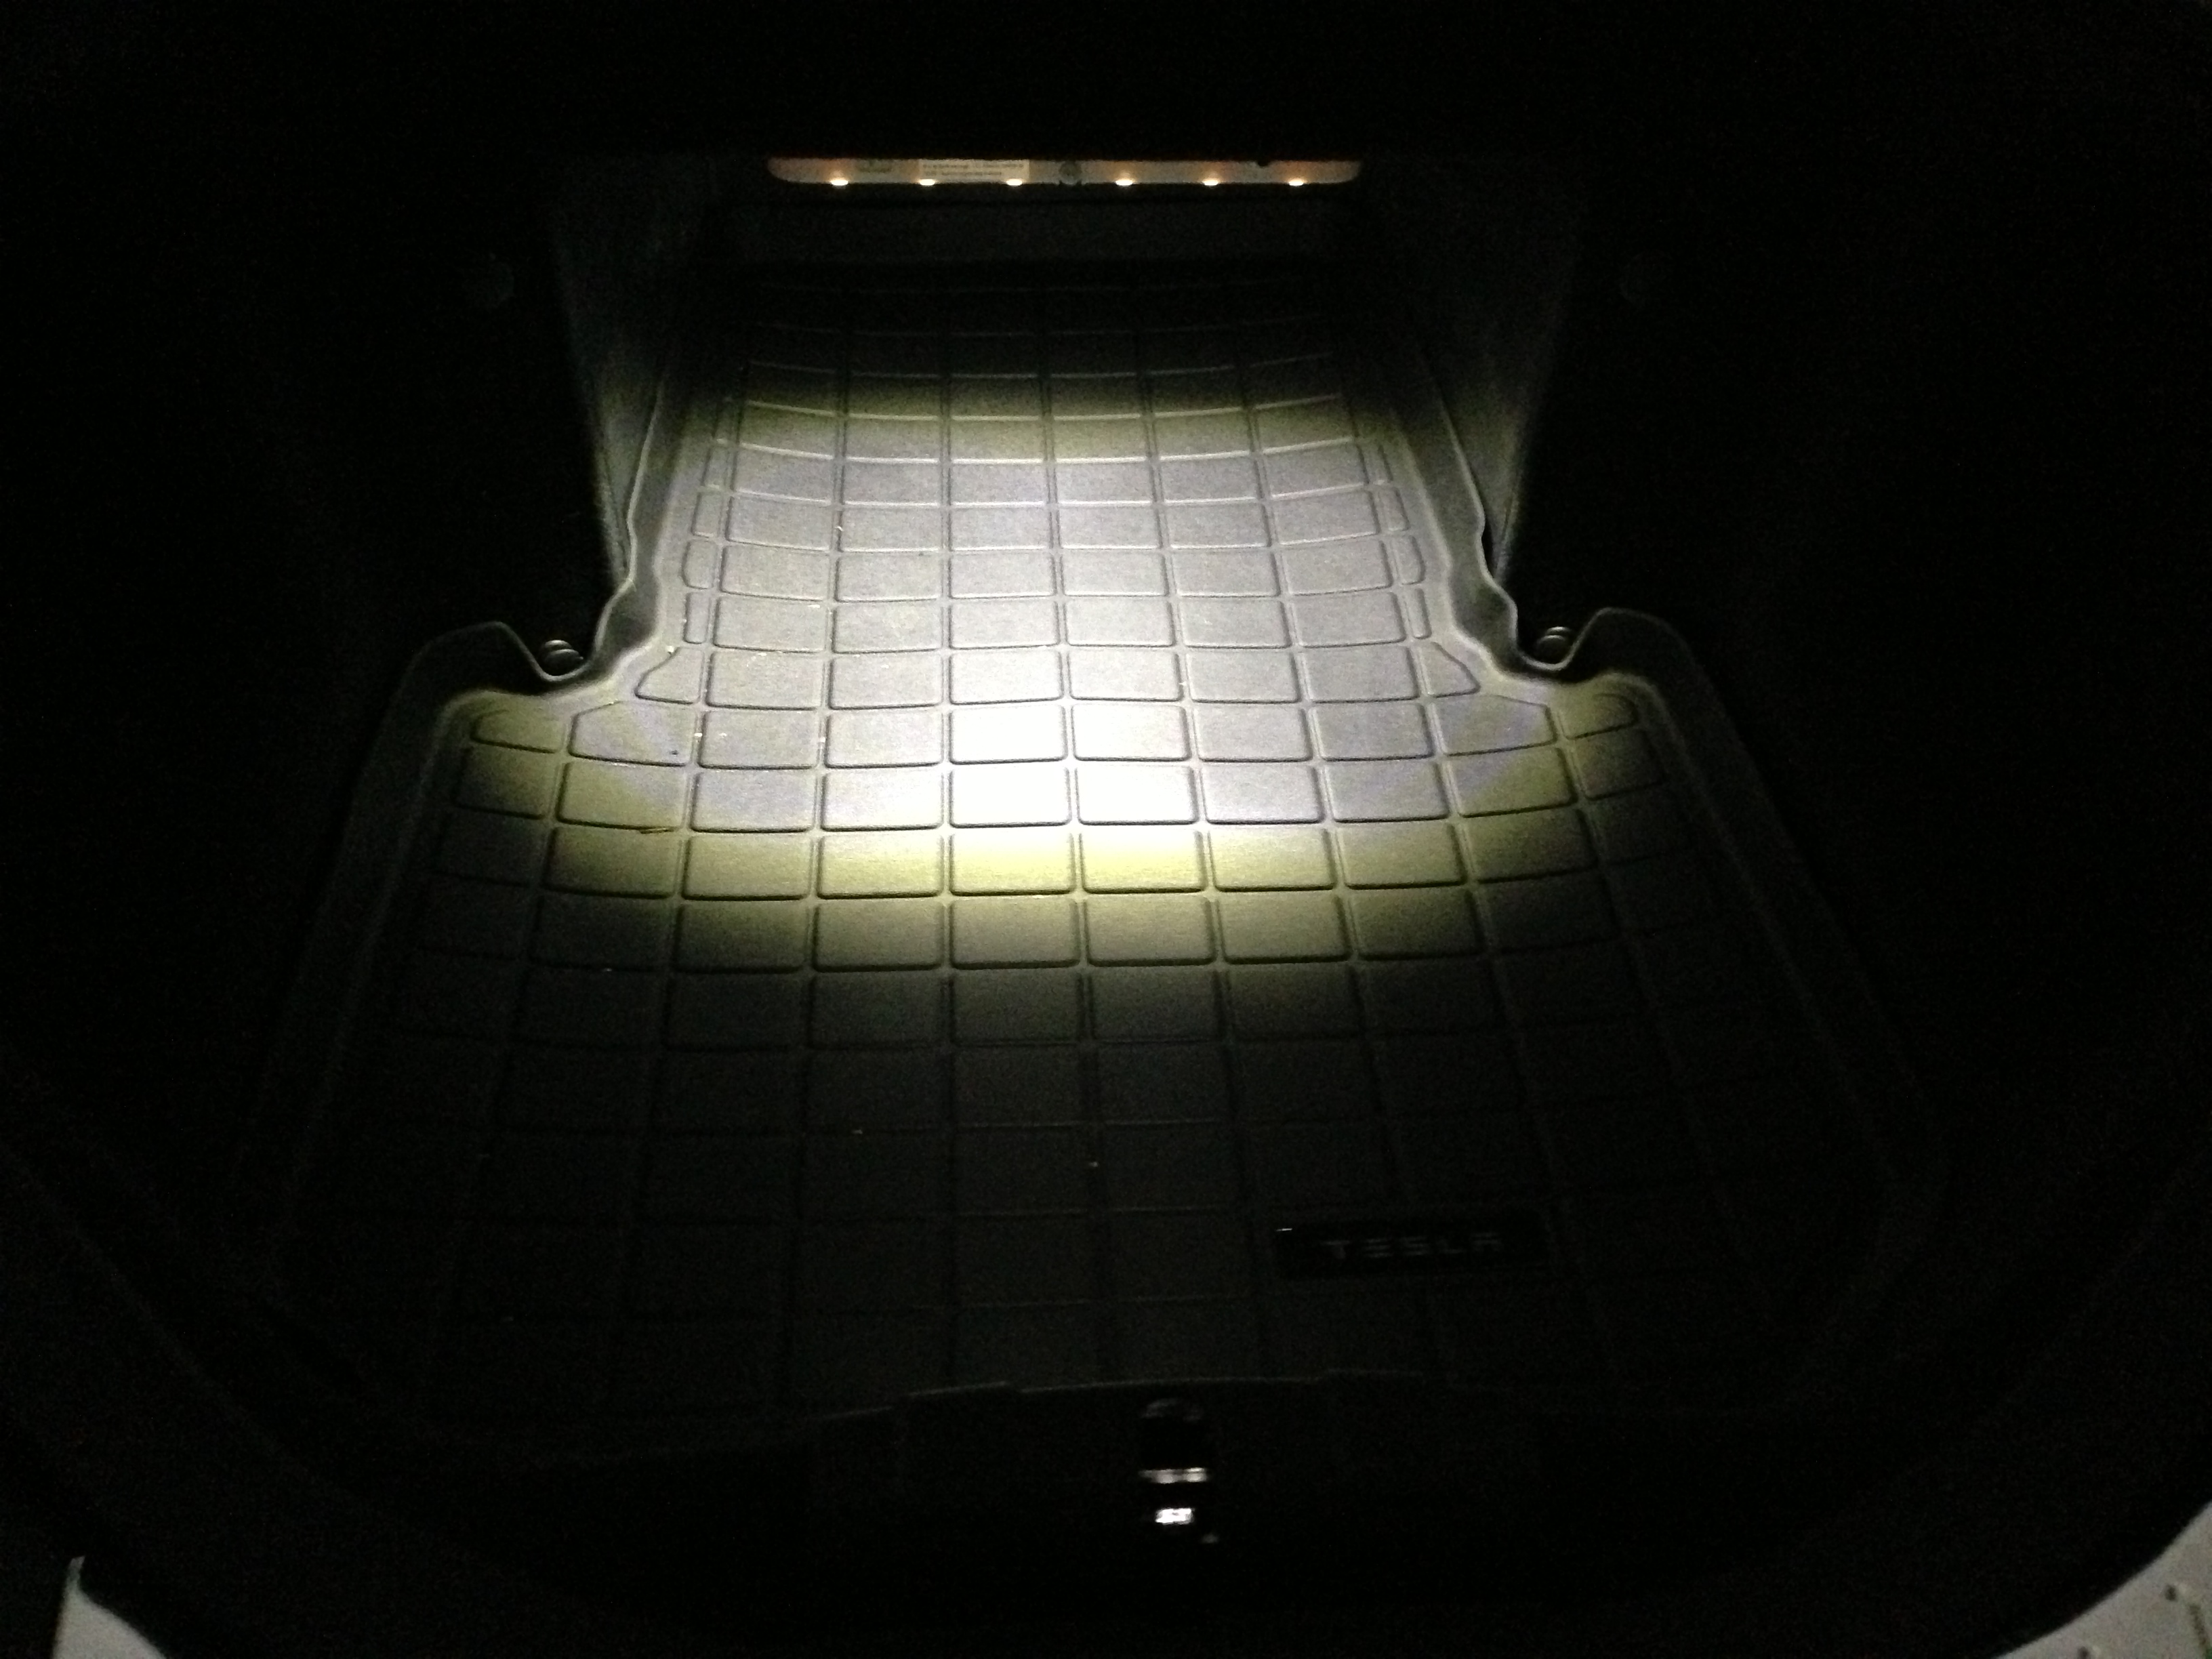
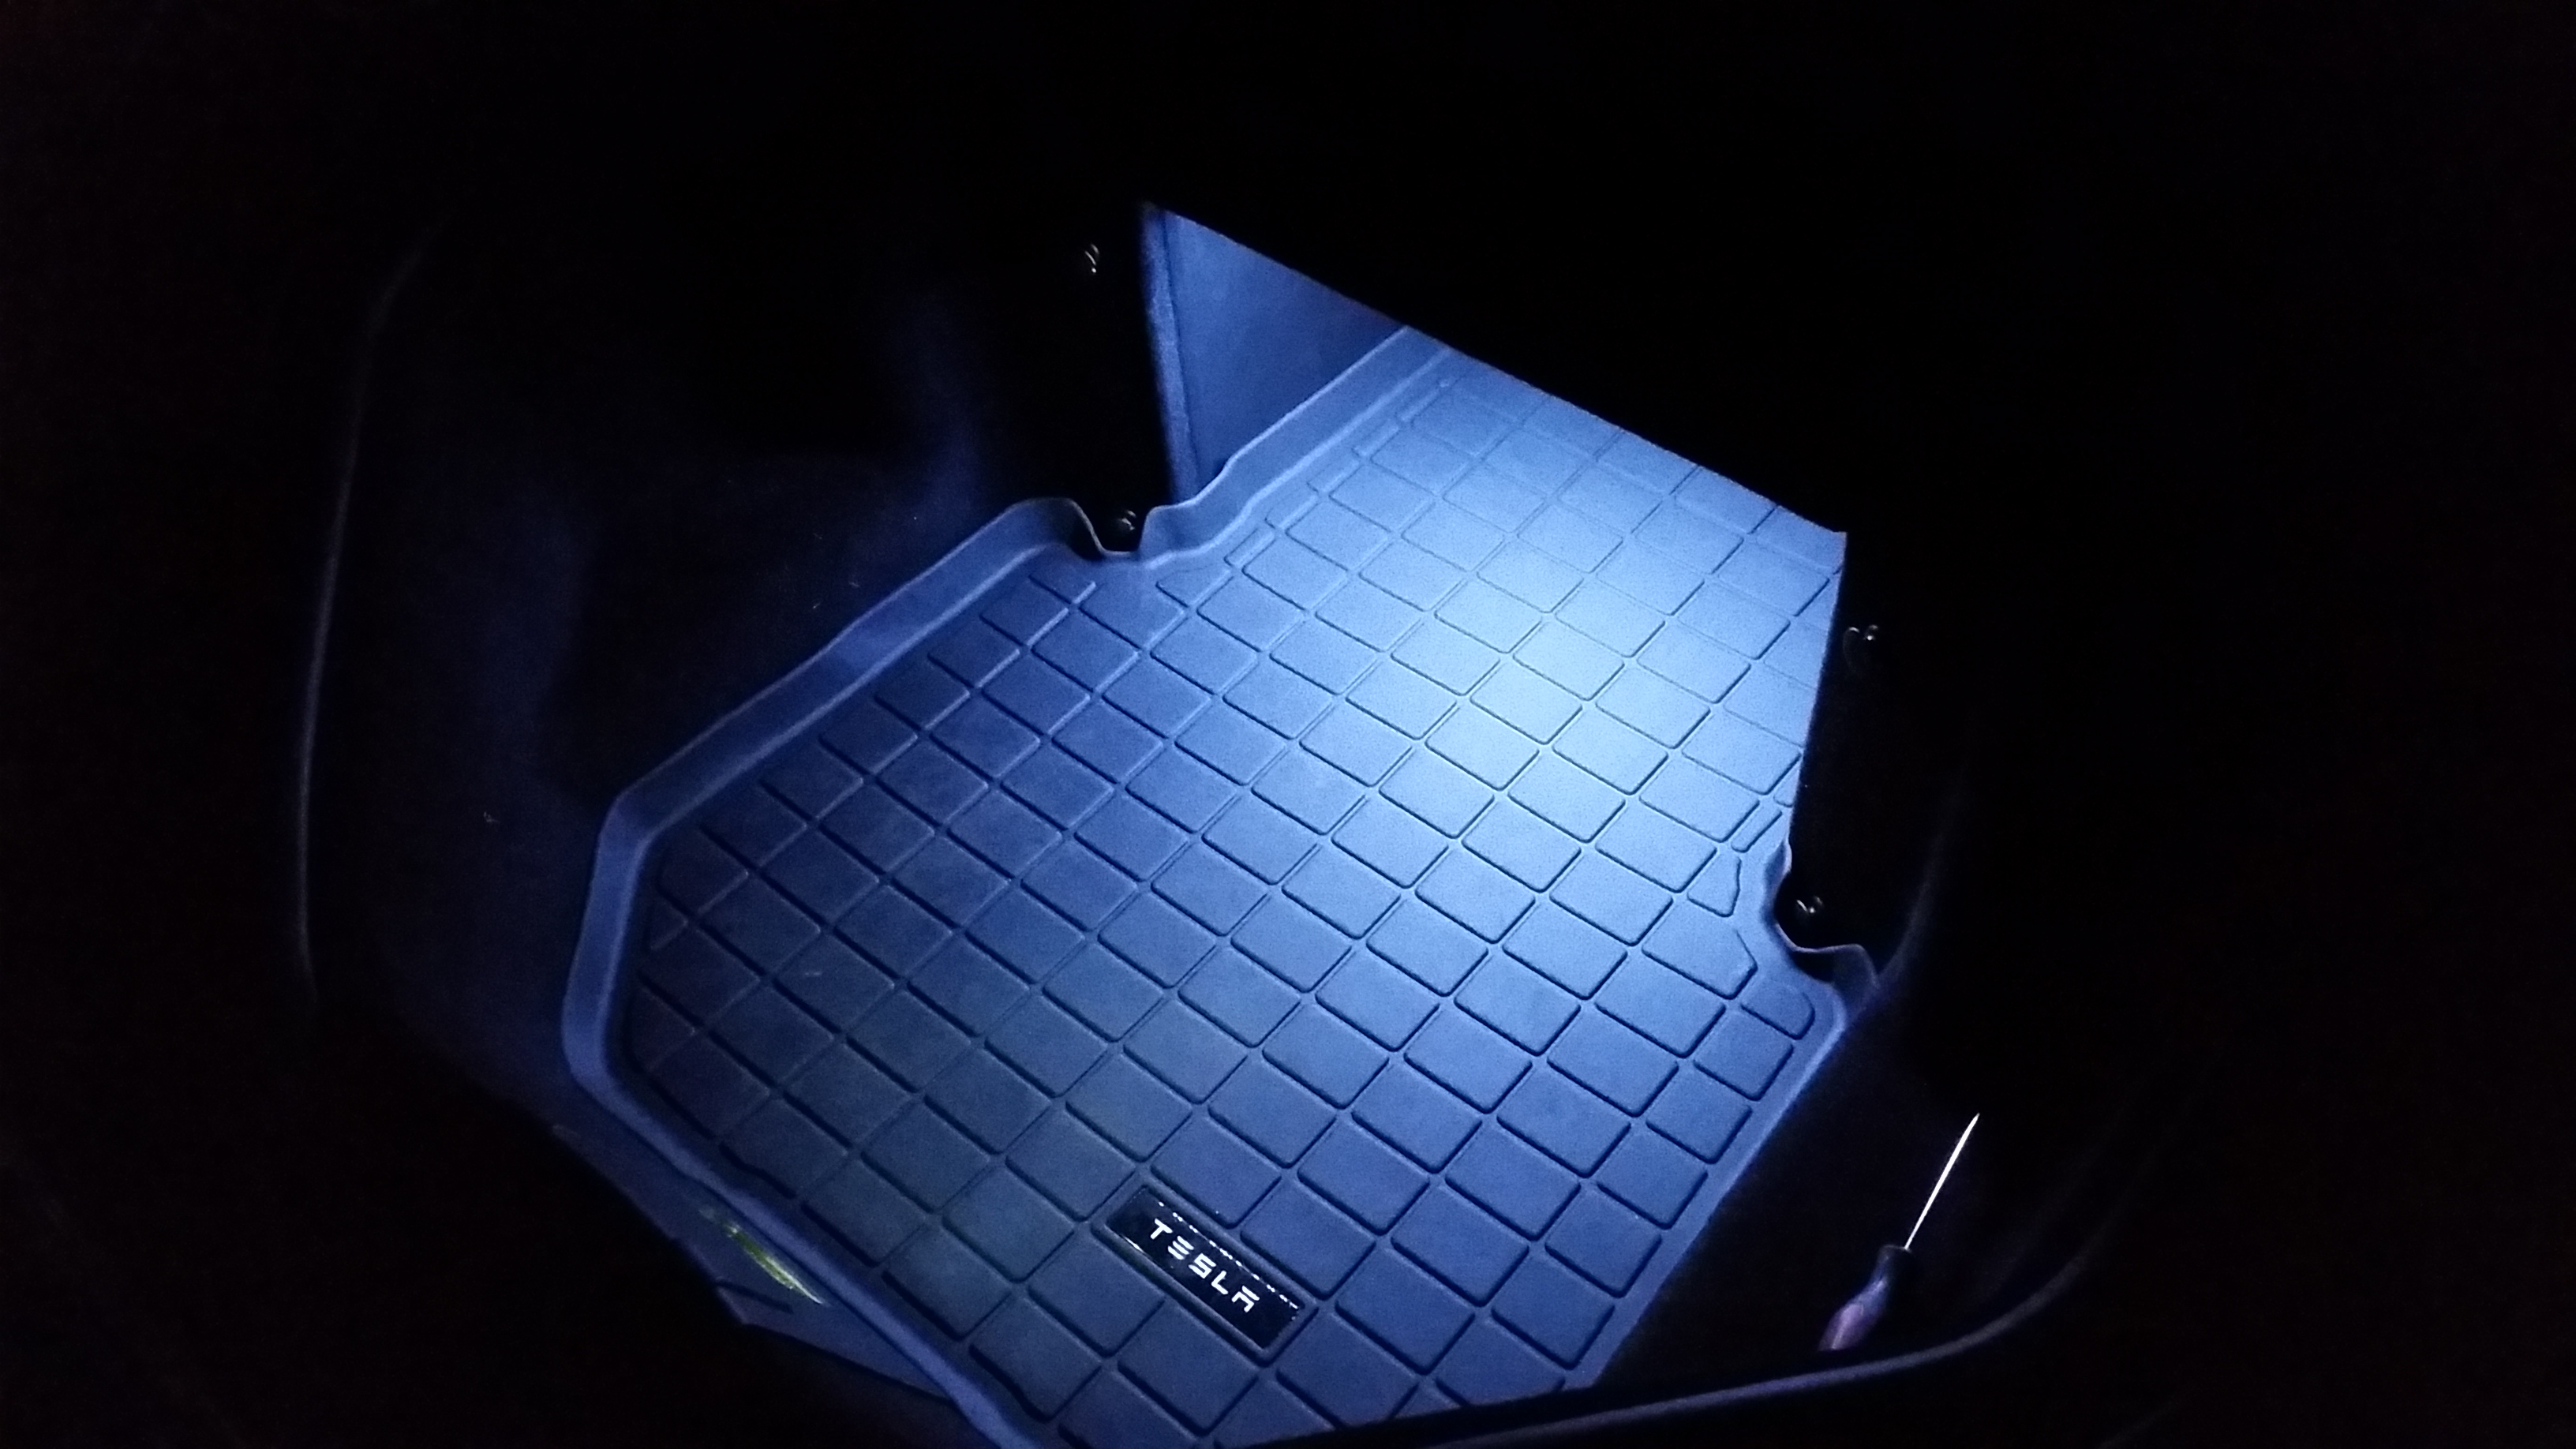
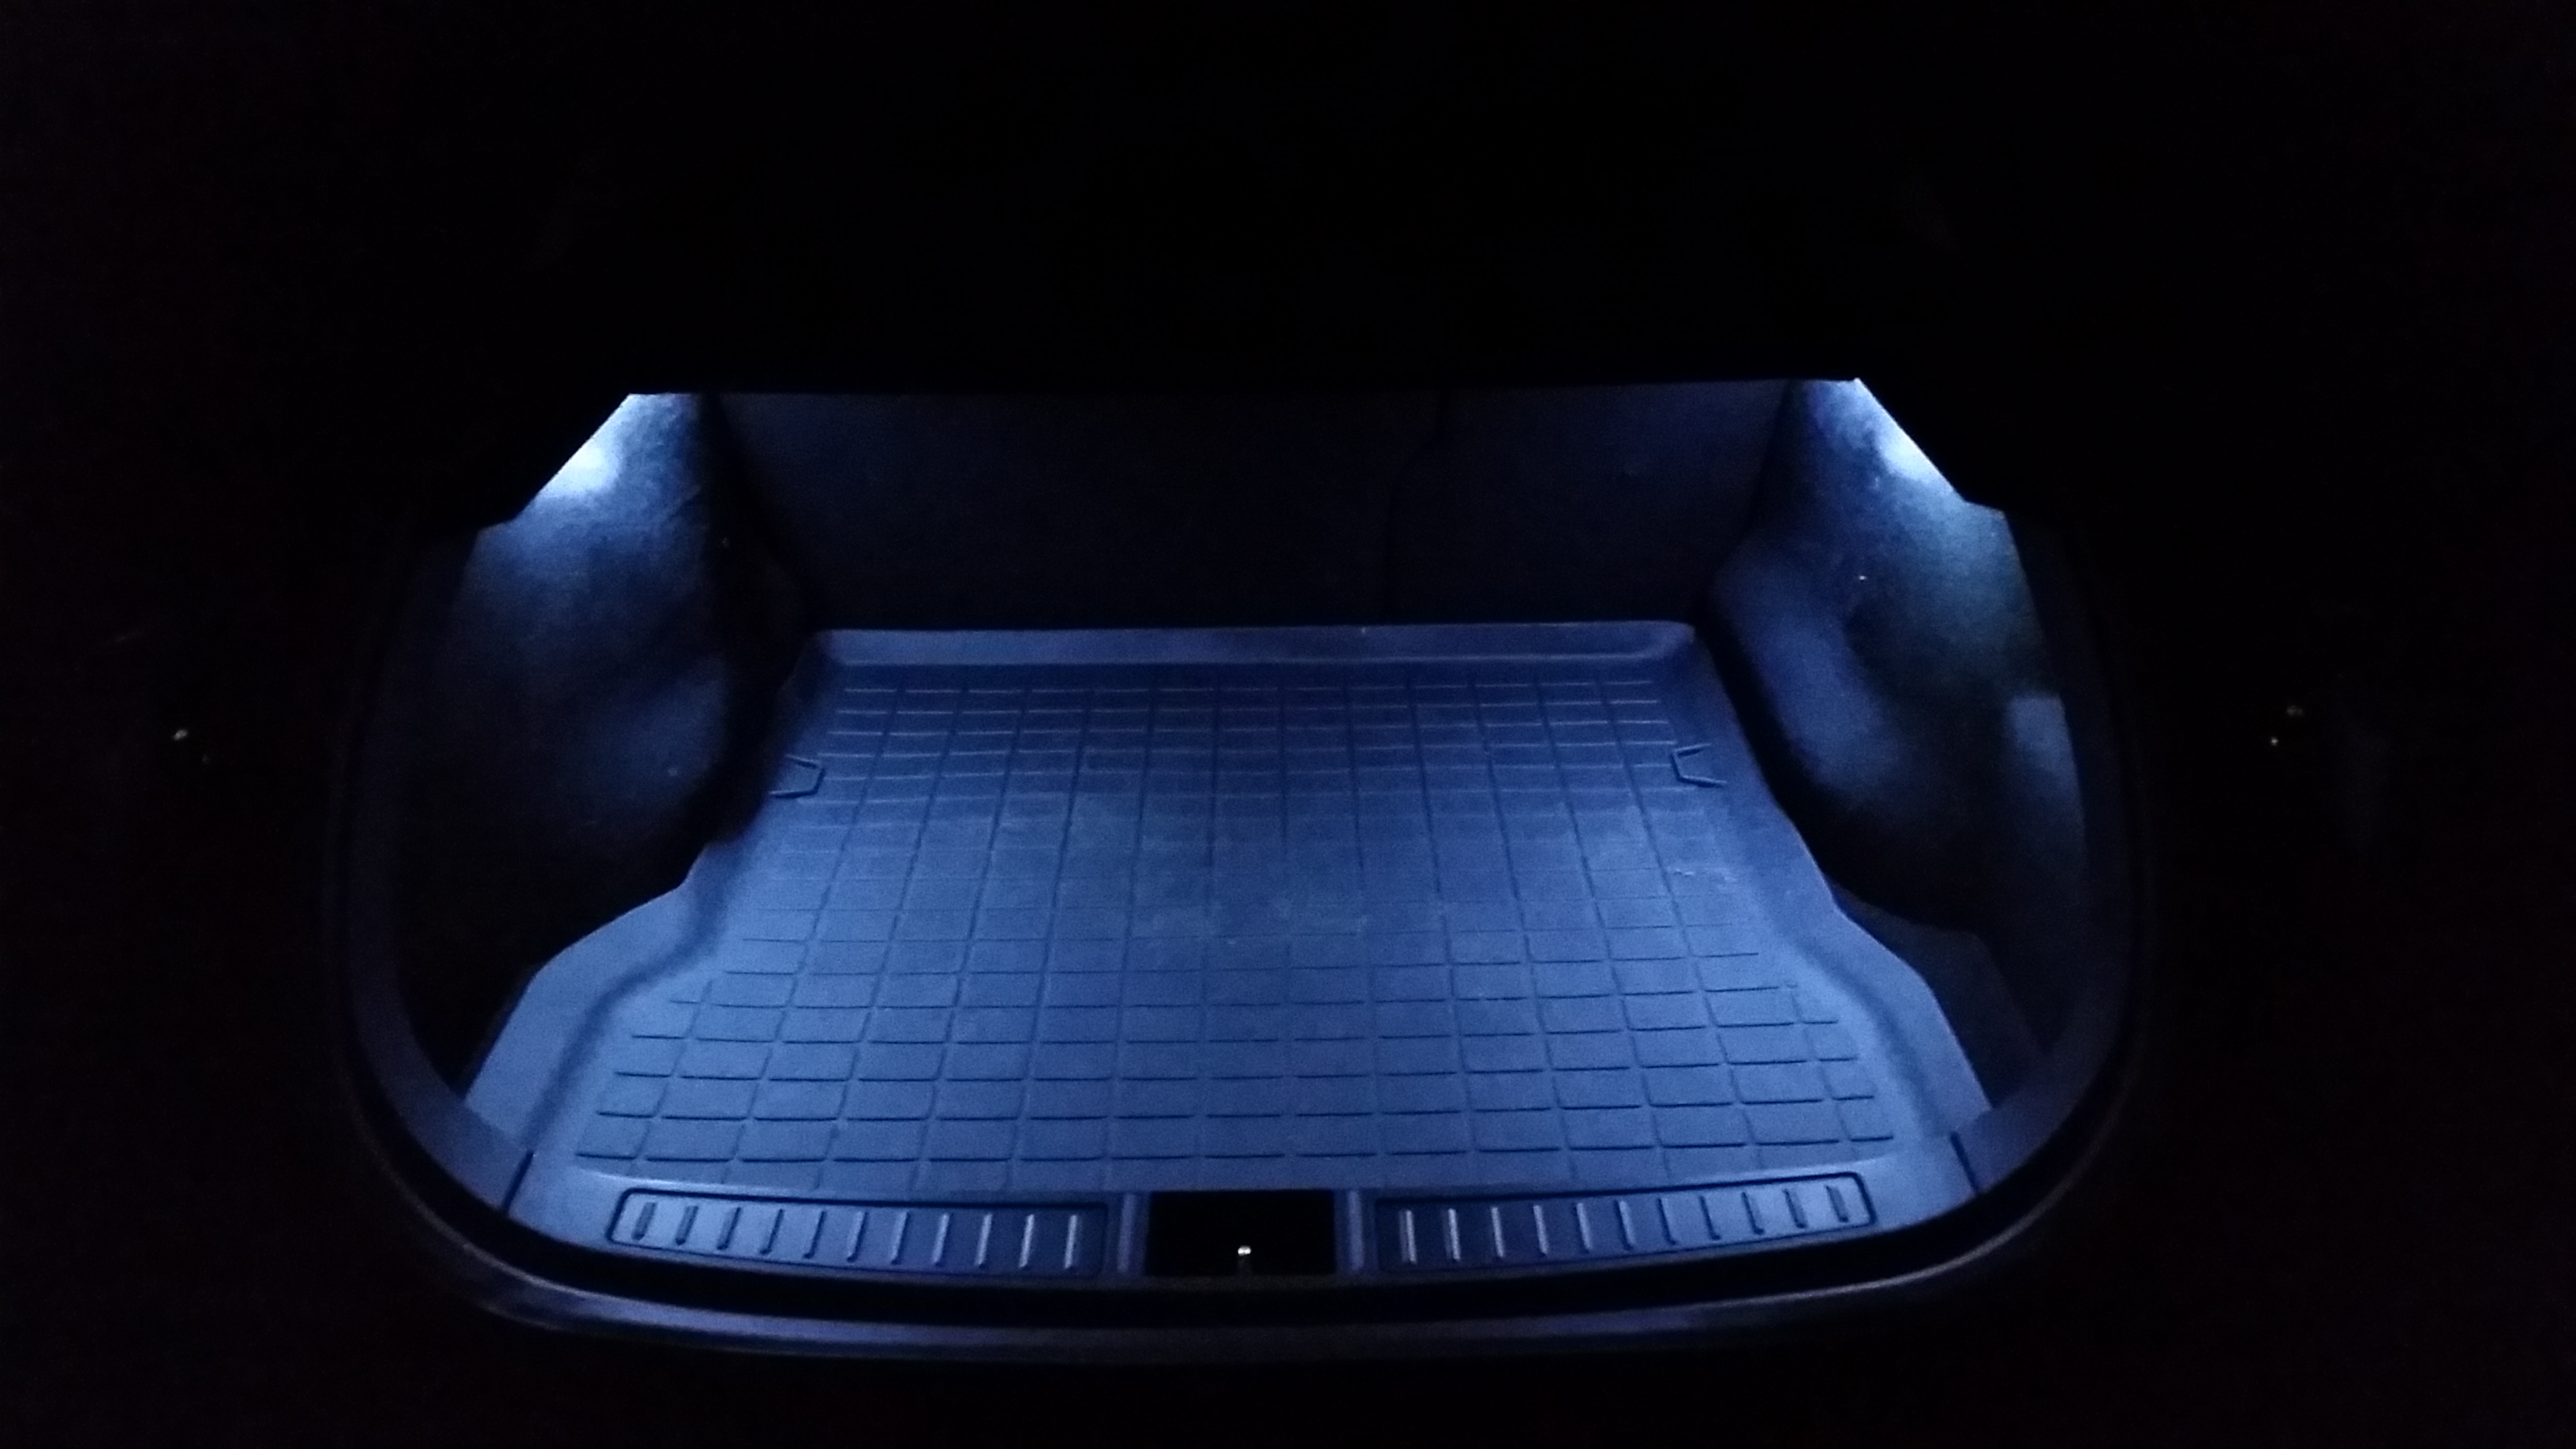
Trunk with:
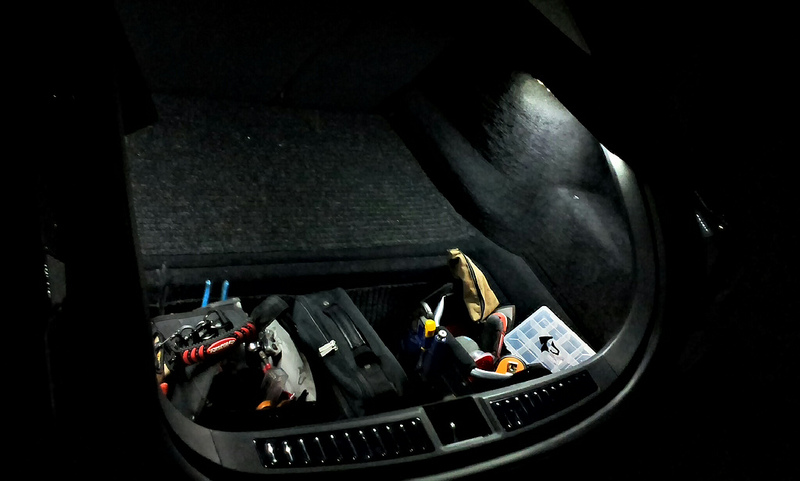
Trunk without:
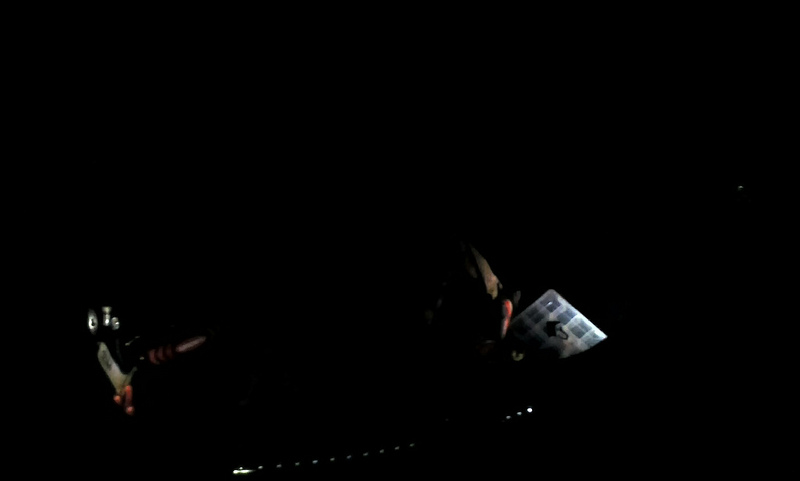
Frunk with:
Frunk without:
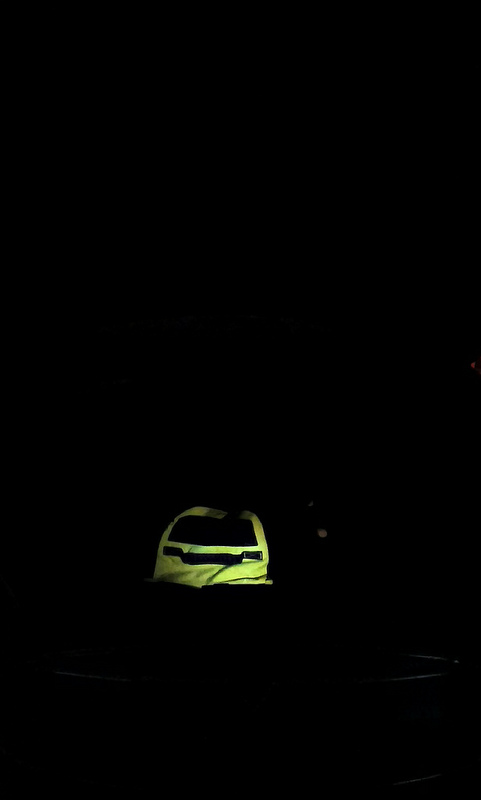
Now there is plenty of light. :smile:�
Jan 2, 2013
vfx Now Jim can see the junk in his frunk!�
Jan 2, 2013
efxjim Gotta stop by and see it!�
Jan 2, 2013
goaliemanshark OMG this is great. I should do this...
We need a mod section!�
Jan 3, 2013
artsci An alternative would be a standard 12v LED light strip with a sticky back and leads already attached to the ends. No need for plugs or extensions of any kind. Just attach the plus and minus leads to the stock light power source, as indicated in this post.�
Jan 3, 2013
Ceilidh I bought some led light strips that run on standard batteries so no wiring required. Less convenient and perhaps less clean, but also no risk with the warranty. Gonna mount them in pretty much the same location. The one I got were made for biminis on boats. I can post pics once I get the car.
Yours do look good. Nice job.
Cheers.�
Jan 4, 2013
tdelta1000 Great write up and post. Your solution is based on a suggestion that I made on Cinergi's post about the lighting in the rear of his S. Do both sets of lights (Modded and TM factory) work in concert? Also, please post some night time pics... thanks. Happy motoring.�
Jan 5, 2013
efxjim Yes the power is taken off the factory lights and they come on at the same time. I'll update with some night shots in a few days.�
Jan 5, 2013
DrComputer Guess I'll have to stop by your shop for my light upgrade.") �
�
Jan 5, 2013
William3 Me too!�
Jan 5, 2013
efxjim Certainly!�
Jan 19, 2013
mrjohnlnguyen Me also!�
Jan 28, 2013
W.Petefish I'm working with Tesla Service on getting the trunk and frunk light levels up. (something got sent to engineering lately for official approval.)�
Jan 30, 2013
tdelta1000 Hey Petefish,
How soon do you expect to hear something back from TM? Are they considering making your idea a permanent factory item? Thanks for sharing.�
Jan 30, 2013
W.Petefish I don't know when. The Dallas Service manager forwarded my idea to engineering. Considering, yes. Am I waiting for official approval, kind of.
If they don't want to make it a factory item, I'll release the part numbers and make an instructable for anyone who wants to make the same mods.�
Jan 30, 2013
rekoh would something as simple as this work?
1 Pair Universal 12V 15LED Car DRL Strip Daytime Running Lights Fog Lamp White | eBay�
Feb 1, 2013
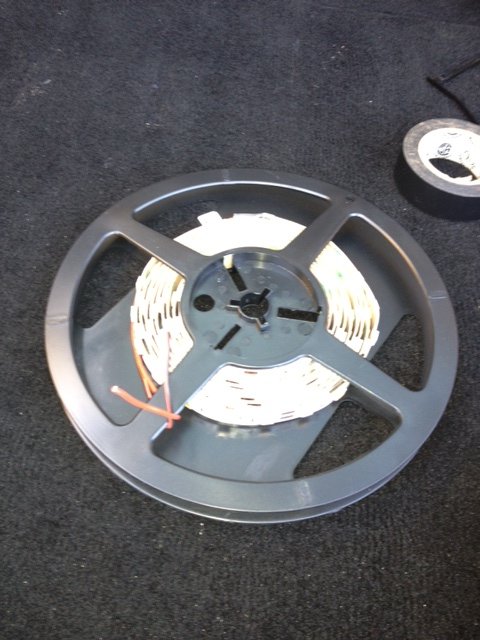
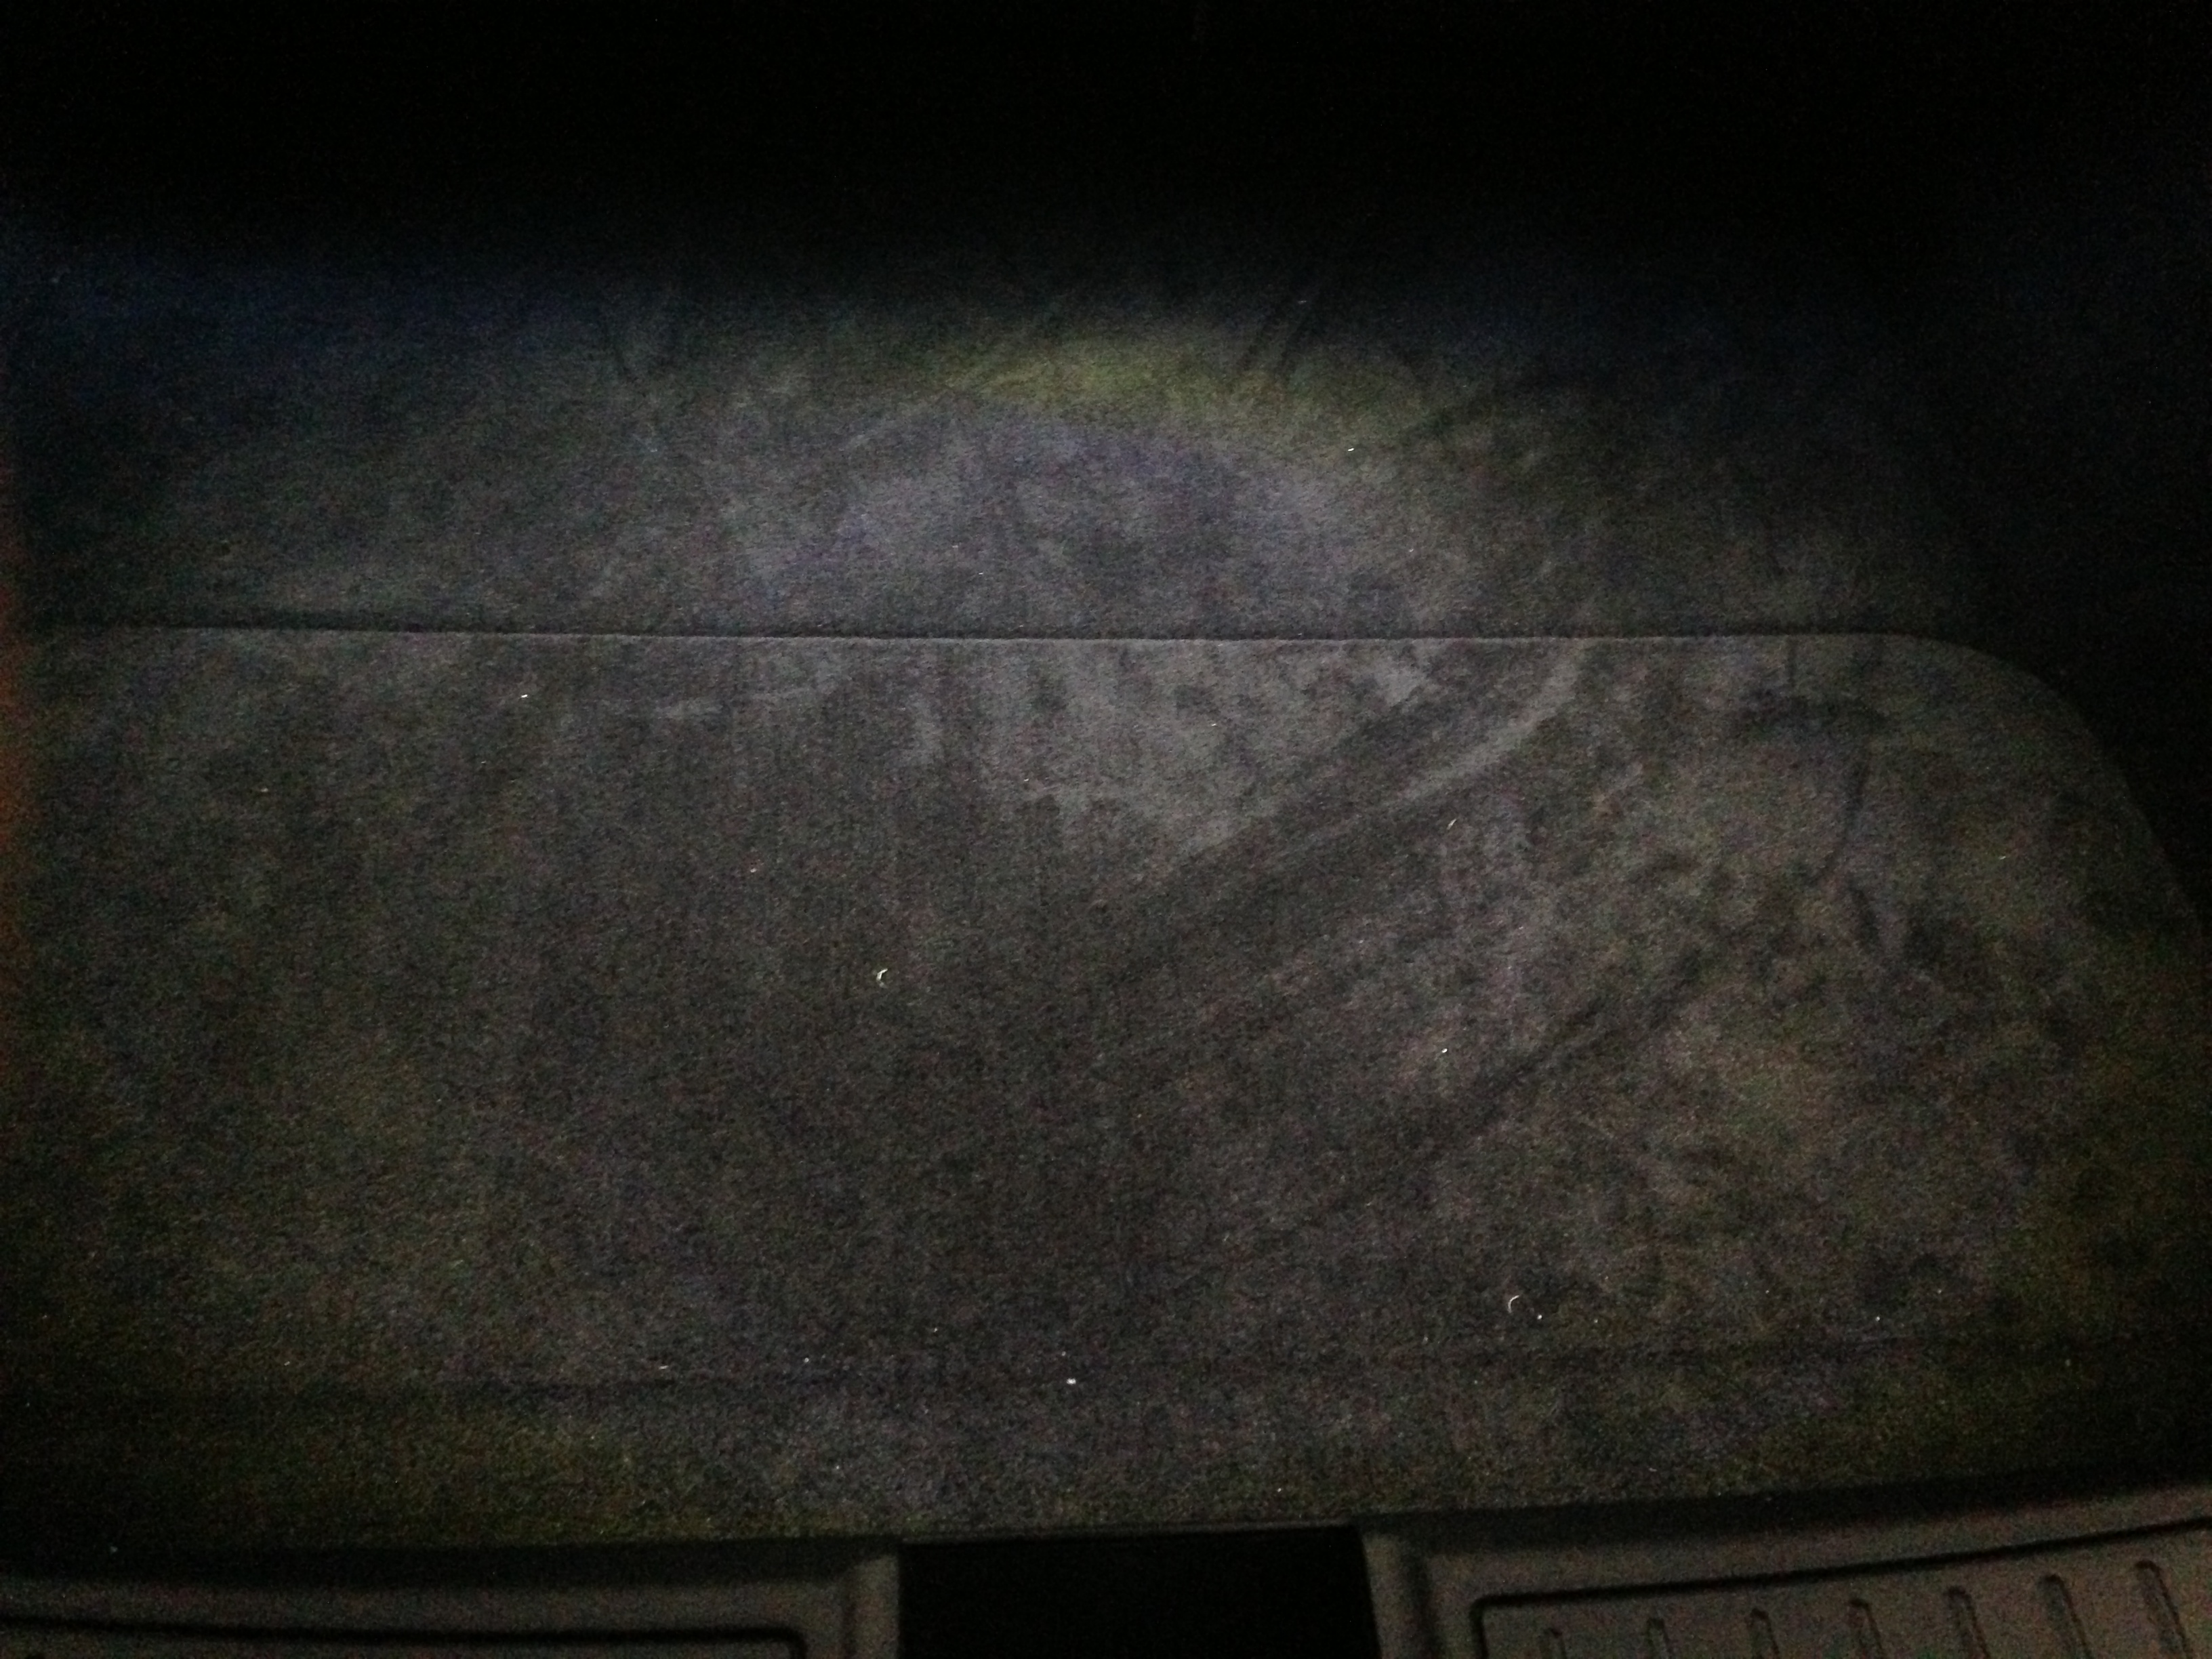
Lloyd I improved the trunk lighting today it was fairly easy. I ordered some adhesive backed strip lighting from Eco Light. I used 4.6w per foot and is 12 volt. which is more than enough. Lower would likely work as well.
I pulled the carpet back in the corner and tied into the existing LED wiring. I soldered and taped my connections. I cut a small hole in the carpet to pass the wires through. I put some epoxy over the connector to make sure the strip would not be pulled out.
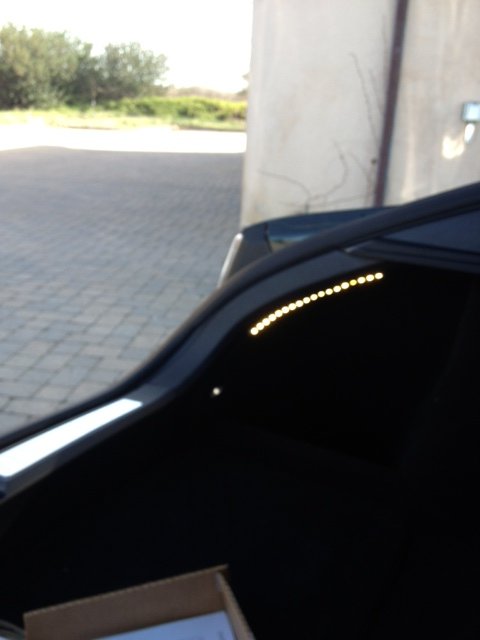
Here they are turned on. They are very bright!
I took a photo from the front area of the trunk so you can see it compared to the existing LED. This is daytime. The adhesive backing is removed and the strip is stuck in place.
This material comes in a roll, and is enough to do 10 cars, but you will need additional terminals.
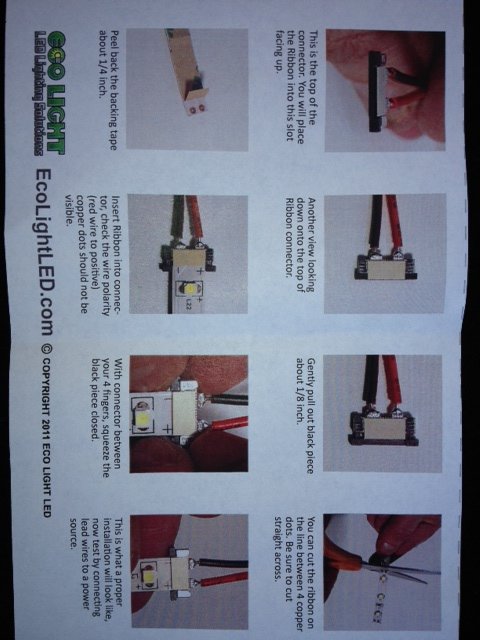
Here is a photo of the instruction sheet for termination, and the website for ordering. They seem like nice folks.
I may see if I can find a place to do the same mod for the Frunk as well.�
Feb 1, 2013
mlascano Very nice! Did you do this on both sides (L and R)?�
Feb 1, 2013
Lloyd One side only as I think this will be more than enough. I have not seen it at night yet, but I anticipate about 10x the existing light, and it gives me light where I wanted it the most, in the well where the charge adapters are kept.�
Feb 1, 2013
mlascano Cool! Give us an update on how it looks in the dark. It looks simple enough that I may be able to do this.�
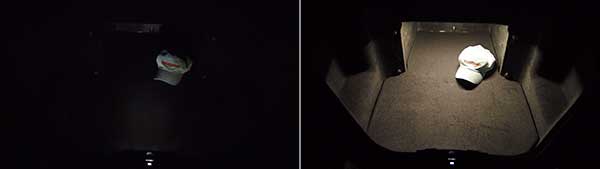
Feb 2, 2013
Lloyd Here are Photos in the dark
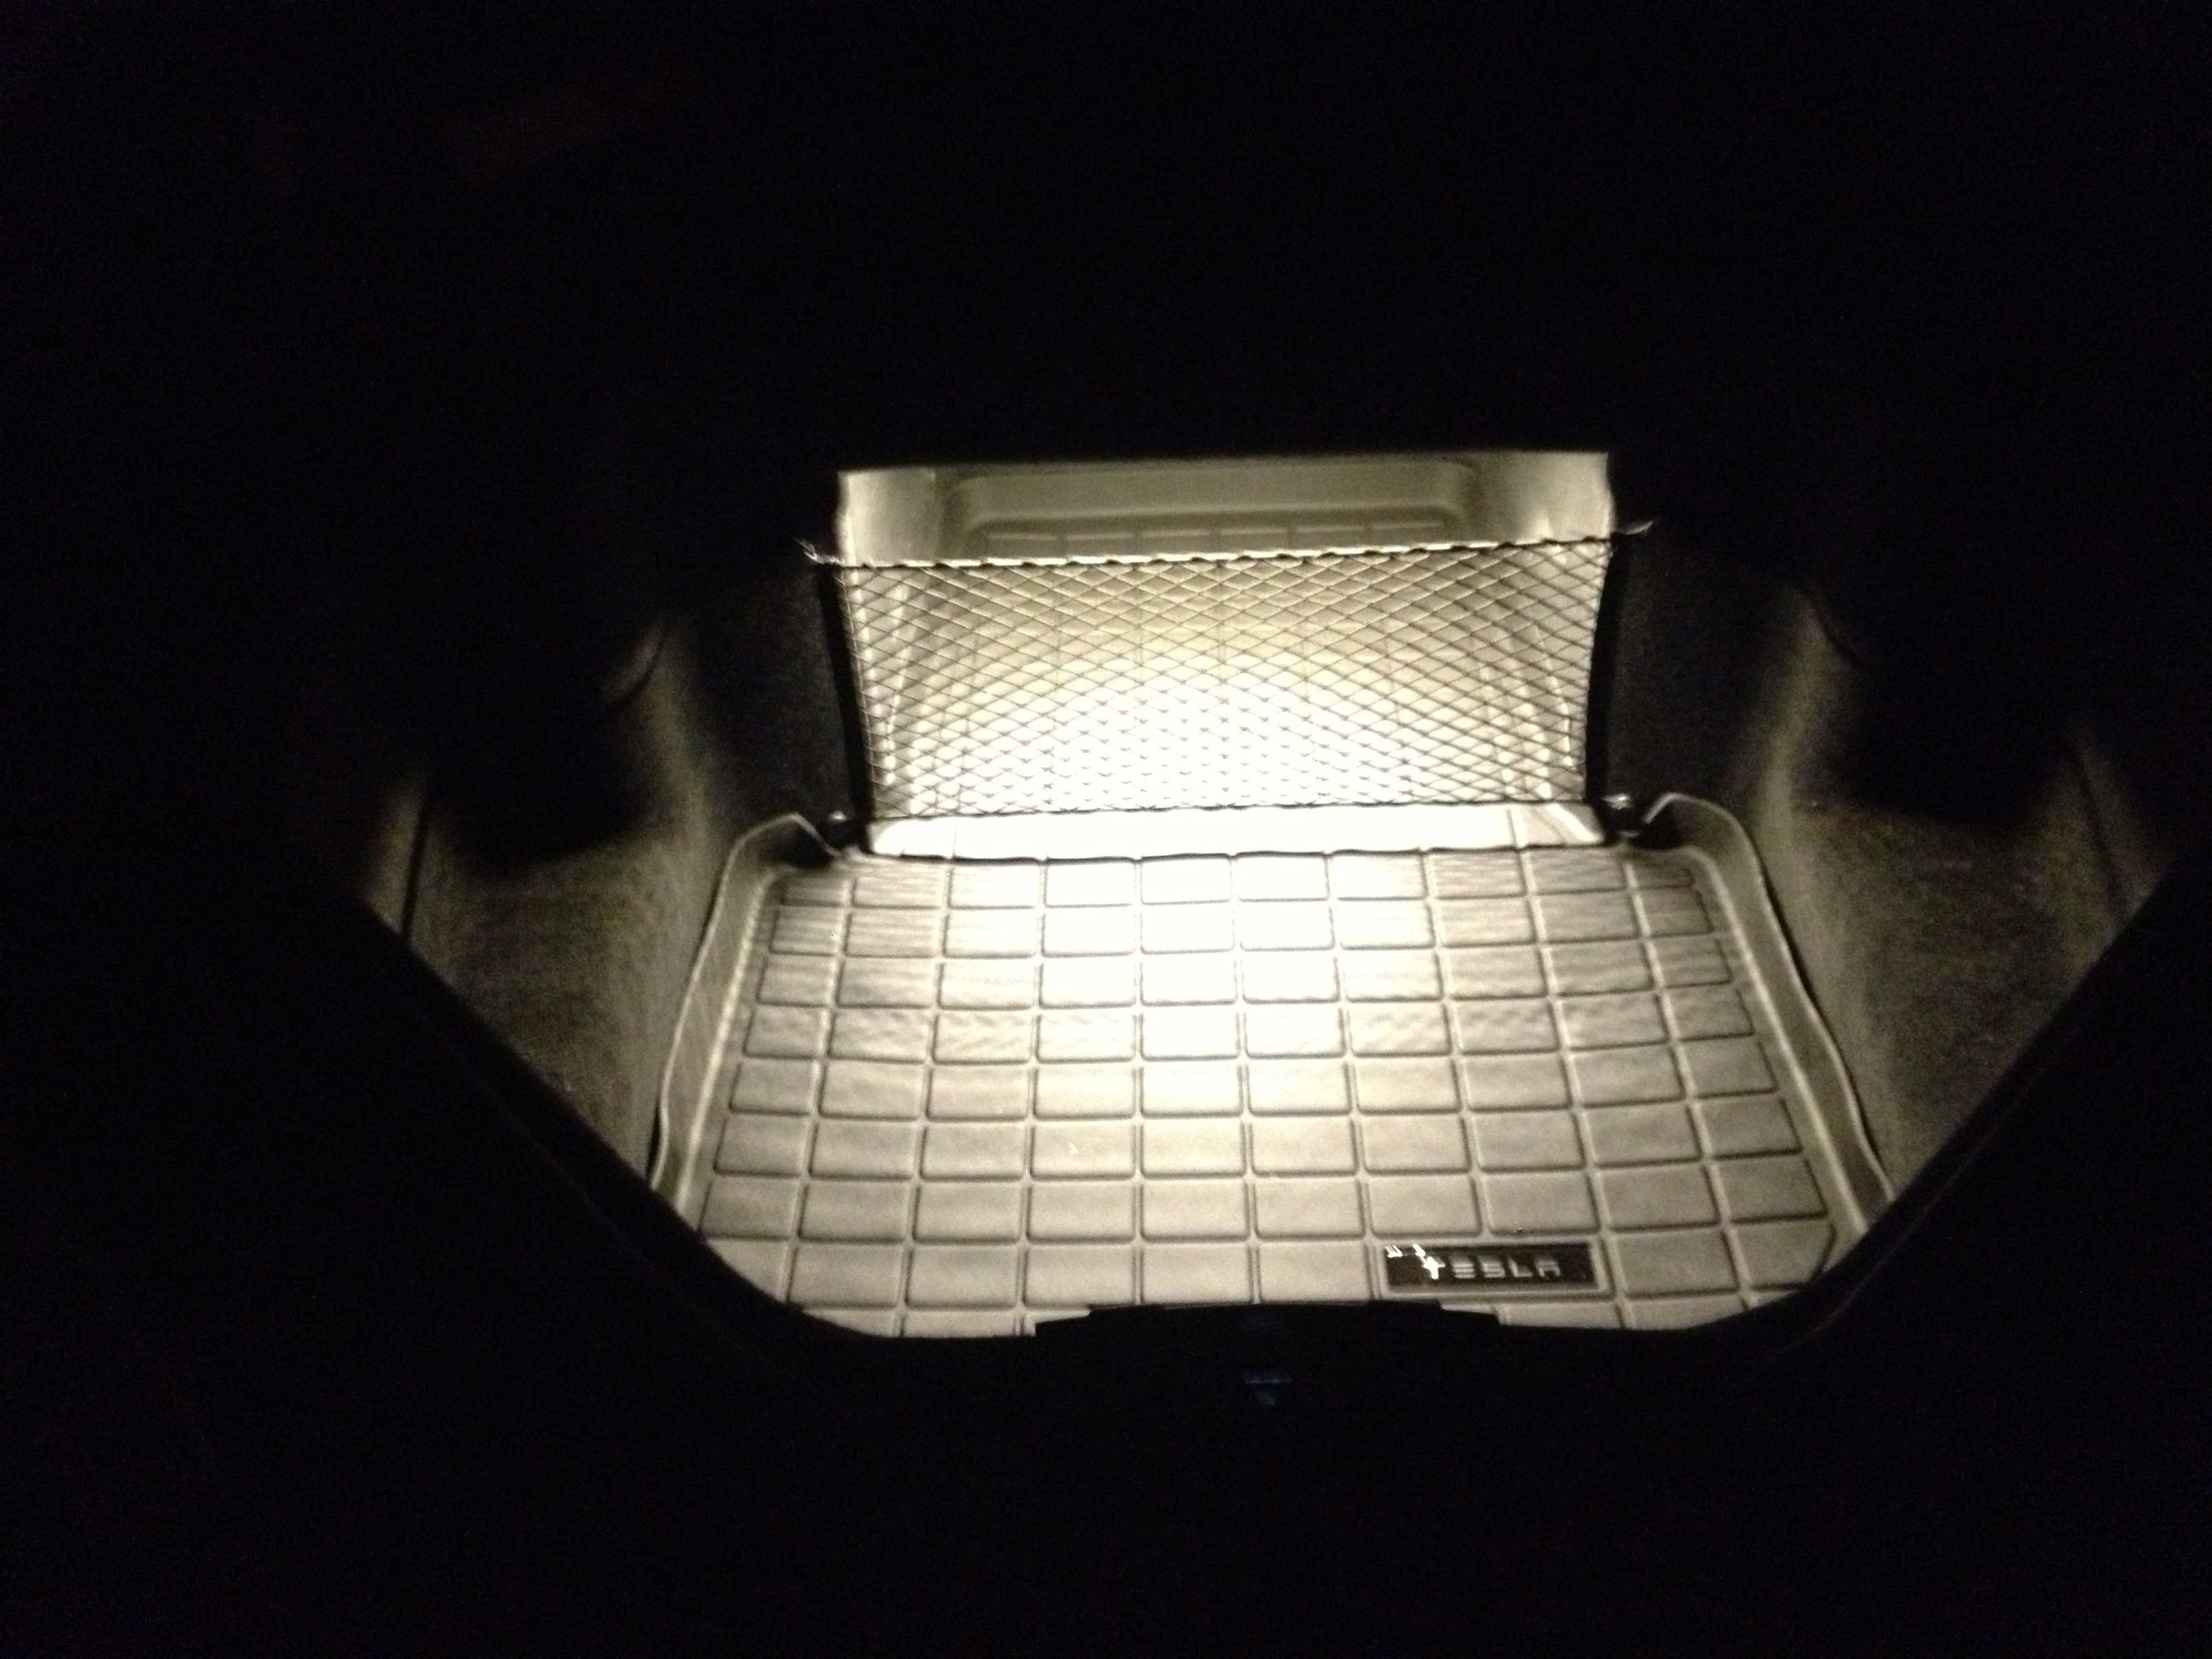 �
�
Feb 3, 2013
bob_p While the lighting is extremely bright, the lighting in the trunk and frunk with my VIN 31xx is bright enough to be usable.�
Feb 4, 2013
Babylonfive I also just did the trunk upgrade and it was super easy.
I used some adhesive-backed strip lights, and added red/black pigtails of length about 30".
I chose the left (driver) side, where there is a removable carpet insert behind the charging power port. Solder the pigtails to the strip and feed the strip behind the left side carpet, and down to the carpet insert area for access to the charging port. Next remove the snap-in existing LED light on the rear left side (as the OP shows). Push a fish-tape up toward the charging port area, and reach in and connect the end of the pigatails to the fish - pull it back down to the existing LED location. Now, here's where I made it a little easier: I used some solderless wire splices to clip onto the existing red and black, mating with the pigtail red and black.
Voila! Very bright trunk!�
Feb 4, 2013
vcor Does this turn on and off with the trunk lights? My understanding is the light assemblies are on a LIN network, which sends coded signals to each specific light module to turn on,off or dim. A LIN network sends the signals along with the power - so it can run as a two wire circuit. This would mean the red/black wires are on most or all of the time. The reason for digging into the light assembly itself and connecting to the LED is to get to the control side. Would be nice if this is not necessary. I'll have to test this out myself!
Edit: Tested it out, and the power goes on/off with the lighting. Perhaps these are not on a LIN network, and even if they are, it appears that just tapping into the red/black will work fine.�
Feb 4, 2013
Babylonfive There may be some intelligent modules, but the trunk light isn't that. It's a switched 12V DC circuit. That's why this upgrade worked... for several of us. :tongue:
David�
Feb 4, 2013
vcor Great news. More lighting has been high on my project list and this makes it a snap.
Did you notice if you have holes on the left and right sides? For example, it is right above the charging cable spot on the one side. You don't see this area unless you get down to the floor and look up. On my car both sides are open as if they forgot to put something covering it. It shows through to metal.
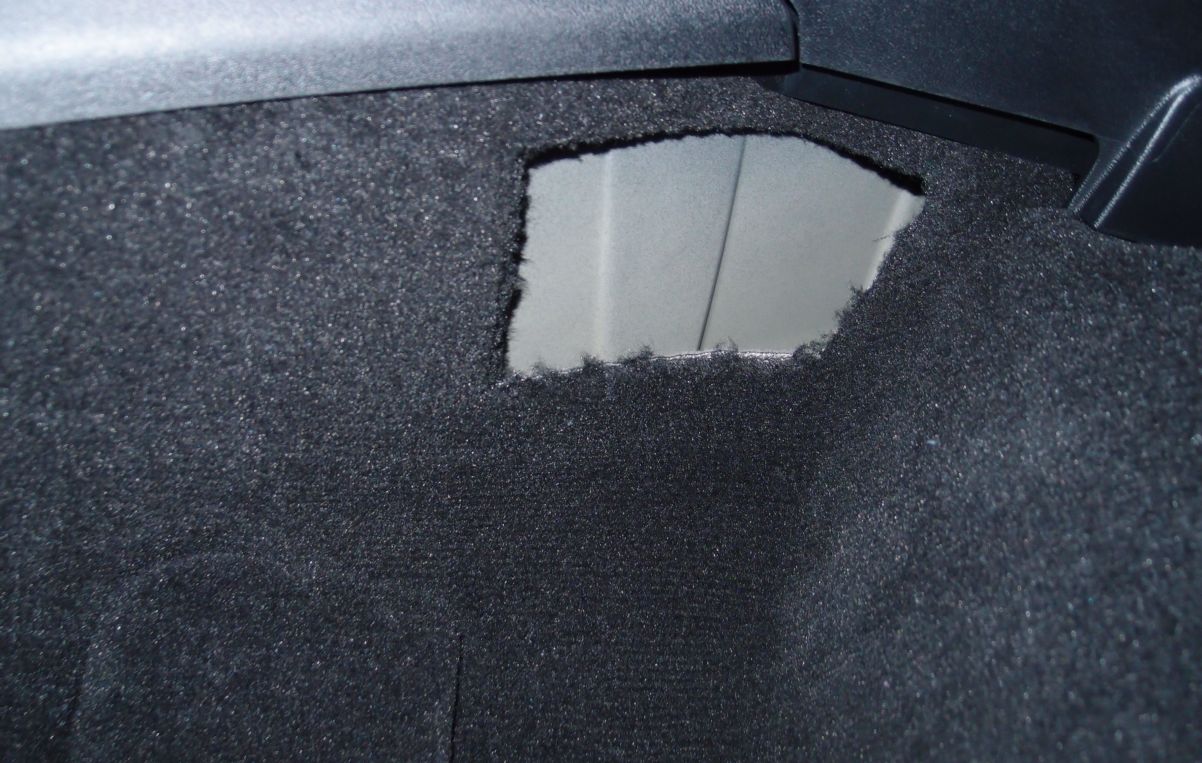 �
�
Feb 4, 2013
Babylonfive Yup, that's one of the openings that helps with the install. Note in your picture the carpet square insert that can easily be removed to help with snaking the wire.
David�
Feb 4, 2013
vcor I saw the other covered hole, so I guess they didn't make a cover for these upper holes. Looks like it was designed for a cover. I may bug my service adviser when they get a few other missing parts in to see if they have covers. Borders on the trivial since I didn't see them until looking for it�
Feb 7, 2013
efxjim That may help to let air out of the car. The vents to the out side are mounted under those ports near the bottom of the car.�
Feb 10, 2013
vcor Ok, I took the plunge and added lights to both sides. The project was fairly simple and cost about $45 in parts.
This is with the standard black carpets.
I also have grey carpets, which really makes it light up!
I wrote up full instructions with images at http://teslatap.com/modifications/lights-how-to-improve-trunk-lighting/�
Feb 17, 2013
tdelta1000 It's good to see that my simple idea sparked so many mods. Please keep sharing those mod photos.�
Feb 18, 2013
vcor @tdelta1000 - I was in the early planing stage, but you definitely motivated me to get it done. Thanks!
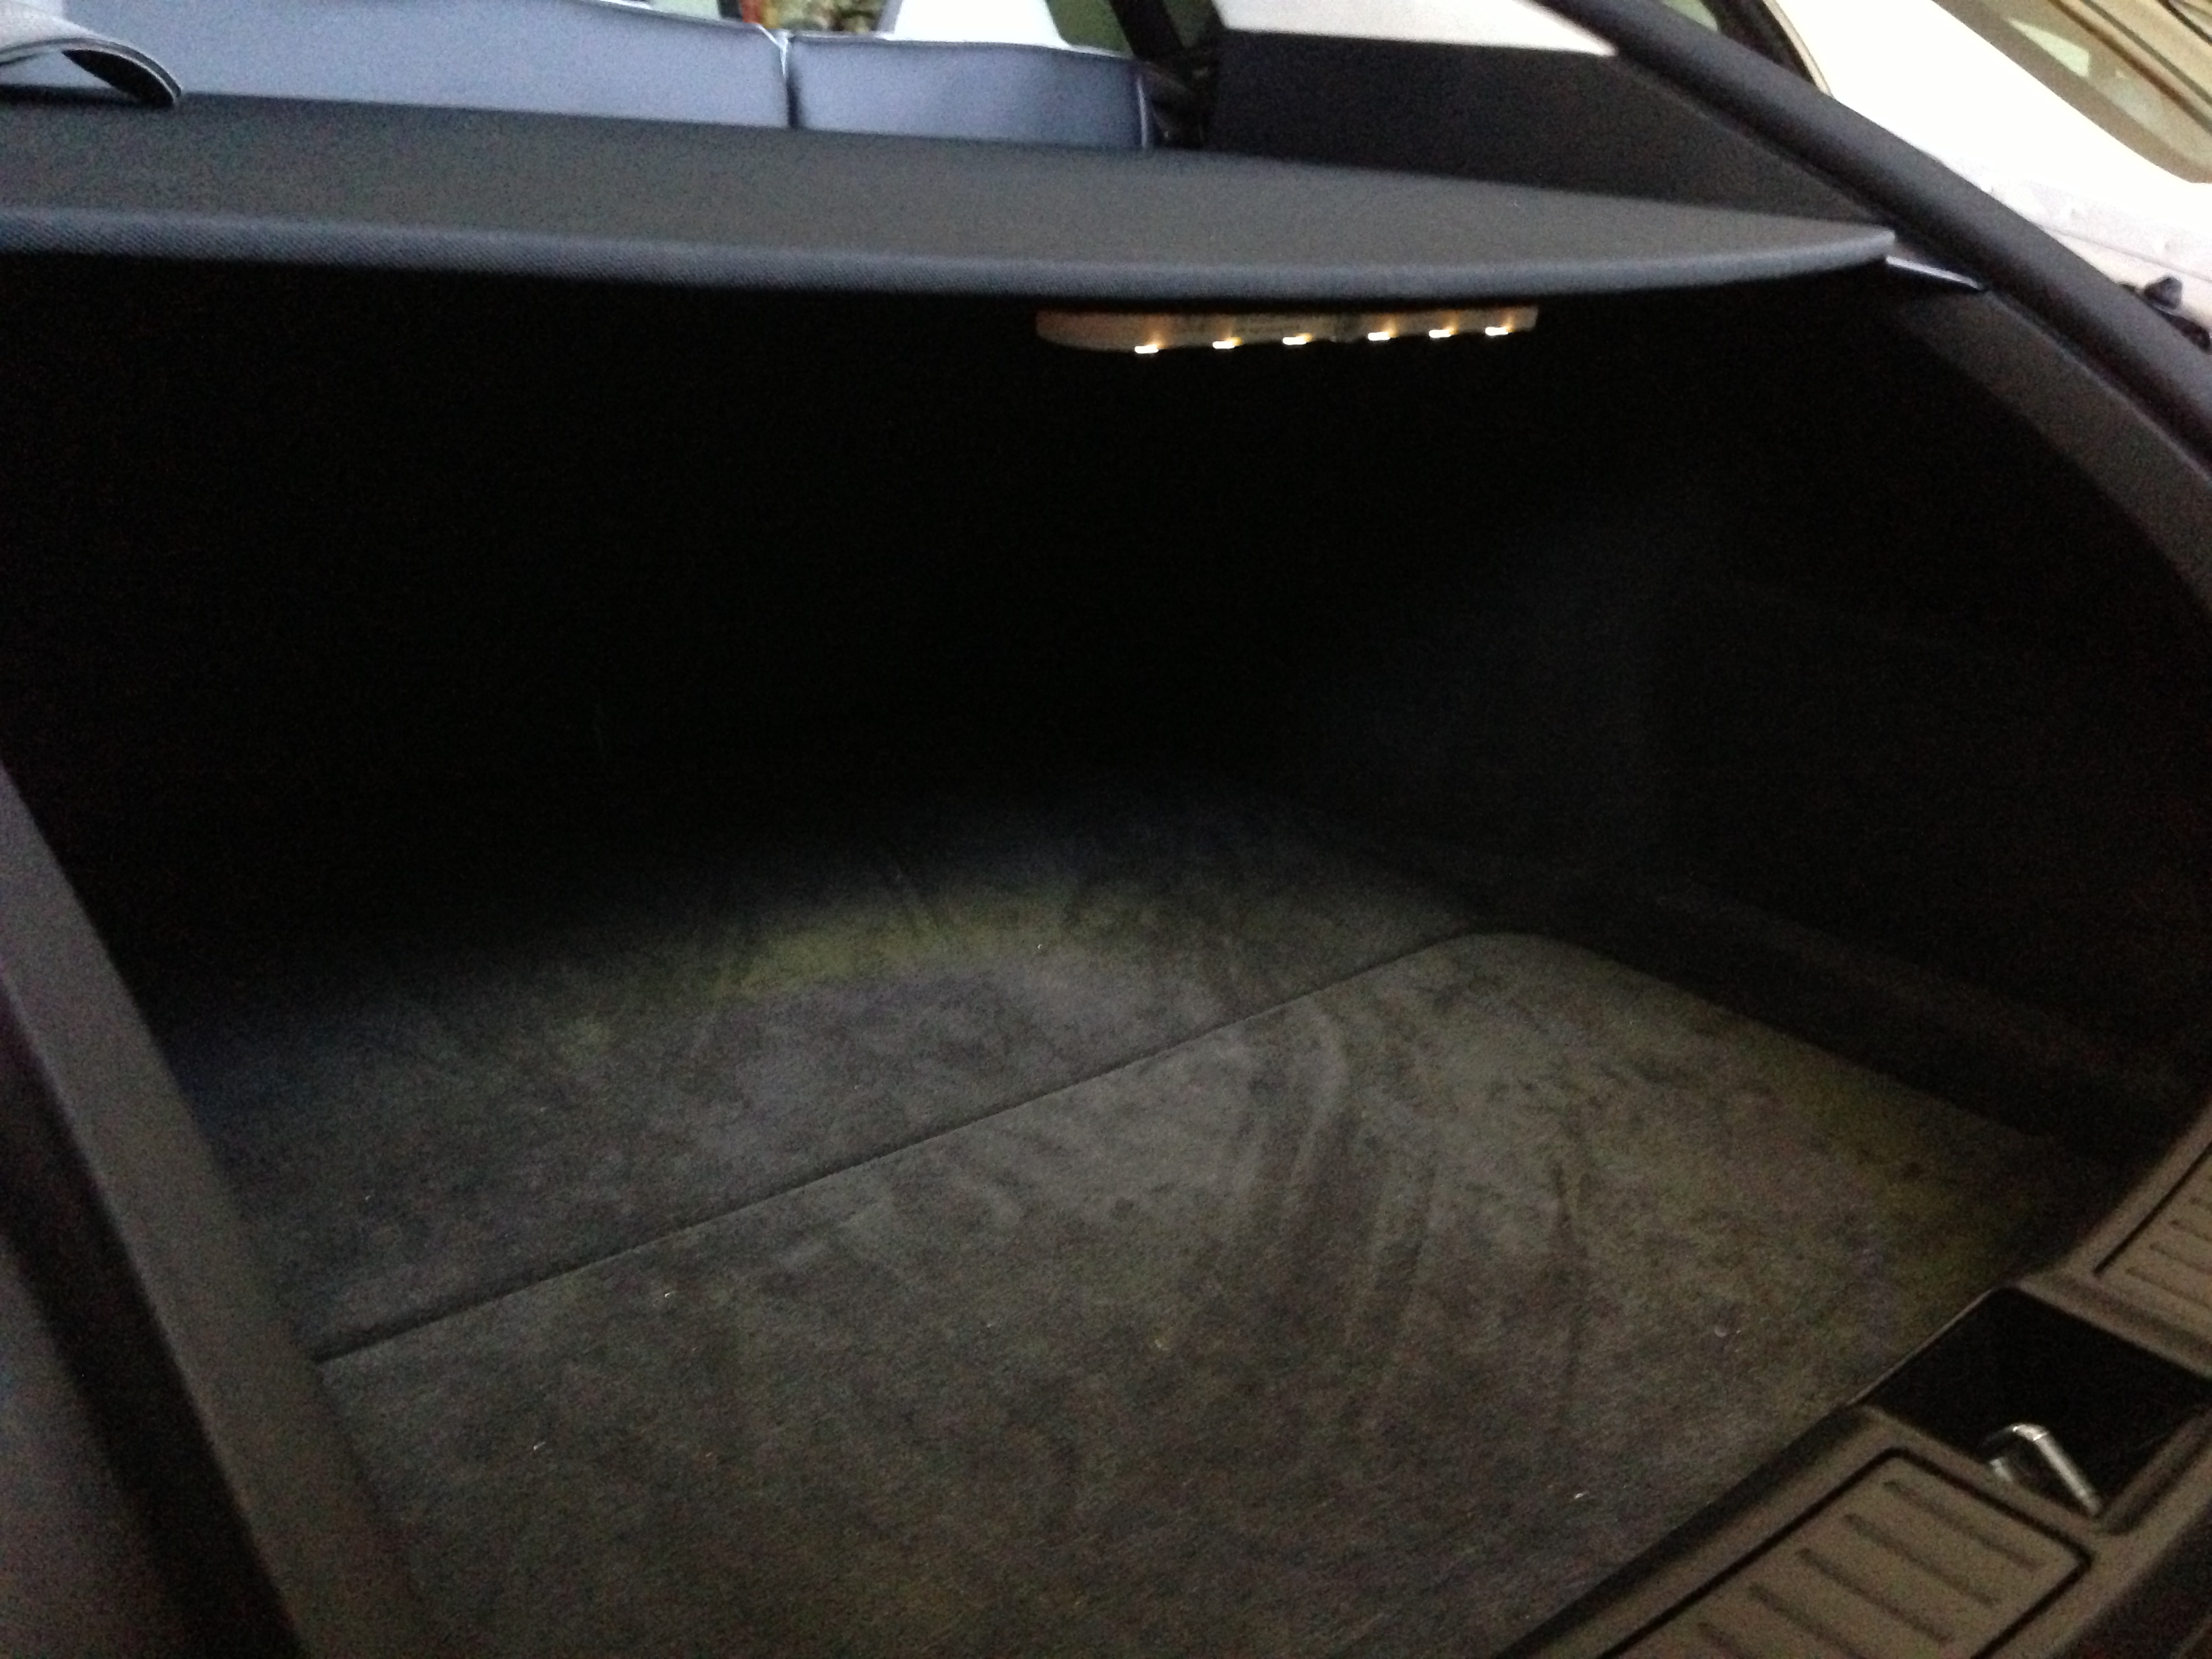
Here's my frunk mod with before and after shots using a LED strip:
I also wrote up detailed instructions with step-by-step photos at How to improve frunk lighting.�
Feb 18, 2013
inottawa I also wrote up detailed instructions with step-by-step photos at How to improve frunk lighting.[/QUOTE]
Awesome site! Thanks for the write up. I'll definitely be looking at this mod when I get my MS.�
Feb 26, 2013
smd 2X White 30cm 15 SMD LED Flexible 3528 Car Waterproof DRL Strip Light Bulb 12 | eBay
I bought these cheapo LED strips on ebay from China and they arrived in CA within about 5 days. I tapped into the wiring for the existing frunk light and added additional wiring under the sidewall lining to the cubby at the back of the frunk and taped it up to the top of the cubby as others had shown. In the back, I tapped into the wiring of the left side light and taped it to the plastic frame of the trunk opening over the storage cubby in the left side of the trunk. It lights up the whole rear very well. While I don't need more light, I decided to go back and order from the same seller again to put a strip in the rear right as well to make the light even from both sides. The same seller also sells a 4x pack of the strips and that's what I should have ordered rather than two 2x strips. Would've save a buck as well. I'm very please with the results and it looks similar to other photos posted here so far, so need for more photos.�
Mar 12, 2013
ThortsMD Tonight I installed an inexpensive battery-powered LED light (LED Light Flute Portable, Silver - Amazon.com) using velcro from Lowes. The light is placed under the parcel shelf holder. Worked perfectly. "On" switch is easily accessible. Gives plenty of light for most tasks. It's also removable so it can function as a flashlight.
 �
�
Mar 13, 2013
Puyallup Bill Holy Guacamole! I was at an electronics swap meet over the weekend and ended up with a 16 foot strip of bright white LEDs. Been racking my brain on what to do with them.
Great - problem solved. Thanks all.�
Mar 16, 2013
smd Here are my photos taken in a dark garage WITHOUT flash...
 �
�
Mar 16, 2013
brianman @smd - How much do you charge for ranger service to install?�
Mar 16, 2013
jayfrost Well a few hours later, I have successfully completed the install of 2 trunk lights and i frunk light! Quite happy with the results. Thanks for all the help and guides. That frunk light was a pain in the a$$ but so worth it!
J�
Mar 18, 2013
carrerascott Thanks for the inspiration. Also added the lighting to my frunk today. Didn't get around to the trunk but i will. Definite improvement, should come this way from the factory...
 �
�
Mar 31, 2013
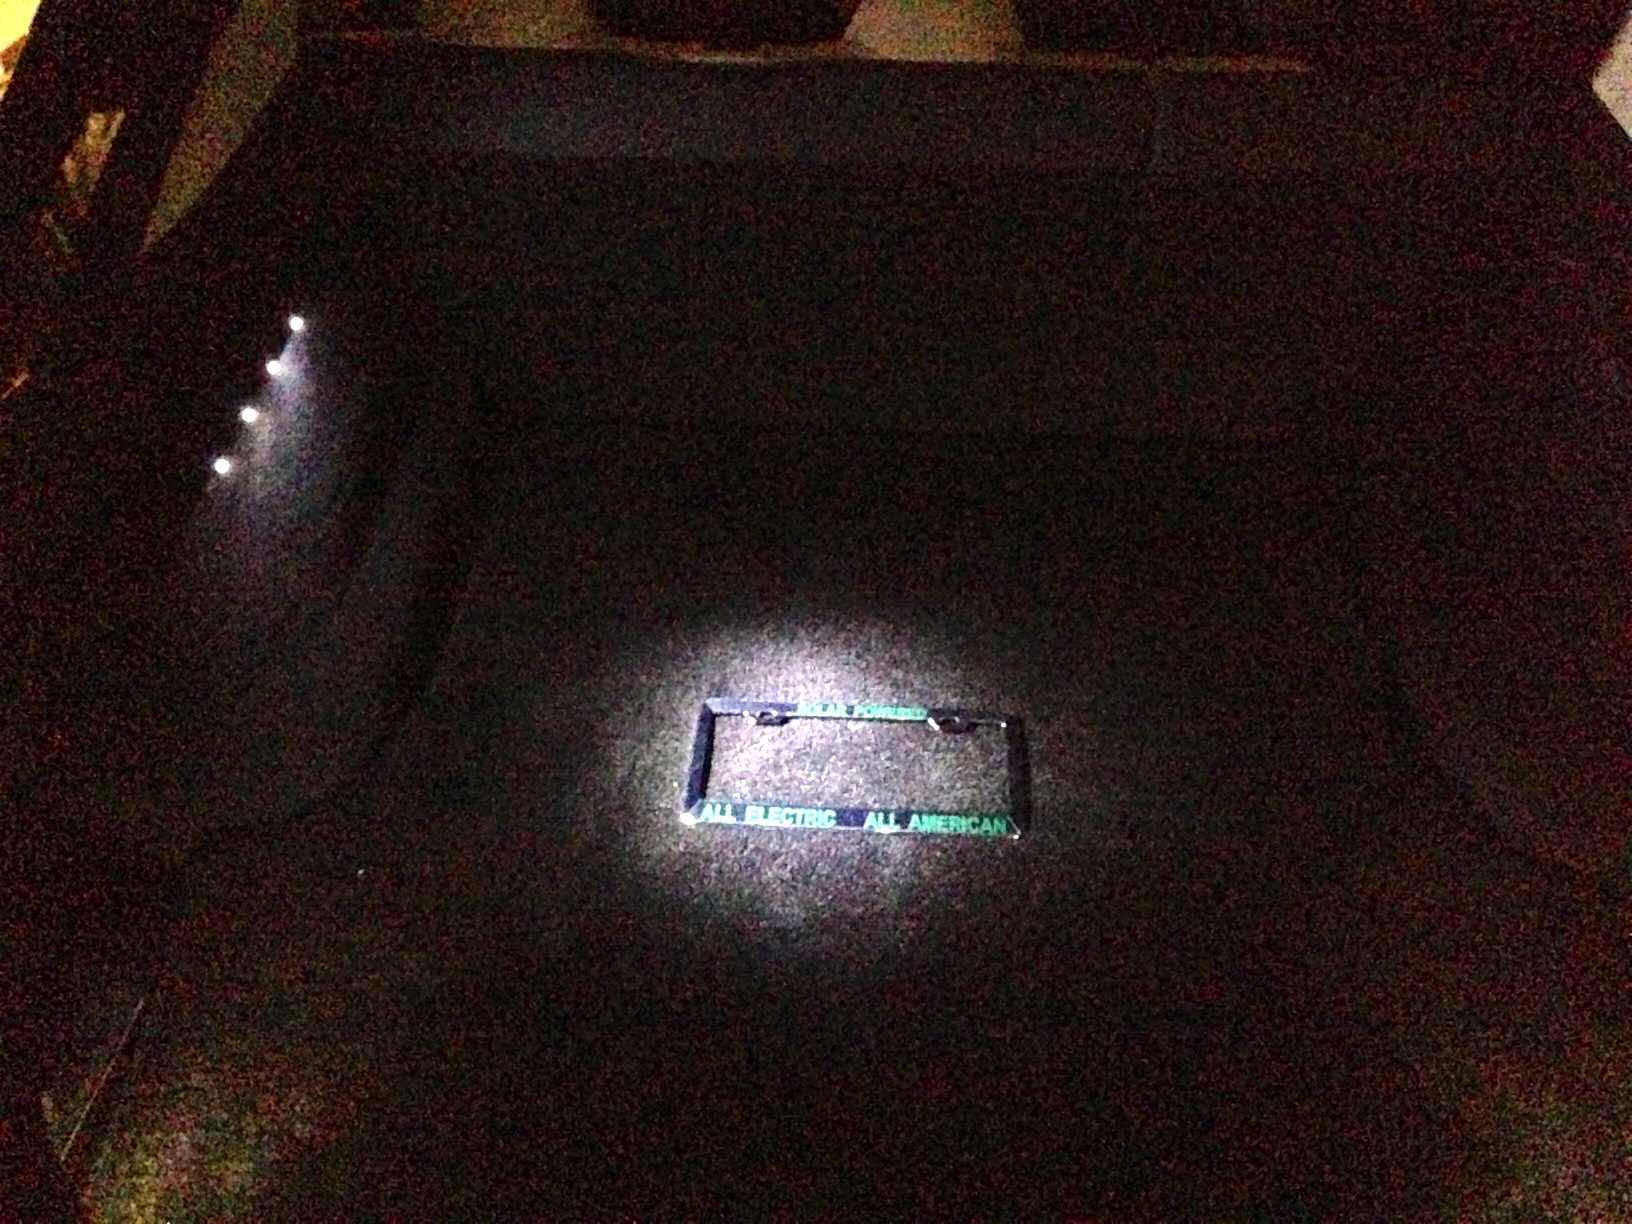
Zextraterrestrial crappy ipod pics
frunk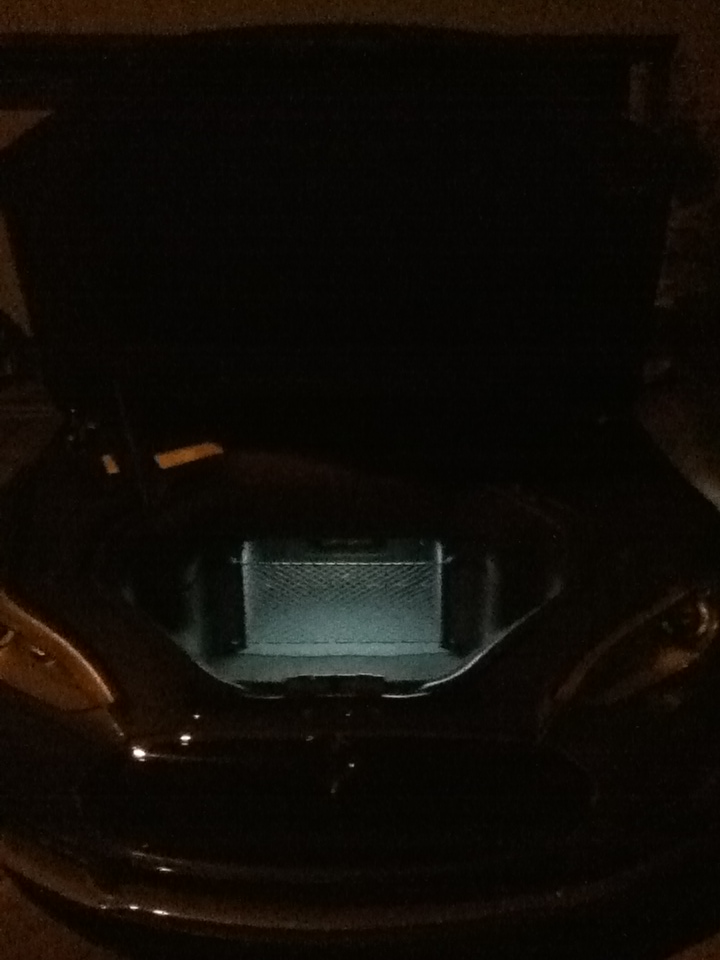
trunk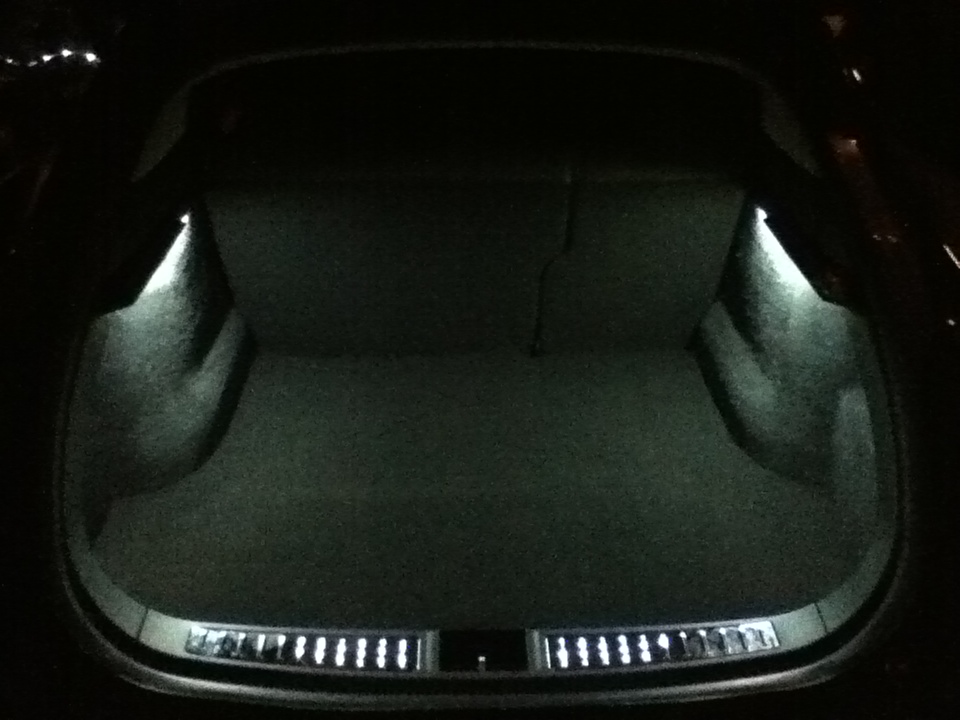
and why aren't these leds?

they are now:smile:�
May 19, 2013
Teriyaki88 Here's an amateur version of your nice installs
I got two motion sensor LED from Costco for $19.99. I added one to the frunk and one on the bottom side of parcel shelf, using only one side of velcro strip. It stick well enough to the car's
carpet.


 �
�
May 19, 2013
andrewket Wouldn't items moving around while the car is in motion cause the lights to switch on? The batteries in the LED unit won't last very long that way.�
May 20, 2013
Teriyaki88 I'm not sure but it was worth trying. It's completely dark so I think it will be fine.
�
May 20, 2013
DrTaras I didn't know you had it in ya! Awesome! :smile:�
May 20, 2013
Neech I was looking at these lights today at Costco. I wasn't sure how sensitive they would be (would they light up from things sliding around or the car turning too fast). Let us know how they are working.�
May 21, 2013
artsci Finally did my install of LED strip lights under the parcel shelf tracks. For power I tapped into the wiring for the two existing lights in the rear of the trunk. That way it turns on and off when the the hatchback lid is open and closed. All of the cabling is completely hidden and it looks like it was an accessory that came with the car. Had to remove all of the trim to run the wiring, but that was easy to do.
I'll post some photos and more details as soon as I get a chance.
Next the frunk lighting.�
May 21, 2013
Babylonfive Artsci, the frunk works the same way with the up-front light. Mine was easy.�
May 21, 2013
artsci Here are a few photos. I used LED light strips from SuperBrighLEDS, a place I frequently use to source LEDs, as their stuff is high quality and, well, super bright. I used the 19" (almost a perfect length for this use) High Power LED Flexible Light Strip - NFLS-X3 in warm white. The brightness certainly show in the photos, as the space is now incredibly well lit for night use.
 �
�
May 23, 2013
SCW-Greg Nice! This is one no-brainer, that the frunk and the license plate.
Do you find these LEDs might be too bright? OR is it just the exposure on this photo?
I mean sometimes you want a lot of light, sometimes it can be too much.�
May 24, 2013
artsci Definitely not too bright but certainly more light than I'm used to having in the part of a car. No more fumbling around for lost stuff.�
May 24, 2013
Volker.Berlin Has anybody had a chance to check out Tesla's own new lighting package? Any opinions on that?�
May 24, 2013
kevincwelch The white/tan trunk mat probably creates the overly-bright effect. I'm sure it would be a little more subdued if the mat was darker. Still looks great, though.
Artsci, were those LED lights terminated with any adapter/plug or bare wires?�
May 24, 2013
artsci I stripped the wires to the two stock LED lamps in the back of the trunk and soldered the LED strip leads to them then ran the wires behind the trim so it's all hidden. I used insulated spade connectors so everything can be easily taken apart if need be.
I agree that the tan mats tend to make the effect brighter than it actually is but it is very well lit.�
May 26, 2013
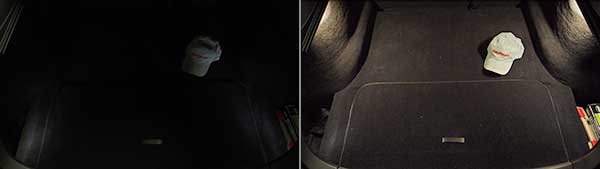
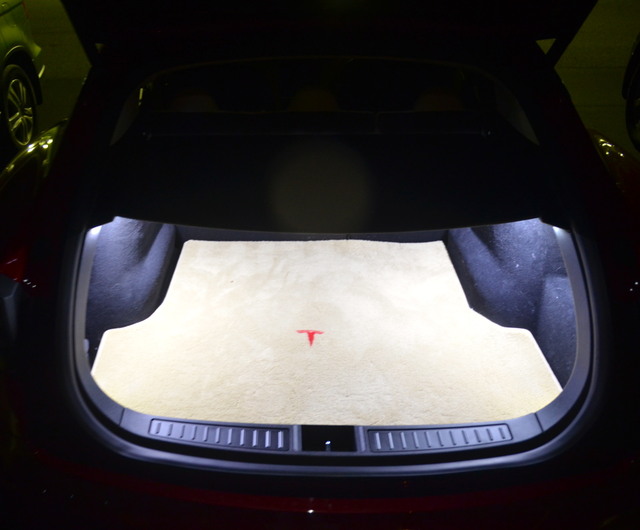
artsci Photos of the frunk results.
 �
�
Jul 10, 2013
gmtom1 Ikea has a LED lighting strip that I think I might try out for the frunk & trunk once I get my MS. For $15, it's worth a shot to see how they work.
Ikea Dioder Battery LED strip�
Jul 10, 2013
Klaus You saw that those are fed by 6 x 1.5V = 9V and not 12V?�
Jul 10, 2013
ZBB They wouldn't need to be wired to the car -just load them with AAA batteries and install in the car,
But I'm guessing they turn on with movement -- the pic shows them attached to the inside of a drawer. So that wouldn't work in the trunk or frunk. But if they are activated with light, then they might be worth shot.�
Jul 10, 2013
gmtom1 That's exactly why I think they are perfect - motion sensing, since I don't need them on when the trunk/frunk is closed, and just wave my hand where they are mounted when I open it.�
Jul 27, 2013
gctseng Anyone add to/replace the light in the glove box?�
Jul 27, 2013
Lloyd If anyone needs supplies to do this, Ecolight makes stick on 12 volt LED lighting strips that work great. You need to splice into the existing lighting, but easy to do!
https://www.ecolightled.com/�
Jul 27, 2013
gmtom1 Just picked up the LED light strips from Costco that was mentioned in post #42 instead of the IKEA version, since it was cheaper and I can always return if I'm not satisfied.
Based on some informal testing in the house, I think the motion sensor is infrared, so I think it will stay off if things move around in the trunk or frunk. Now I just need a car to install it in!�
Aug 31, 2013
4SUPER9 I am planning to do these mods as soon as I find some time.
What I am more interested in is additional lighting for the cabin. Particularly in the footwells and under the cubby (I don't have a CCI). Ideally I would like these to activate with the dome lighting. Does anyone know where I can most easily tap in to make this happen?�
Aug 31, 2013
wormhole For an electrical newbie, can you expand on this further? This method sounds far easier for someone like me.�
Sep 7, 2013
jcadman22 I tried the drawer lights from Ikea and found that they are motion activated which leads me to believe they'll turn on with every little jostle. Back to the store.�
Dec 9, 2013
ABVA It will be nice if somebody has a step by step video on Youtube or some where else for us non-electricians�
Dec 9, 2013
wormhole There is. Teslatap.com�
Jan 7, 2014
Soulopoulos I love your simple LED solution. Do you have a brand or Partnumber? We do not have a Costco in Belgium and I would love to three of those...�
Jan 7, 2014
MarkR Here is a link to a Costco motion sensing LED that is battery operated.
LED Motion Sensing Ceiling Light 5-pack
You might also want to look for motion sensor LED lights on eBay. Many will be battery-operated (that's okay), and most could be rewired easily if you want to connect to the existing 12v in the car.�
Mar 26, 2014
Akikiki My MS does not have the LED lights on either side of the inside of the trunk.
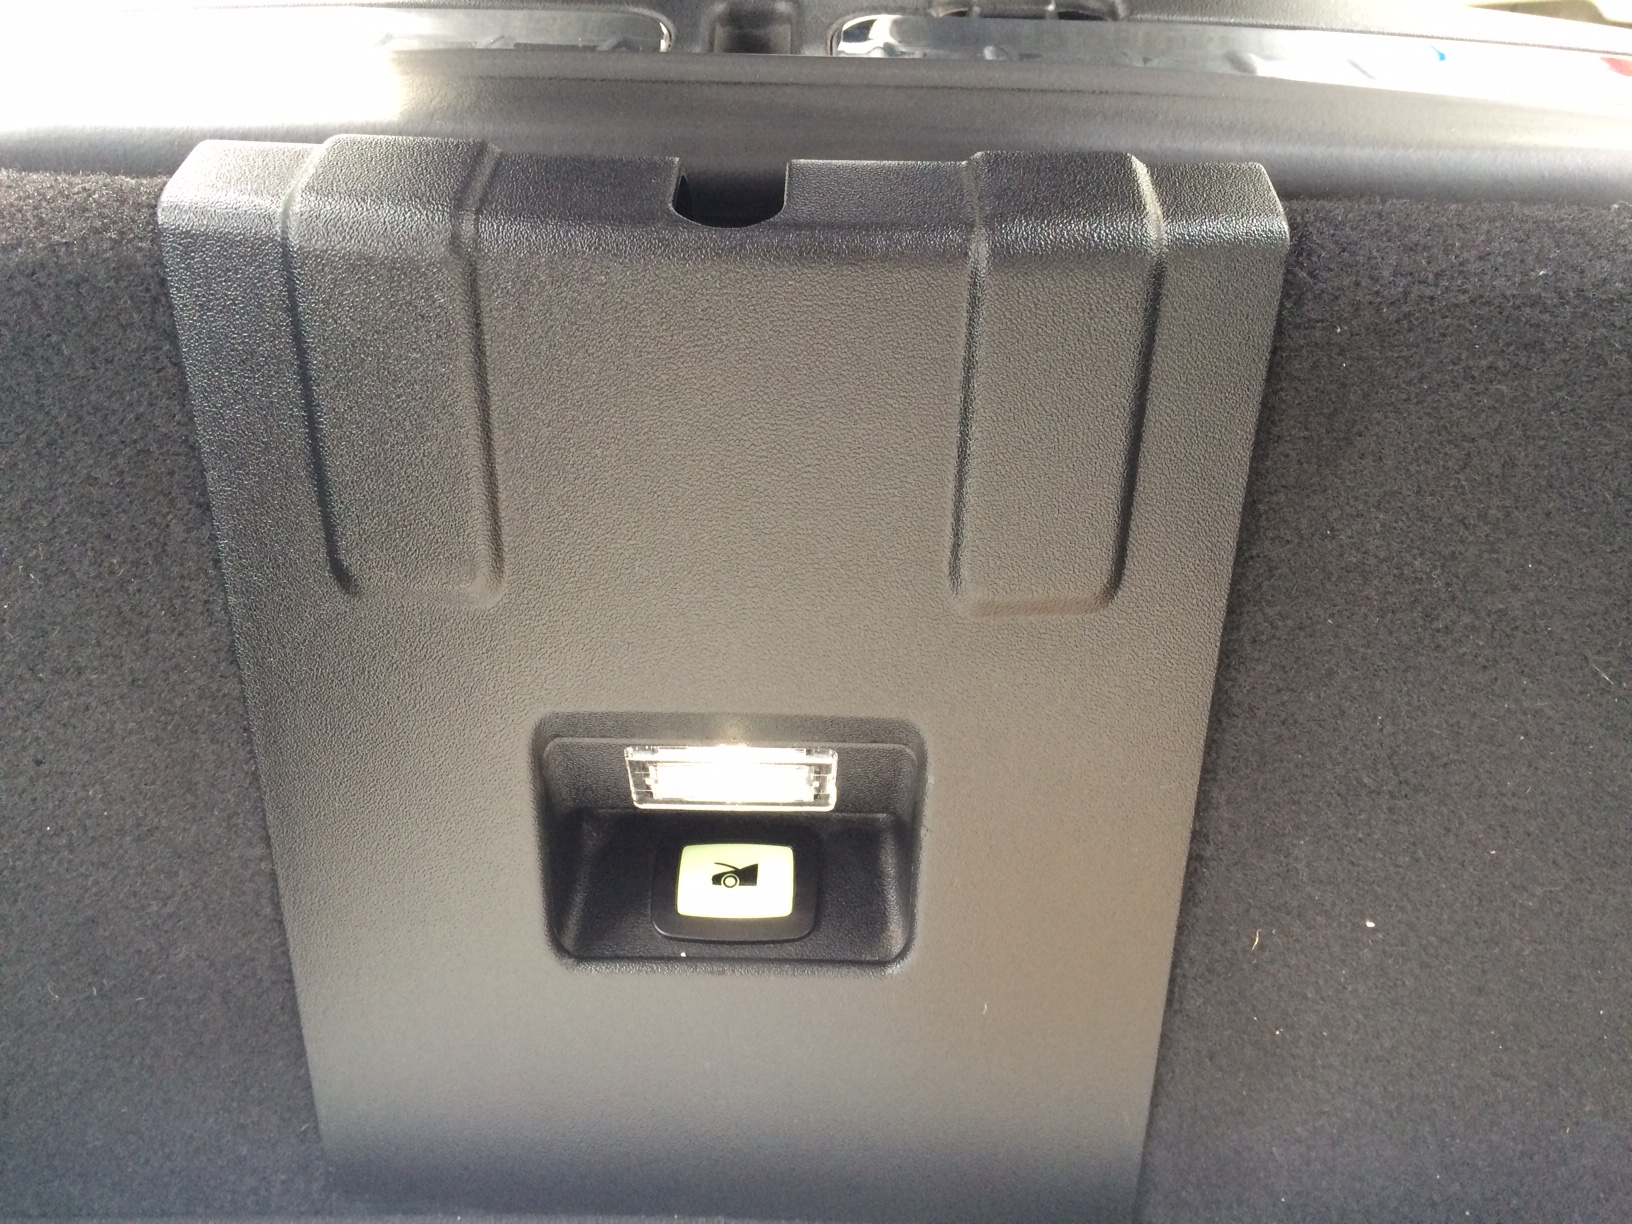
I am working on adding lighting to the trunk. After acquiring some parts and reading the how-to�s on TeslaTap.com and TMC, I thought I was ready. But my MS does not have the basic LED lights that it seems others do. So, I called my local SC and asked it there was a service bulletin or announcement that explained this. A few minutes later, I got a call back. Once upon a time, the trunk lights and interior lights were part of the Tech Package, but were separated. The lights were expanded and became the Premium Interior Lighting option.
There�s a cutout imprint for the LED lights in the corners, but not punched out yet. Since the lights are now an add-on as an option it would make sense that the harness is there and ready for the lights.
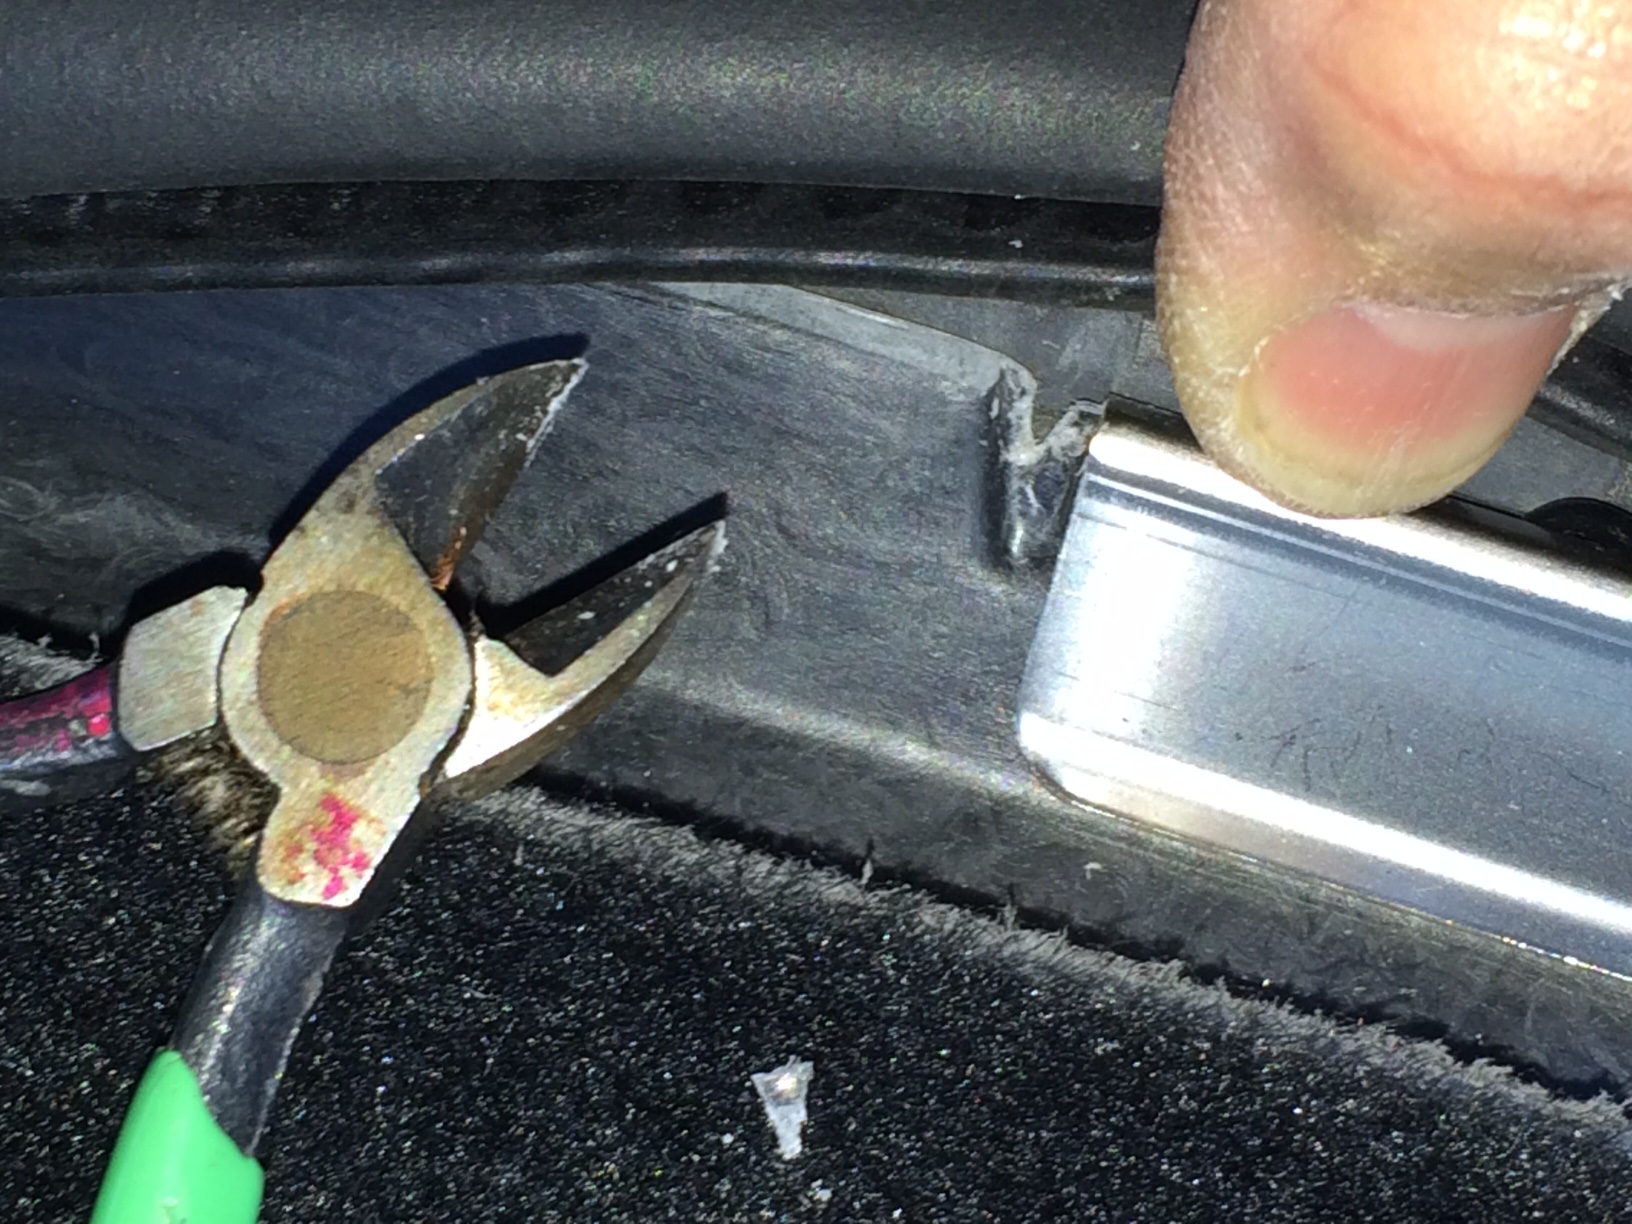
So, I looked. Even on cars without the side trunk lights, the connector for the LED Light is there behind the cutout imprint. The cutout imprint has a small cut already in it. You can make it a little bigger with a box cutter. Don�t cut too wide, you don�t want to completely open this as you want a part left to fill the hole since you don�t have the LED light. I fished my finger around inside the cutout, but could not find a wire.
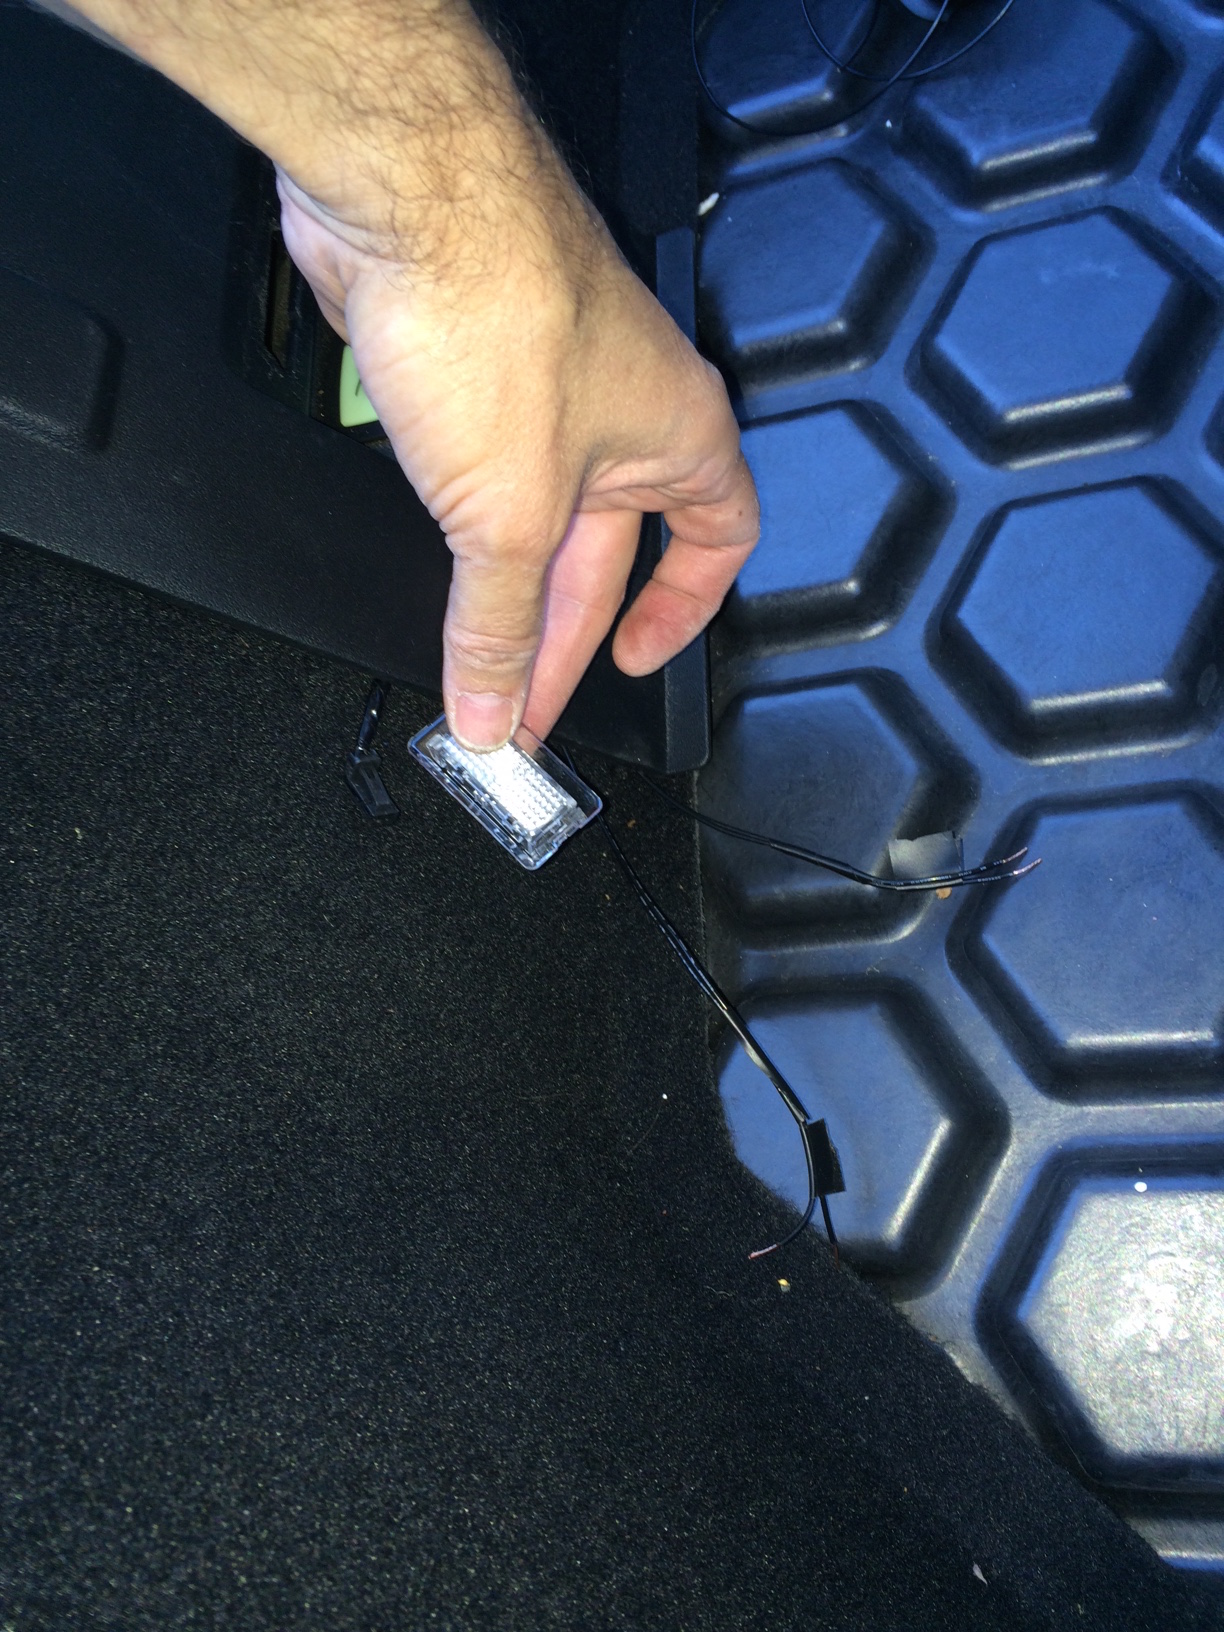
So, I took my well cover out, removed the plastic carpet tacks that hold the carpet in place on the opening to the feet well. Then I wrestled the carpet arms on the outside of the well, up and out of the way. I was surprised I could pull the carpet up high enough to expose the pad in the center of the trunk (not that I was trying to get to the pad).
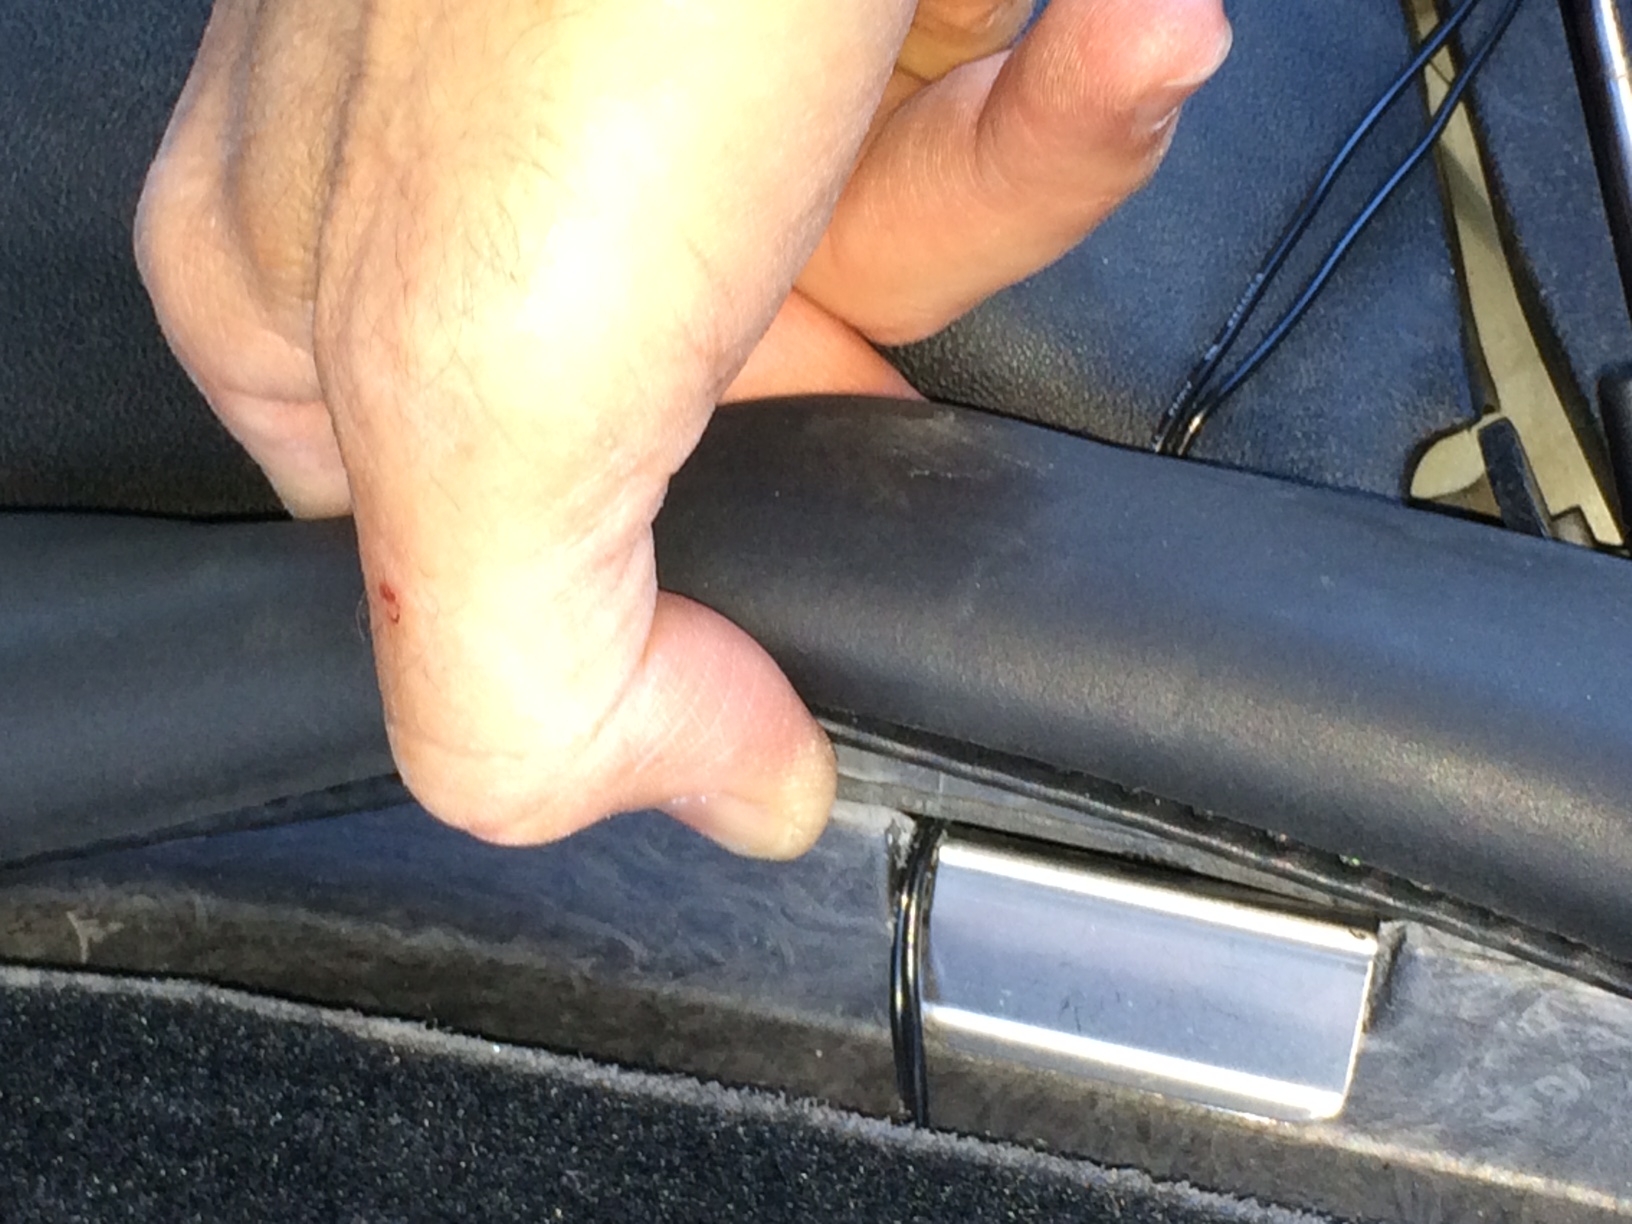
Once the foot well carpet arm was up and out of the way, I could see and more easily pull the LED light connector down and out. There was only about an inch of play. So, I opted to cut the cutout imprint a little and fished around for the connector and pulled it up and through the cutout. Now, I had about three inches of play and I could attach quick-connect patch wires to give me some working room. Then I pushed the LED connector and the quick-connected patched wires back through the cutout.

Now I have a power source for the LED strips. I added barrel connector w/wire to my power extension wires and my LED strip.
Left side. I tucked extra wire up around the inside plastic frame of the trunk until I got to the parcel shelf rail. With the wire tucked in, I pulled the tape and mounted the LED strip.
Right side. I could not locate the LED light connector. So I tucked two new wires about 4 feet long under the plastic lip just inside the trunk across from the left side to the right side. Once on this side I used the same barrel connectors w/wire for the connection to the LED strip. I connected the other LED strip and tucked the extra wire along the plastic of the trunk up to the right side parcel shelf rail like the left.
Update: Okay, after I determined that my car did have the harness even though it didn't have the trunk LED Lights, I ordered them through my SC. Cost was a little less than $12.00 each. I had them now.
When I started my LED Strip Light add-on project, I could not find the LED Light connector on the right hand side. So, I got bold and popped the plastic trim on the just to the inside right hand side of the truck out of the way. Then pulled the inter wall (felt pad) away from the inside corner. AH HA! With a flashlight I found the right hand wire and connector. Why, I don't understand, but the connector and wire was take to a harness further up into the corner of the truck. I would never have fished it out without pulling this stuff open. I cut the white tape securing the connector. There was enough slack to pull it down and out the LED Lamp hole. I pushed the felt padding back, replaced the inside truck plastic trim, then snapped the connector into the LED Lamp. Worked fine.
Now, my S has the factory trunk lights for only $24.00 and the LED strips I added like others here did. Every little bit helps.
****
Confident everything is connected, I opened the back door to trigger the lights, and bingo it all works. My strips could be brighter. (It is what it is.) I can easily though add two more LED strips along the curve of the inside of the trunk with ease. I may do that yet.
The best part of this is the new LED lights are on the same circuit, and controlled by the same timer that the lid�s single light is. This saves us the effort of a separate switch, mounting it, and remembering to turn it off every time.
Backing up a little, at first I was not sure this was a LED light connector. So, I put black plastic tape on two small safety pins and stuck one in each side of the front of the connector. Then using an ohmmeter tested for power. At first it seems dead. Then I checked that the hatchback lid�s light was off. So, I opened the back door to trigger the light. It did. Now the connector had power for a few minutes until it timed out. Next I temporarily wired an LED strip to the safety pins and tried again. This time the opened door triggered the LED strip. Perfect, now I know the quick-connector is in fact the LED Light connector even though the LED light is not present on my car.
Since I relied on TeslaTap for much of my how-to, I posted a version of this on his instruction thread. I hope it helps those that discover that they too don't have the LED Lights.�
Mar 27, 2014
4SUPER9 Great job! What's really incredible is that TM expects someone to pay extra to have LED's in their trunk. That's ridiculous.�
Mar 28, 2014
ken830 Wait... What?! Did that become an option!? Or is it lumped in with the Premium Interior Lighting package?�
May 6, 2014
yobigd20 I am offended that Tesla would strip this out and add it to a "premium interior lighting package". First off, the lights that are there certainly are not "premium" by any means. If they were, this thread wouldn't exist. Second, WTF Tesla. $100k car with ****** lighting? Again, very offended. This isn't the Tesla we all love. This is a Tesla that is sticking it to it's customers. Things like this should never be part of an "option". And as far as the cost of the option, it should be more like $50-$100, not $1000. Cmon Tesla. What the hell are you doing out there? Thinking of new ways to screw customers? Now you're starting to think like the other auto manufacturer's we all hate. This premium interior package is a huge slap in our faces.�
May 6, 2014
hikerockies Agree with you completely. Premium lighting package is a complete rip-off at $1000. My S60 ordered long before this package appeared has these lights and I like them. I am taking delivery of my second Model S tomorrow and at $1000 this package was not even up for consideration. I would have paid $100-$150. I will find out tomorrow how many essential lights I am missing because I did not opt for a $1000 package.�
May 6, 2014
Gizmotoy My trunk is essentially pitch black in my parking garage. There's no lights I can turn on in the garage. It's crazy. I've been carrying around a rechargeable LED worklight (awesome, BTW, for post-wash inspections) until I can get around to doing a more permanent solution.�
Jun 11, 2014
AndroidDream Just got my car and one thing I noticed was that I couldn't find my charge cable in the trunk, because it was so dark in there. I could not believe that there wasn't any light at all in there. There are two cut out holes in the upper corners of the carpet and I was wondering how they could possibly have missed putting in the lights. A quick search and I found this thread, and apparently there aren't supposed to be any lights. That's completely ridiculous. There's a small light on the hatch, but that does absolutely nothing when it's over six feet in the air. Although pathetically small, at least the frunk light is actually in the frunk. Looks like I'll be adding my own lights. Thanks Akikiki for your work digging around to find the hidden wires.�
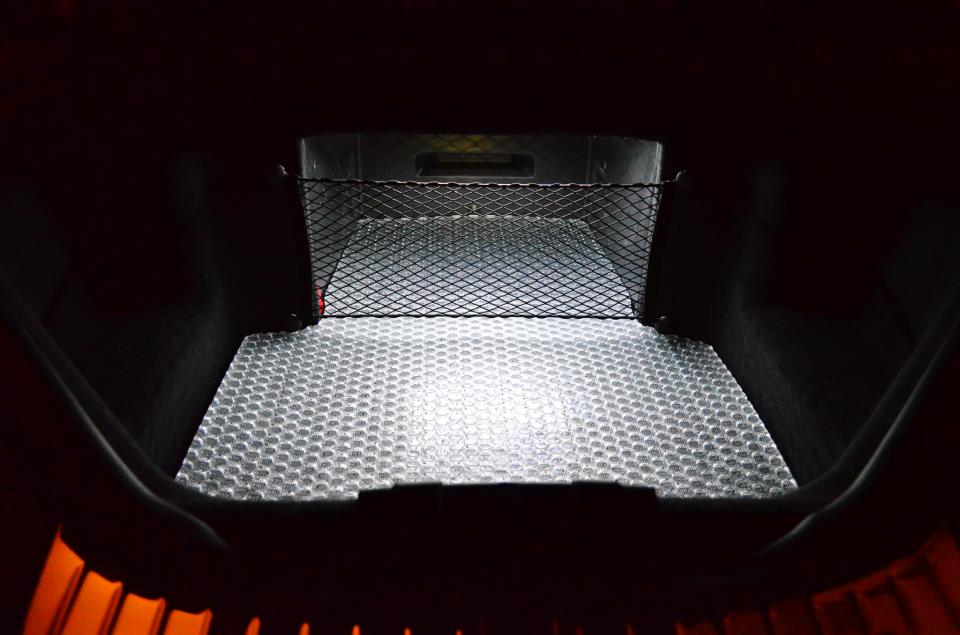
Jun 11, 2014
wk057 So, decided to add some lighting to my frunk and trunk. Never actually looked on the forum or anything before doing this, so, was all done on my own.
My Model S does not have existing lighting in the trunk at all. The only light in the trunk is the single LED on the hatch.
Fortunately, the wire that powers this LED is accessible in the harness that goes up the hatch. I reached it on the passenger side after removing a couple of panels near/on the C pillar. On mine it was black with a white stripe. Used a chassis ground point for negative. After confirming, I tapped this with a solderless tap and moved on.
The frunk was simple, LED was easily tapped for power.
I used some cheap LED light strips. Two in the frunk, two on each side of the trunk under the parcel shelf holder.
They turn off when the existing LEDs turn off (after a timeout or after closing... tested the frunk one by leaving my phone in it recording a video).
Here's the spoils:
Both taken in otherwise near complete darkness.�
Jun 12, 2014
Runs Kwh Wow, I like the side lights. It's like the premium lighting up front - but in the back�
Jun 12, 2014
wk057 Without tracking down some more easily accessible wiring... maybe. The tap I did to the hatch LED power wasn't all that easy... the rest was pretty simple, though... just a matter of routing and hiding wires nicely.�
Aug 4, 2014
4SUPER9 I just did the LED light modification to my trunk. The battery powered motion sensor one was just not that great, and it went off whenever anything slid across the trunk.
I followed the directions over at TeslaTap, except for a few key things that I will post over there as well.
- First, I purchased 3 sets of 50cm LED's at SuperBrightLEDs.com here. Being that I bought 3 separate sets (one for the Frunk), instead of a whole roll, they each already had wires already soldered on. No further modifications needed! The length was perfect. While the original instructions called for 6", the 50 cm (19.7") lengths went under the lips for the entire parcel shelf, extending all the way forward to the back of the rear seats. There is still a lip there, but it gets really small, with just enough space for the LED strip. Pic below
- While shopping at SuperBrightLEDs.com, pick up about 15' of 24 G wire. Plenty for this install and the Frunk if you later need it.
- Next, I saw no practical use for the "barrel" connectors. This seemed like an unnecessary complexity in trying to find the correct parts, modifying them, etc. I used simple male/female crimp connectors found at my local hardware store.
- Use Posi-Taps instead of the solderless taps they recommend. I learned about these while installing my Lighted-T. I only had two of these left and the install was super easy/fast. Being the impatient fellow that I am, I bought the solderless taps for the other side at my local hardware store (that's all they had). That install was do-able, but much slower and awkward as I had to fight to get the solderless taps to fit. It was just not as ridiculously easy as it is with the posi-taps.
- Total project time: 60 minutes for both sides. If I had to do it again, and I may for a couple of friends, probably could do it in under 30 minutes.
The outcome was fantastic. I'm really happy with it.
Hope this helps!
 �
�
Aug 21, 2014
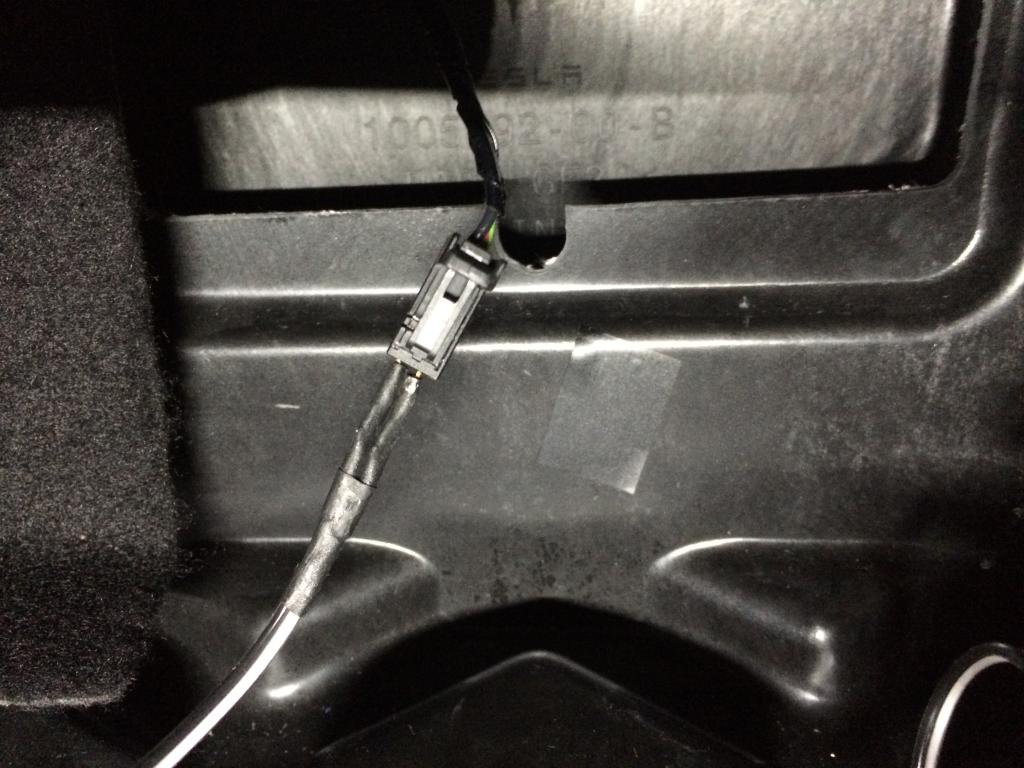
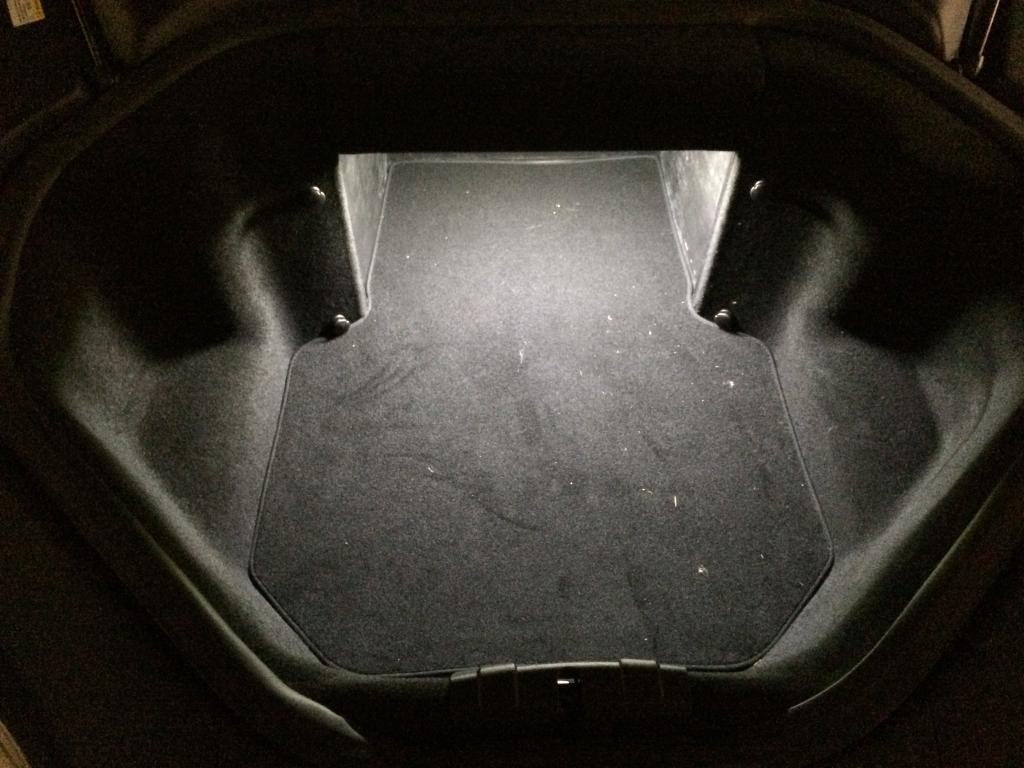
russman Here are my improvements to the added lights, as I did not want to make any changes to any of the wiring in the car, thus allowing me to put the car back to the way it was. To keep the cost lower, I used two strips of the LEDS with the wiring on both end and just cut the strip in half. Used half for the frunk, and two halves for the trunk. I have a spare half for something else.
Using these connectors I found at Fry's:
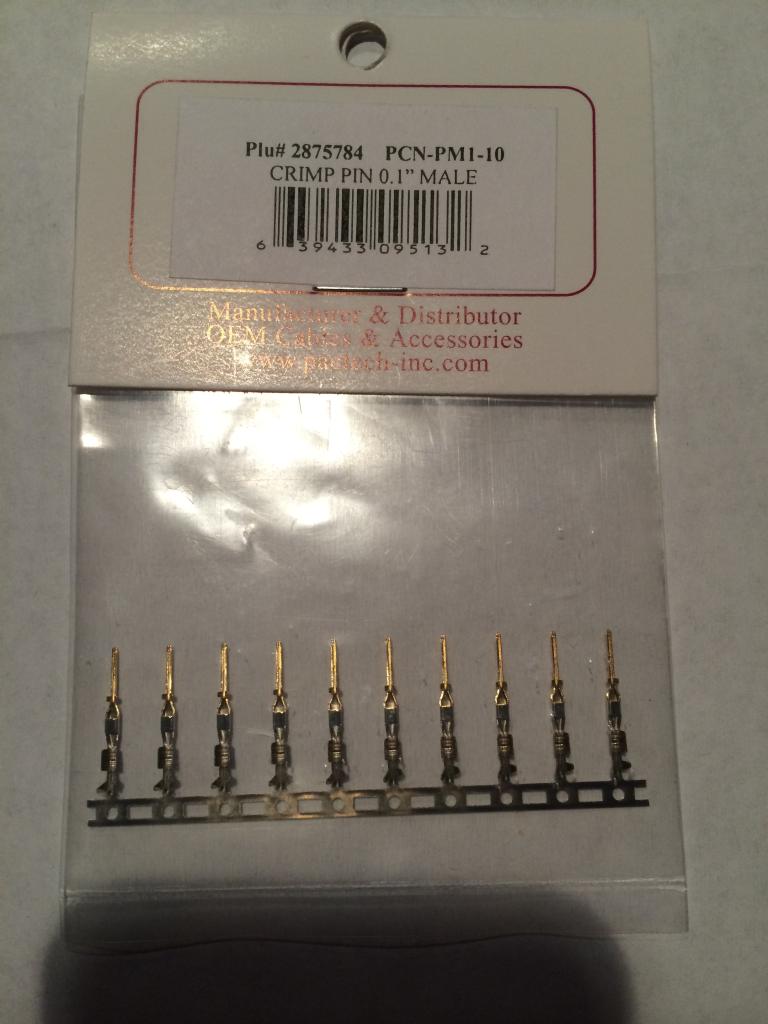
I modified the led strips like so:
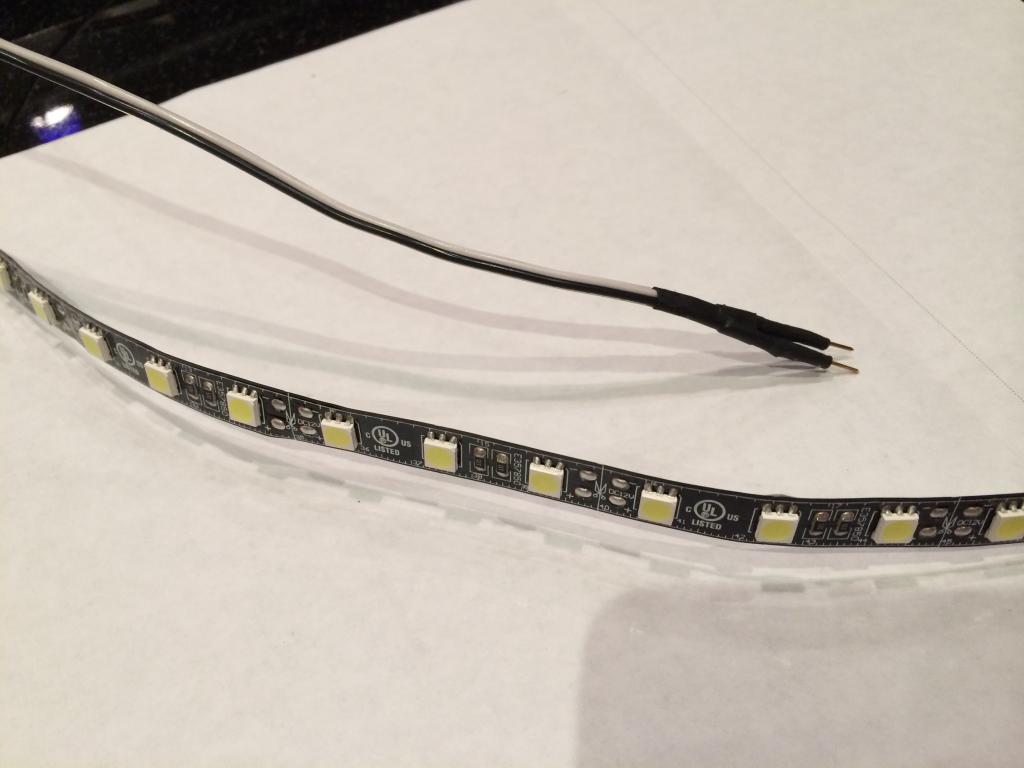
Then using my home made connector, I just plugged the strip into the existing light connectors in the frunk and the two in the trunk like so and I can remove the strips just by unplugging them and putting the original light back into the connector. For newer cars that don't have the trunk lights, the female connectors are still there for you to plug into:
Finished lighting:
 �
�


Jan 28, 2015
rrosenbl Improved frunk lighting modification!
I made a significant improvement to the frunk lighting modifications posted previously and on Teslatap (Lights How to Improve Frunk Lighting | TeslaTap ). This modification will allow owners of the newer Dual Motor Model S to improve Frunk lighting.
Initially I used the the Tesla Motors Forum plans for lighting up the Trunk and Frunk with low wattage ,self adhesive, waterproof LED lights (see parts list below) and a tip of the hat to 4SUPER9 for introducing me to Posi-Taps they ROCK!! I was also inspired by Lights How to Improve Frunk Lighting | TeslaTap . I appreciated their detailed instructions of how to install a short LED strip in well the frunk but the newer Dual Motor Model S lacks the well.
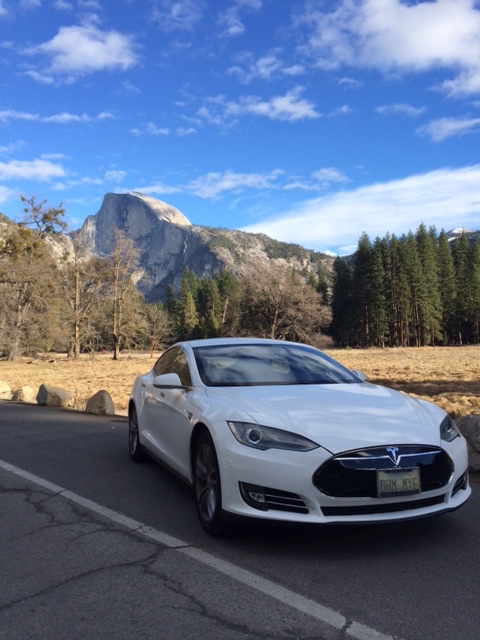
However I was NOT satisfied with the Frunk lighting result, the light was often blocked by stuff I'd stashed there. For example, I keep an ice chest in my Frunk, handy for ice cream and other cold foods from the supermarket, but the ice chest wedges into the well blocking the light. Plus when packing for trips such as this recent trip to Yosemite Valley:
The duffle bag I'd stuffed into the Frunk covered up the LED lights, I was back to square one. THE SOLUTION CAME TO ME LATE ONE NIGHT IN YOSEMITE AS I SEARCHED OUT ANY FOOD/LOTIONS/CRUMBS IN THE FRUNK THAT MIGHT ATTRACT BEARS. MY FINGERS WERE NUMB FROM THE COLD. Here's what I've done:
Run a second pair of wires around the driver-side Frunk bucket lining to about the 2 o'clock position, starting from the OEM anemic LED light:
Here's where I attached the Posi-Taps:
guided the wires around the side of the bucket lining:
run the wires under the rubber gasket:
and made a 1/8th" V-notch along side the clip, this will be totally covered up by the rubber gasket, on the rear side of the Frunk and won't allow any moisture intrusion (I've since driven through heavy rains without an ounce of moisture in the Frunk!)
and gently refitted the gasket over the wires being careful to not pinch or damage them.
I then guided the wires under the plastic funk-surround back to the washer hose.
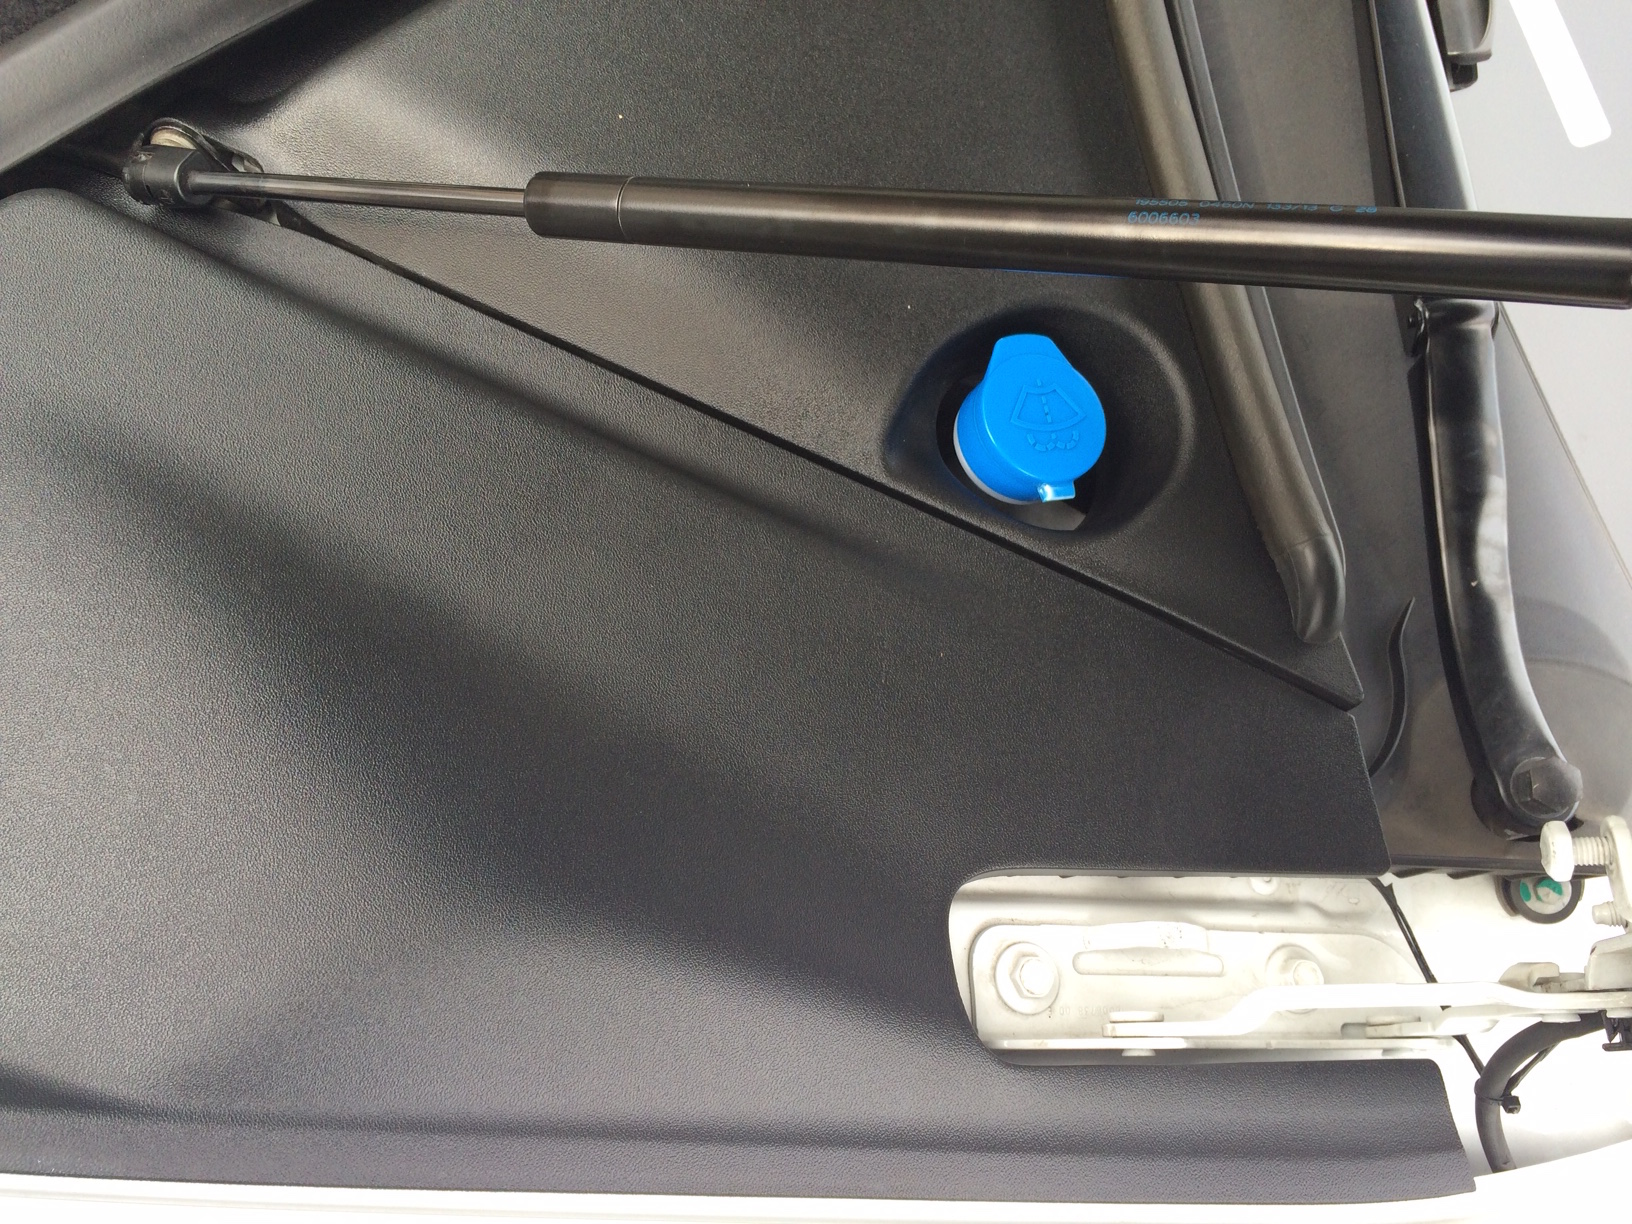
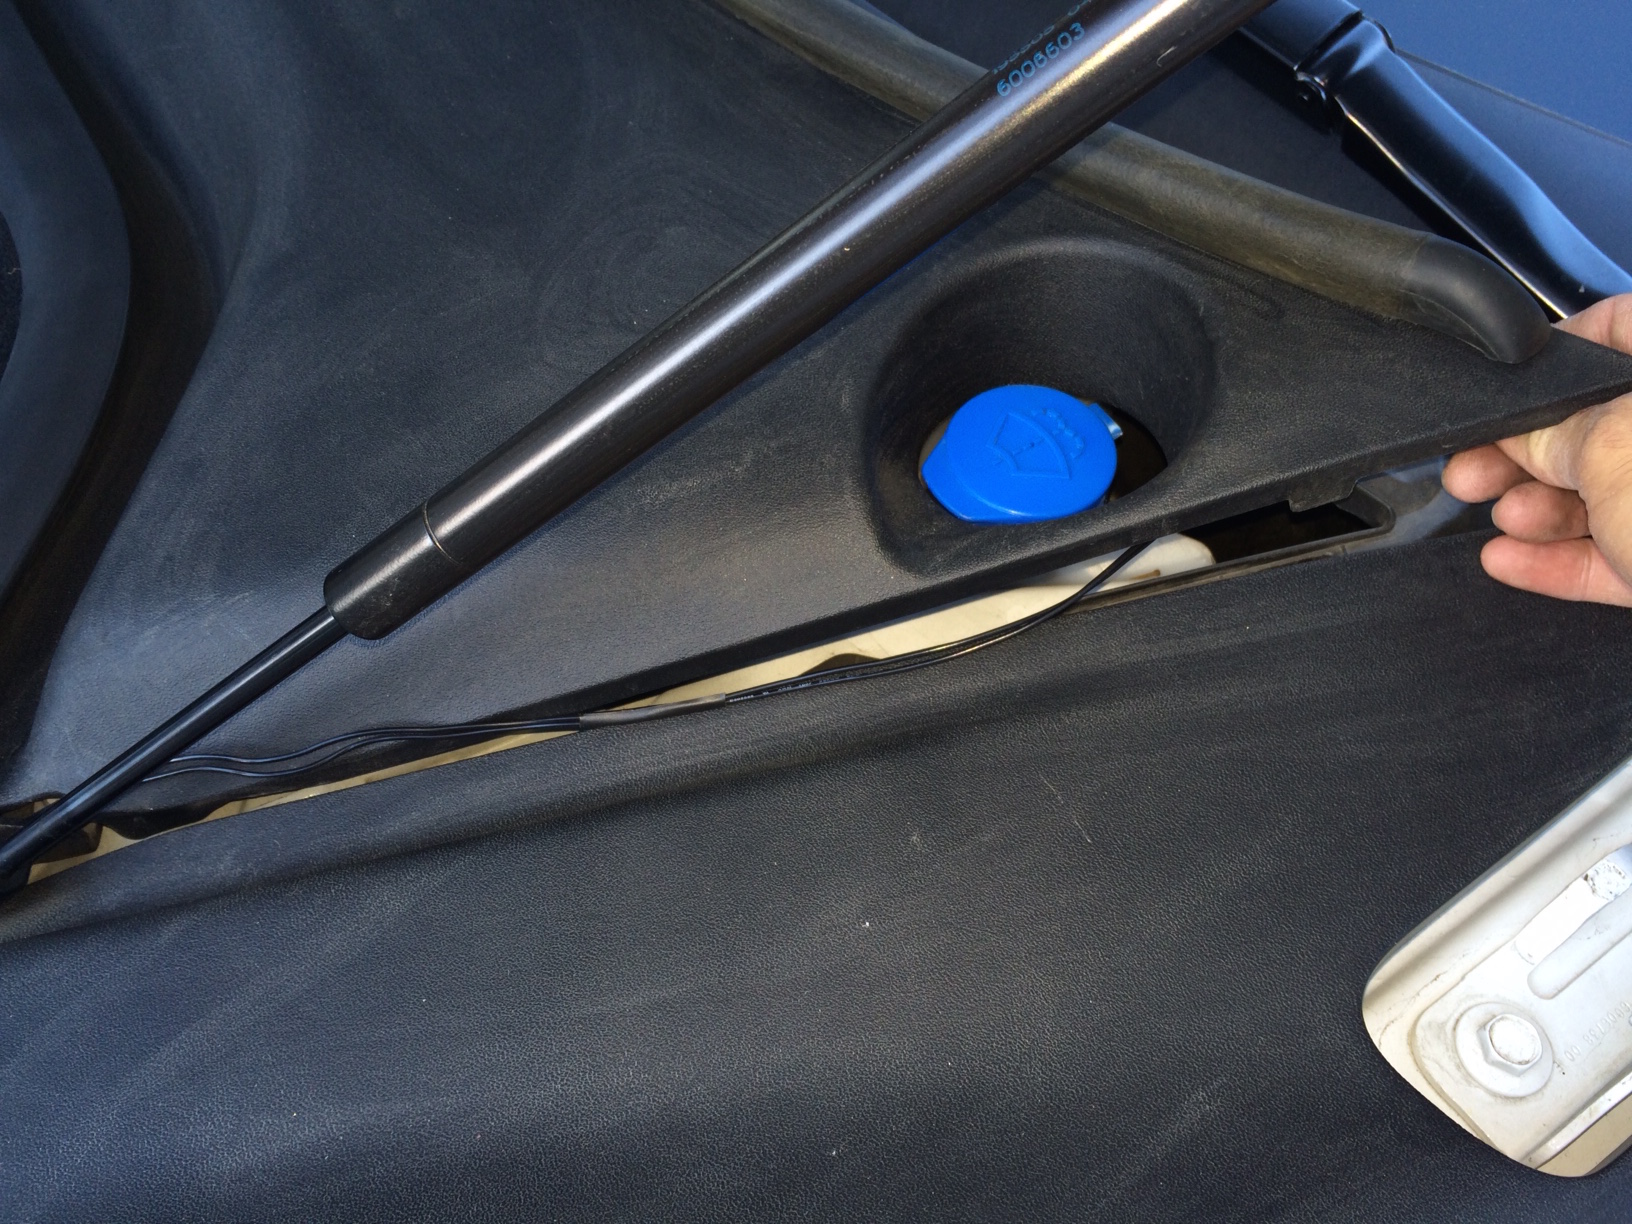
and zip tied the wire to the washer hose at 4-5" intervals to a point 1/3 the way to towards the center of the frunk lid.
At that point there is a well in frunk lid where you can sneak your connectors (power wires mated to the LED strip).
I centered a ~10 inch strip of LED lights just being the Frunk sealing gasket:
and voil� excellent frunk lighting, no glare and an excellent improvement this already excellent vehicle.
Parts List
SuperbrightLEDs.com, St. Louis Missouri
Used 1- LED strip Part # WFLS�WW30�BK:50cm[19.7in] warm white $14.95, (2/3 length for the Frunk lid and 1/3 length for the inner-well light)
Posi-products.com use the Posi-Tap, which make the job very simple and do not harm the cars original wiring, I purchased:
Used: 1- BLISTER CARD Posi-Tap� PTA2022M 6pc, part #ZRTL-641-6 $8.95
Radio Shack:
Used: 22 gauge, very thin, stranded Hookup Wire
Insulated Butt Connectors (need a crimping tool ~$8 and a bit of practice)�
May 3, 2015
scottm can someone post a picture of the trunk premium lighting LED locations left and right, so we know where to go fishing... for those that don't have premium light option
thanks�
Jun 9, 2016
MDMGSO47 My just delivered refreshed Tesla has the same situation as yours. There is only one light in the trunk door that is essentially useless. I have stamped imprints on the back wall of the trunk on both sides of the door opening, that are not cut out.
I found LED lights that have the proper connectors to plug into the Tesla light plugs behind the carpet on the side walls of the trunk, so I was ready to go.
ELLuminer2�Trunk Lighting for Tesla Model S
I followed your instructions and tried to to move the carpet arms on the walls of the trunk, but they wouldn't budge. I am concerned about damaging them if I use too much force. Any suggestions?�
Jun 9, 2016
Akikiki To MDMGS047, Trunk arms? Do you mean the hard plastic trim that is inside the trunk and goes from the floor up inside the opening? The pop out with the same clips that Tesla uses nearly everywhere. Worse that can happen, you break a couple. But the pop off/slide off and you can get replacements from Tesla. I found some similar clips on Amazon that work as substitutes and cost 20% less for a package. Search plastic trim clips. Back to your question, but move forward, slowly, but move forward to remove the trim if it helps. I though was able to pull the fuzzy carpet on the interior of the trunk out enough to find the wiring harness in the lower corners. You will likely find the connectors for the lights secured with zip ties or black cloth wrap to the harness. Cut the tie or unwrap the tape to free some length to the slot in the carpet. The passenger side is usually harder than the driver side. (I helped someone and both were difficult on the passenger side.) Any more questions?�
Không có nhận xét nào:
Đăng nhận xét